Idli anyone?
Idli, also spelled as Idly or Iddly is a food native to Southern India. It is the most favorite South Indian breakfast next to Dosa, Wada and Samabar. Idlis have been compared to the moon and jasmine flowers in literature. They are steamed cakes of dehulled black gram dal and cream of rice or wheat. These soft and fluffy cakes are easy to digest and rich in proteins and carbohydrates. They are prepared in many hotels, homes and restaurants almost every day for the morning breakfasts especially in South India and elsewhere too. It is a healthy and nutritious probiotic pure South Indian breakfast.

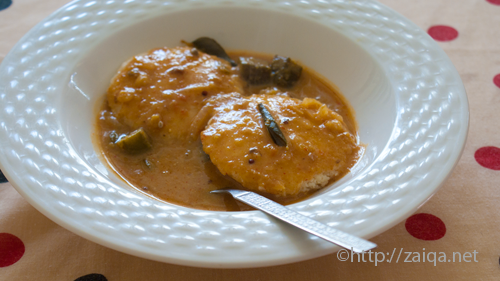
Idlis served along with Sambar generously poured over them
The ‘Idli Rawa‘, which is the cream of rice or wheat is available in any Indian stores. The Idli mould is also easily available in most of the Indian stores, and are sold in almost every stainless steel utensils shop in India. The Idli plates in a Idli mould have depressions to pour the batter in those. These depressions vary in sizes in different stores. I have a medium size Idli mould which is perfect for my family.
To prepare Idli, I start its preperation from a day ahead. Like for example if I plan to prepare it on Sunday for breakfast or brunch, I start its preparation from Saturday morning. On the Saturday morning, I wash and soak the urad dal in plenty of water, and before I go to sleep in the night I drain away the water and grind the dal well, then mix it with the washed idli rawa in a bowl and keep the bowl in a warm and dark place to ferment night long. Then on Sunday morning the fermented batter is ready to prepare yummy Idlis. I use equal amounts of idli Rawa and dal for Idli preparation.
Idli – Steamed Rice-Lentil Cakes
Makes : approx 40 Idlis
Ingredients:
Urad Dal (or) Mask ki dal/Split husked Black gram – 1 1/2 cups
Cream of Rice (Idli Rawa) – 1 1/2 cups
Baking powder – 1/2 tsp
Salt – 1 tablespoon
Canola Oil – to grease the Idli Plates


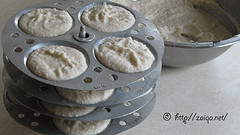
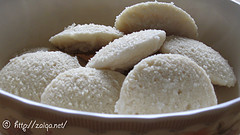
Idli batter in the Idli Mould & Cooked Served Idlis
Method:
(Note: Read the entire post before you proceed to prepare the Idli)
1. Wash the Urad dal in several changes of water and soak it in surplus water for about 6-8 hours. Later, drain the dal. In a wet grinder, or a food processor, blend the Urad dal adding just a little of water to aid in the blending to a very smooth and fluffy paste. Do not add to much water, it should be added just so that the mixer/grinder motor runs smoothly. The fluffier the batter, the better it is, so grind well for 10-15 minutes. Transfer the batter to a very large stainless steel mixing bowl (as the batter will ferment and rise and overflow if the container is small).
2. While the urad dal is grinding, wash the idli rava with water about 2-3 times and drain it completely. There is no need to soak the idli rava in water. Make sure no excess water remains after draining the water. Add this to the urad dal batter. Also add baking powder and mix it all completely using a spoon without any lumps. The batter should be as thick as possible. Cover and leave the batter undisturbed overnight so that it ferments and doubles in size. If you are not living in India or live in cold temperature places, you could use the oven to ferment the batter: Set the oven on to minimum (lowest setting/warm) for about 5-10 minutes, then turn it off. Cover and keep the mixing bowl with the batter in the warmed oven so that it ferments for about 8-15 hours or overnight.
3. The next morning the batter should have fermented well and the volume almost doubled. Once the batter has risen it can be used immediately to prepare idlis. If you are not going to make idlis immediately, store the batter in the refrigerator or else the idlis will be very sour. Add salt to the batter and mix it well. The consistency of the batter should be like condensed milk, not too thick nor too thin. You can add more water if needed to achieve that consistency.
4. Grease all the Idli plates with a few drops of oil and pour about 2-3 tablespoon of batter in each depression in the Idli plates.
5. Before filling the idli plates, add some water in a large pressure cooker and switch on the stove. So by the time you are done with the batter the water will start boiling and you can place the idli stand in the cooker and close the lid. Make sure the water does not touch the lowest idli plate in the stand. The water level in the pressure cooker should be well below it. Close the lid of the cooker and do not put the weight on it. In about 10 minutes you will see steam escaping from the vent of the cooker. Using an oven mitt remove the idli stand from the cooker and place it on the countertop. Scoop the Idlies out of the plates using a spoon in a big serving bowl. Cover the serving bowl with lid to keep the idlis warm. Repeat this process with the next batch adding water to the cooker as necessary until the batter is all used up.
Suggested Accompaniments: Serve them hot along with Sambar, Coconut chutney, Hara Dhaniya aur Pudina Ki Chutney at breakfast or as a brunch or a snack.
Tips:
- If you live in warmer places, you need not add baking soda to the batter.
- If you live in a cold place, it happens that the batter has not fermented at all. If the batter has not fermented and doubled in size by next day, do not use it for Idli. Instead make Dosa out of it.
- If you do not find Cream of Rice, you can even use Cream of Wheat as the Idli Rawa.
- This is the basic recipe for the prepartion of Idli. You can alter it by adding a few chopped french beans, carrots, cilantro to the batter.
- Adding a dollop of butter to the steamed idlis while having them hot along with sambar makes it even more delectable.
- These Idli moulds are the traditional methods to prepare Idli at home. If you are somehow not able to find the Idli Mould, you can use little metal bowls which can be kept in a steamer or an egg poacher or tiny aluminium molds for cakes and muffins. I have however never used these. I only use the Idli Mould each time I prepare Idli.
- You don’t need a pressure cooker for steaming idlis. Simply use any vessel with a vent on the lid which is big enough to fit the idli plates stand you are using. Add some water to the vessel and heat it while you fill the batter. Place the stand inside the vessel and close it with a lid. If the lid does not have vent for the steam to escape, leave a small portion of the vessel open. Steam it for 10-15 minutes. Insert a toothpick or a knife in the center of the idli and if it comes out clean the idlis are ready. Switch off the stove and serve it after a couple of minutes.
- You can even freeze the leftover idlis to be used some other day. Simply place cooled idlis on a tray seperately and let them freeze for 3 hours. Once frozen, transfer them all to a zip lock freezer bag and store until needed. When you want to have them, simply place the frozen idlis in a plate and microwave for 2 minutes approx.
Luv,
Mona
You can follow any responses to this entry through the RSS 2.0 feed. You can leave a response, or trackback from your own site.
April 17th, 2008 at 10:59 pm
Mona, this looks delicious! I’ve never tried or seen Idli, but from what I read and see it is something yummy! I don’t know what cream of rice is, sorry:) Your blog is cute, I am learning so much about Indian food from you!
Farida, if you have not yet tried Idli, then please do, you will definitely fall in love with it. Cream of rice is nothing but fine rice flour from uncooked rice with a consistency of fine sand. You can prepare it at home, or even buy it from the market. ~Mona
April 18th, 2008 at 2:57 pm
love your fluffy idlies soaked in the spicy sambhar
April 18th, 2008 at 8:58 pm
I am interested in the food culture of your country.
And I support your site. If there is time, please come in my site.
From Japan
http://food-soybean.blogspot.com/
April 19th, 2008 at 8:47 am
Hi Mona….. I have also posted idly and sambar this time….. Urs looks perfect…. YUM!…. This is my all time fav….
April 19th, 2008 at 12:58 pm
Mona , is there any chance to grab that plate yummmmmyyyyyyyyyy
April 19th, 2008 at 1:15 pm
Never did like idlis but was the only thing I could eat while I was pregnant. Now I just love them.
April 19th, 2008 at 6:06 pm
I LOVE idli’s…LOVE THEM! These look so good and I am wanting some right now!
April 19th, 2008 at 11:45 pm
being a southie, idlis and dosas are my fav and when topped with sambhar.. it tastes like heaven.. yummy pic Mona!..:D
Siri
April 22nd, 2008 at 2:30 pm
I love Idli-sambar . & your picture is making me hungry!!:-) Delicious.
April 22nd, 2008 at 6:54 pm
wow mona wonderful idlis…I tried to leave comment sometime back,but there was some prob I suppose….your idli looks fab…its regular fare at our house…since my husband is from TN he requests it most of the time 🙂 ,but never prepared from scratch, here in dubai u get idli mixture…you just gotta put it in moulds…this is made daily in my sasural! Love your idlies…and mona had a doubt, in the kofta curry in your previous post, do you cook the minced meat before grinding and making it in balls for kofta..plz let me know….
Syeda, Thnx! and truly the ready made mixes are really helpful and I use them quite often too.
Well, In the Methi Kofte recipe I use kaccha Qimah, I just mix the raw washed and drained meat very well using my hands with the required spices, and grind them all in a meat processor to a mixture. You can even avoid the grinding process and instead just mash the mixture till pulverised with your fingers and palms till smooth. ~Mona
April 23rd, 2008 at 5:12 pm
thanx a lot mona! will make the curry and post it’s pic soon! thanx a bunch
April 26th, 2008 at 6:05 pm
Hey Mona- we luv Idlis 24/7. Your pics looks delish!!
August 19th, 2008 at 3:10 pm
We would like to feature this recipe on our blog. Please email sophiekiblogger@gmail.com if interested. Thanks 🙂
May 27th, 2011 at 5:48 pm
Salam Mona
I made the batter in the morning after soaking the dal last nite,
One mistake I did was that I added salt while mixing and now after 6 hours my batter didn’t rise that much!
Is it because of the salt? The climate here is very hot so I do not understand.
Sana, usually it is advised that salt should be added just before preparing idli after the batter has completely fermented. Try it next time this way, you should inshallah get it right.