Healthy Ramadan Meal – Baked Chicken with Vegetables, Couscous and Tatziki

July 4th, 2014 Mona Posted in Black pepper powder, Bok Choy, Broccoli, Canned Tomato paste, Capsicum, Carrot/Gajar, Cilantro/Kothmir (fresh), Couscous, Cucumber, Garam masala powder, Garlic/Lahsun, Ginger-Garlic paste, Green Beans/Binees ki phalli, Lemon/Nimbu, Mint/Pudina (fresh), Olive Oil, Olive/Zetoon, Onion/Pyaaz, Poultry/Murgh, Radish, Red Potatoes, Salt/Namak, Tomato/Tamatar (fresh), Turmeric/Haldi, Vegetable Stock, White Potato/Aloo, Yogurt/Dahi No Comments »

We desi people tend to eat unhealthy especially during the month of Ramadan. We should all be making a great effort to cook healthy meals for our family and take care of our loved ones instead. Inshallah from this Ramadan onwards, I will posting healthy meal ideas for Iftaar and Suhoor. Keep watching this space for more healthy recipes and meal ideas to come.

The following recipe is just something I made on a whim. It is easy, healthy, and makes a perfect meal for ramadan.

Baked Chicken with Vegetables, Couscous and Tatziki

Chicken Legs/thighs pieces – 12-15 pieces
Black Pepper powder – 1/4 tsp
Salt – 1 tsp
Turmeric – 1/4 tsp
Onion – 1, roughly chopped
Ginger garlic paste – 1 tbsp
Mixed Chopped Vegetables – 4 cups, carrots, grape tomatoes, peppers, potatoes, olives, green beans, broccoli, radish, baby bok choy etc
Garam masala – 1/2 tsp
Olives – pitted, 1/4 cup
Olive oil – 2 tbsp
for Couscous:
Couscous – 1 cup
Olive oil – 1 tbsp
Tomato paste/Pasta sauce (store bought) – 1 tbsp
Fresh leaves and Cilantro – 1 tbsp, finely chopped
Water/Chicken/Vegetable stock – 2 cups, very hot
Salt – 1 tsp
for Tatziki
Cucumber – 1/2, peeled and grated
Garlic clove – 1, mashed
Salt – 1/2 tsp
Fat-free Yoghurt – 1 cup
Juice of half lemon
Fresh mint – 4-5 leaves, finely chopped

Ingredients:
Preheat the oven to 350°F. In a mixing bowl bowl, add chicken, black pepper powder, turmeric, salt, ginger garlic paste, onion, garam masala, olives, olive oil and mix well. In a baking dish with high sides, add the vegetables in a layer. Over them add the marinated chicken again a layer. Cover with aluminium foil and bake for 35-45 minutes covered, then the next 15-20 minutes uncovered until the chicken is juicy and done.
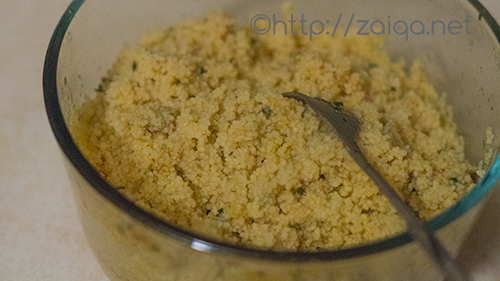
Add pasta sauce/tomato paste, chopped herbs, olive oil, and water/chicken stock in a kettle and let it come to a boil. Add couscous in a bowl. Once the water/chicken stock is boiling, pour over the couscous in the bowl and cover with a tight lid. Keep adise and let rest for 10 minutes. Then fluff with fork.

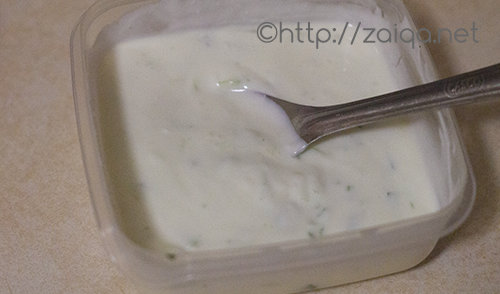
Using a box grater, coarsely grate the cucumber. Sprinkle it with a 1/2 tsp of salt. Let rest for 10 minutes. Then squeeze and scrunch with clean hands to get rid of the excess salty water. Add it to a bowl. Also add yogurt, mashed garlic, lemon juice, chopped mint leaves and salt. Tatziki is ready.

In a serving dish, add the couscous in a layer. Top it with baked chicken and vegetables. Serve along with tatziki on the side.

Healthy Desi Meals Ideas for Iftaar/Suhoor:
For Iftaar
~ Chanay ki Dal – Lemony Boiled Split Bengal Gram 
~ Jaam ka Kachalu – Guava Chaat 
~ Fruit Chaat – Fruit Salad
~ Baked Samosas – bake the samosas instead of deep frying
~ Ragda Cutlet – alter the recipe by not adding any oil to cook the onions, just saute them in a pan until they get a nice brown color; bake the potato cutlets instead of shallow frying; also do not sweeten yogurt
~ Pita Pockets made using Sheekh Kebabs 

Luv,
Mona

AddThis Social Bookmark Button

Halal Tandoori Turkey – Roasted Turkey Desi Style with Pasta

October 6th, 2013 Mona Posted in Black pepper powder, Bok Choy, Broccoli, Carrot/Gajar, Cilantro/Kothmir (fresh), Coriander seeds, Cumin seeds/Zeera, Garam masala powder, Lemon/Nimbu, Mint/Pudina (fresh), Olive Oil, Radish, Red Chilli powder, Red Potatoes, Salt/Namak, Turkey, Turmeric/Haldi, Yogurt/Dahi 15 Comments »

Every Eid I try to cook something special and make the day memorable by preparing a delicious meal. I had never tried turkey before. So I was ecstatic to learn that Mina Halal is now offering zabihah by hand, Grade A, whole halal turkey through large grocery retailers throughout Ontario.

Mina Halal Turkey

Turkey is a magnificent bird. It has ultra lean, high in flavor meat and is it large enough to easily feed a gathering of 8-12. Turkey is high in protein, low in calories and one of the leanest meats around. It’s also an excellent source of B12. Dark meat from the drumstick is also an excellent source of zinc and selenium. This Eid why dont you all try my recipe in your home and impress your loved ones. They will be happy to eat something new and feel special inshallah. And when there are leftovers, you can use the meat in a multitude of ways, from soup and sandwiches, to pizza and pasta, to burgers and beyond.

I wanted to make an desi version of roasted turkey. And what better roasting technique than making a tandoori roasted bird. I served the tandoori turkey along with pasta and vegetables which I made using the broth after roasting the bird. The result was a spicy lip-smacking turkey that we all thoroughly enjoyed.

Halal Tandoori Turkey – Roasted Turkey Desi Style with Pasta

Ingredients:

Halal Turkey – fresh or frozen (if frozen thaw according to instructions)
Vegetables:
Baby Bokchoy
Carrots – chopped horizpntally into 1/2 inch pieces
Broccoli florets
Baby radish
Baby potatoes with skin (red and white)
To Marinate:
Olive oil – 3 tbsp
Hung Yogurt – 1 cup
Red chilli powder – 4 tsp
Salt – 4 tsp
Juice of one large lemon
Turmeric powder – 1/2 tsp
Roasted Cumin Seed powder – 1 tsp
Roasted Coriander seed powder – 1 1/4 tsp
Garam masala powder – 1 tsp
Black pepper powder – 1/2 tsp
Cilantro and Mint leaves – finely chopped, 1/2 cup, tightly packed

Method:

1. In a bowl, add all the ingredients for the marinade and mix well to form a paste.
2. Preheat oven to 440° F. Rinse inside and outside of turkey; pat dry with paper towels. Rub the marinate mixture all over the turkey, inside and out. Transfer to a large mixing bowl, cover with cling wrap and let marinate in the refrigerator overnight.

marinated Turkey on a bed of fresh vegetables

3. The next day, atleast 5-6 hours before serving, begin the preparation of roasted turkey. Take the turkey out of the refrigerator. In a large roasting pan, place aluminium foil to cover it. Place the vegetables in the roasting pan so that they cover the entire base of the pan. Season them with salt and pepper. Tuck wings under turkey, tie the legs together with kitchen twine, and place it in the roasting pan over the vegetables.

roasted turkey

4. Roast turkey, uncovered for 15-20 minutes until you get a nice browned color on the turkey. Then lower the heat to 325° F, and cover the turkey with aluminium foil. Roast for a furthur 3 1/2 to 4 hours, until thermometer inserted into the thickest part of the thigh registers 165 degrees. The turkey will be cooked to perfection and so soft that the meat will literally fall off the bone.

vegetables nicely done in the delicious broth

5. Transfer the turkey to a platter. Let cool for 30 minutes until you make the pasta.
6. Place a strainer over a bowl. Transfer the vegetables along with the pan juices into the strainer.

turkey meat

the base for the pasta made with broth and pasta sauce

vegetables in the strainer over a bowl

pasta served along with vegetables and roasted turkey meat

For Pasta: (Serves: 4)
7. Add 350 ml pasta sauce (I choose Garden Select) and the collected pan juices to a saucepan and let it come to a boil. Taste and add salt pepper to suit your taste. Mix and add 500 gms fusilli pasta to the saucepan and enough warm water to cover the pasta. Cover the pan and cook on medium heat. Keep stirring every few minutes. After about 10-15 minutes, lower the heat to simmer and cook covered while stirring occasionally until the pasta is done. Add more water if needed to cook the pasta. While you are cooking the pasta, debone the turkey and transfer the meat into a serving platter. Once the pasta is done, add the vegetables from the strainer to the pasta and gently mix. Serve the pasta along with turkey meat. Enjoy!

I still have a ton of leftover turkey meat mashallah. I will be posting something delicious with the leftover turkey meat in a few days inshallah.

Tip: you can store cooked leftover turkey meat once it has cooled down to room temperature in freezer bags in the freezer indefinitely. To use thaw in the refrigerator.

Luv,
Mona

AddThis Social Bookmark Button

Aloo aur Gosht ki Tahari

July 4th, 2011 Mona Posted in Basmati Rice/Chawal, Canola Oil, Cilantro/Kothmir (fresh), Eid/Ramadhan/Iftaar, Garam masala powder, Ginger-Garlic paste, Hyderabadi special, Lamb/Beef/Mutton/Veal/Sheep, Lemon/Nimbu, Mint/Pudina (fresh), Red Chilli powder, Red Potatoes, Salt/Namak, Tomato/Tamatar (fresh), Turmeric/Haldi, White Potato/Aloo, Yellow Onion/Pyaaz, Yogurt/Dahi 16 Comments »

One dish meals are a savior. In today’s revved up life, they are a time, fuel saver, and cleanup is a breeze. Tahari is one such balanced and nutritious one pot family meal that is very often cooked in Hyderabadi homes.

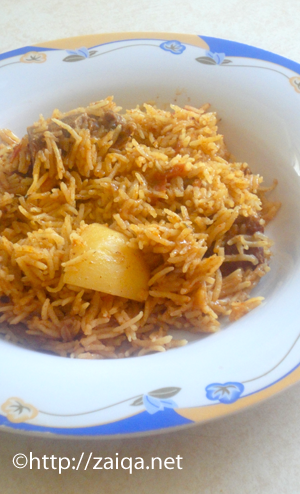
Aloo aur Gosht ki Tahari – Spiced Basmati Rice with Potatoes and Lamb meat

Tahari might be called as a cousin of Biryani. During the process of Biryani preperation, the meat and rice are layered and then cooked on dum (slow heat) in one pot. Whereas in Tahari, once the meat is cooked, water is poured to the meat and then rice is added and cooked along. There is no layering process in Tahari as in Biryani. The ration of water:rice has be perfect for a well cooked Tahari, or else you end up with a mushy mess.

There are two kinds of Tahari: 1. Minced meat+Rice Tahari; 2. Lamb meat with bones+Rice Tahari. Today I am writing about the latter one. The previous kind I have already blogged a while earlier. Adding tomatoes to Tahari is optional. I have always seen both my Ammi and my Mother in law add tomatoes to Tahari, but there are some that do not suggest it. I prefer to add tomatoes as it gives a nice flavor to the dish that I love. However you can avoid adding tomatoes if you want.

Aloo aur Gosht ki Tahari – Spiced Basmati Rice with Potatoes and Lamb meat

Ingredients:

Basmati Rice – 3 cups
Canola oil – 1/2 cup
Onions – 2 cups, sliced
Ginger garlic paste – 2 tbsp
Salt – 1 tbsp
Turmeric powder – 1/4 tsp
Mint leaves – 1/2 cup, loosely packed, finely chopped
Cilantro – 1/2 cup, loosely packed, finely chopped
Red chilli powder – 2 tbsp
Tomatoes – 2, large, diced
Potatoes – 2, large, quartered
Yogurt – 1 cup, lightly whisked
Lamb meat with bones – 650 gms
Garam masala powder – 1 tsp
Juice of a Lime

Method:

1. In a vessel, add rice and wash it in 2-3 changes of fresh cool water. Then, soak it in surplus fresh cool water for about 30 minutes while you prepare the following meat preparation.
2. In a pressure cooker at medium high heat pour in oil and as soon as it warms up, add the sliced onions. Stir fry them until they are golden brown in color. Add ginger garlic paste and fry along for a minute. Add red chilli powder, salt, chopped tomatoes, chopped mint and cilantro and turmeric powder and mix well. Cook for 2-5 minutes until the tomatoes are mushy. Add the lightly whisked yogurt and keep stirring for a minute. Add the quartered potatoes and mix. Let cook covered until the potatoes are tender (test using a fork) and oil has separated. Add the lamb meat with bones and mix well. Cook until the meat is no longer pink. Cover with the lid and pressure cook until the meat is tender. Open the lid and add garam masala powder and lime juice. Let the mixture cook until oil separates. Now pour in about 4 cups of water, close the lid, increase the heat and let it come to a boil.
3. Drain the soaking rice and keep it ready.
4. As soon as the meat mixture begins to boil, add the drained rice and gently mix. Let it come to a boil again. Once boiling, reduce heat to simmer and cover with a lid. Let it cook till very little water remains. Keep checking it every now and then, and give a gentle stir everytime. Add a few splashes of water if you feel you need more water for the rice to cook. Once the water is mostly dried up, close the heat, but leave the saucepan on the hot stove so that a nice steam forms. Let the dish rest for 15-30 minutes. Serve warm along with a pickle or papad.

Note: You can even lightly fry the quartered potatoes before you add to the dish. I prefer not to.

Luv,
Mona

AddThis Social Bookmark Button

Aloo Baingan

January 27th, 2011 Mona Posted in Canola Oil, Cilantro/Kothmir (fresh), Coriander seeds, Cumin seeds/Zeera, Eggplant/Baingan, Ginger-Garlic paste, Green Chillies, Red Chilli powder, Salt/Namak, Tomato/Tamatar (fresh), Turmeric/Haldi, White Potato/Aloo 13 Comments »

A simple vegetable curry with use of the most humble vegetables to brighten your day. One of my most favorite vegetable curries that comforts me.

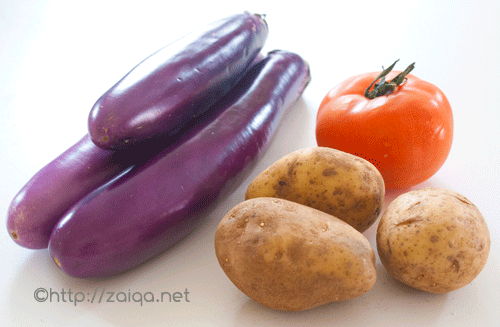
Asian Eggplants, PEI Potatoes and Ontario grown Tomato

The soft and velvety texture of cooked and potatoes eggplants along with the slight sourness from the tomatoes makes this curry very juicy and delicious. Enjoy it along with pulao, naan or paratha.

Aloo Baingan – Potatoes and Eggplants in a tomato gravy

Ingredients:

Asian Eggplant – 3, washed, pat dried, and cut into semi-circles (you can use any variety of eggplant)
Potatoes – 3, medium sized, washed, pat dried, peeled and quartered
Tomato – 2, medium, roughly chopped
Green chillies – 4, finely chopped
Canola oil
Cumin seeds – 1 tsp
Ginger garlic paste – 1 tbsp
Salt – to taste
Red chilli powder – 2 tsp
Turmeric powder – 1/4 tsp
Roasted Coriander seed powder – 1/2 tsp
Cilantro – for garnish, finely chopped

Aloo Baingan – Potatoes and Eggplants in a tomato gravy

Method:

1. In a kadai, pour oil to deep fry the chopped eggplant and potatoes. Once the oil is very hot, deep fry the cut potatoes and eggplant until they attain a slight brown color. Using a slotted spoon remove them into a wire mesh strainer to let the excess oil to drain away.
2. In a pan, pour about 1 tbsp oil and as soon as it warms up, add the cumin seeds and let them splutter. Add the green chillies, ginger garlic paste and fry for a minute. Add the chopped tomatoes, red chilli powder, roasted coriander seed powder, salt and turmeric powder. Mix well. Add the deep fried potatoes and eggplant and give a gentle mix. Add a little bit of water and cover with a lid for 3-5 minutes. Check to see if the potatoes are done. Garnish with chopped cilantro, remove from heat and serve.

Note: 1. You can also add boiled/frozen peas to the curry in the end.
2. You can even add a little bit of kasuri methi or fresh chopped methi in the end for a different flavor.
3. You can skip the deep frying of the potatoes and eggplant and directly add the chopped vegetables into the gravy. You will have to increase the cooking time as well as add a little bit of water to aid in the cooking process. Deep frying the vegetables makes them soft and adds a good flavor.

Luv,
Mona

AddThis Social Bookmark Button

Tarkari ki Biryani

November 9th, 2010 Mona Posted in Almonds/Badaam, Broccoli, Canola Oil, Carrot/Gajar, Cashewnuts/Kaaju, Cilantro/Kothmir (fresh), Cinnamon/Dalchini, Clove/Laung, Cumin seeds/Zeera, Eid/Ramadhan/Iftaar, Ghee, Ginger-Garlic paste, Green Chillies, Green Onion/Hari Pyaz, Hyderabadi special, Mint/Pudina (fresh), Peas/Matar, Red Chilli powder, Saffron/Zafraan, Salt/Namak, Tomato/Tamatar (fresh), Turmeric/Haldi, White Potato/Aloo, Yellow Onion/Pyaaz, Yogurt/Dahi 22 Comments »

I was immensely thrilled to learn just a few months back during this last Ramadan that Haleem is the first Hyderabadi delicacy to be granted the Geographical Indication Certificate (GI status) along the lines of the famous Tirupati laddu, Darjeeling tea, Goan feni and Banarasi silk. So it will only be referred to as ‘Hyderabadi Haleem’ from now on. How cool is that. I wish that Biryani and many other such iconic dishes of the city too get the recognition as soon as possible.

Biryani is a dish of royalty, of the nizams of the Hyderabad and the Moghuls, known for its cooking method, delicate flavor, heavenly aroma and the use of many spices in the right proportion. In Persian “Birian” means ‘fried before cooking’. There exist two kinds of Biryani, the non-vegetarian and the vegetarian versions. I have already blogged about both the kachchi (raw) and pakki (cooked) method of the Chicken and Mutton Biryani. You can find the recipes here. Apart from the Hyderabadi Biryani, many other versions also do exist, like the Iranian Biryani, the Khaibari Biryani (from Afghanistan) and Pakistani Biryani, all with a few regional variations that change with religion, geography and culture, but all under the same name Biryani. Today Hyderabadi Biryani caters to palates all over the world.
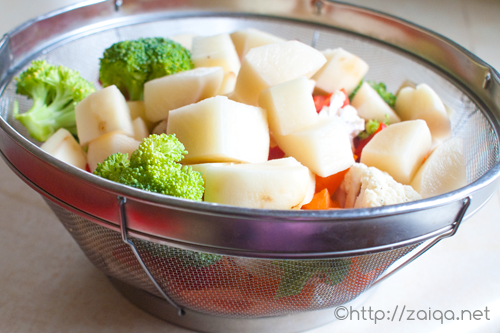
Chopped Mixed Vegetables

Like I had mentioned in my last post, I love to prepare traditional dishes like Nihari, Biryani and Haleem during the cold season. So the last weekend, I prepared Hyderabadi Vegetable Biryani along with Tomato Chutney as the main course for a dinner party.

Tarkari in Urdu language means vegetables. Just like the non-vegetarian version, the vegetarian version is just as ambrosial and a delightful crowd pleaser. All my guests loved it. I do not know how I missed writing about this Biryani all this while. So without further ado, for all those who were waiting for the Hyderabadi version of the Vegetable Biryani, here goes. Following is my Ammi’s recipe.

Hyderabadi Tarkari ki Biryani – Vegetable Biryani
Serves: 6- 7

Ingredients:

Fragrant long grained Basmatic Rice – 3 cups
Warm milk – 3/4 cup
Saffron strands – two pinches
Canola oil – 5 tbsp (or Ghee)
Yellow Onions – 2, large, finely sliced
Ginger garlic paste – 1 tbsp
Long Green chillies – 2, each slit lengthwise and chopped into half
Mixed Vegetables – large cauliflower florets, large broccoli florets, carrots cut into 2″ long thick sticks, capsicum (any color) cut into long and thin strips, green beans cut into 2″ long pieces, boiled/frozen green peas, quartered potatoes, quartered firm red tomatoes – 5 cups
Cumin seeds – 2 tsp
Red Chilli powder – 2 tsp
Salt – 4 1/2 tsp
Turmeric powder – 1/4 tsp
Cilantro – 1/2 cup, loosely packed, roughly chopped
Yogurt – 250 ml, 1 cup
Caraway seeds/Shahzeera – 1 tsp
Dried Bay leaf – 2
Cloves – 4
Green cardamoms – 5
Mint leaves – 1 cup, loosely packed, roughly chopped
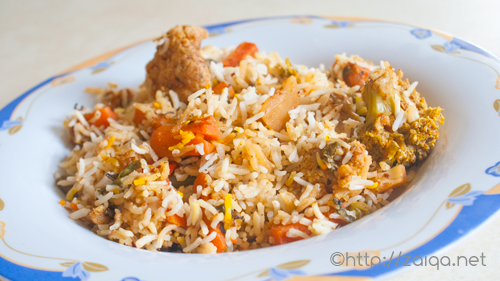
Tarkari Biryani – Vegetable Biryani

Method:

1. Wash the rice in several changes of water and let soak in cool surplus water in a vessel.
2. In a small cup, pour in warm milk and saffron strands. Keep aside.
3. In a large and wide saucepan, add oil and as soon as it warms up add the sliced onions and fry them while stirring frequently until evenly golden brown in color. Remove the pan from heat and using a slotted spoon transfer half of the fried onion into a platter and reserve for garnish.
4. In the same saucepan, add the cumin seeds, ginger-garlic paste and green chillies, stir fry for a minute. Immediately add all the mixed vegetables. Also add red chilli powder, 1 1/2 tsp of salt and turmeric powder and chopped cilantro. Mix well very gently. Increase the heat to high and let the vegetables sear. Give the vegetables a stir every two minutes, until they get seared on all sides. Now add the yogurt and mix. Lower the heat to medium high and let cook covered for 3-5 minutes. Once the vegetables are cooked, (but not mushy) (do not overcook the vegetables) (pierce a knife into a potato and check if it is done) uncover and cook on high while stirring whenever required until the vegetables are almost dry. Keep aside.
5. In a large heavy bottomed vessel pour in surplus water and add shahzeera, dried bay leaf, cloves, green cardamoms and cover with a lid. Let it come a rolling boil. Once boiling, drain the soaking rice and add to the boiling water. Let it cook until the rice if half done. Once done, drain the rice and keep ready. Now starts the layering process of the Biryani. Working quickly, in the same vessel, add half of the drained rice. Now add the cooked mixed vegetables. Spread over the rice evenly. Now spread the reserved fried onions meant for garnish, and the chopped mint leaves evenly over the vegetables. Next, arrange the left over rice evenly covering the vegetables. Lastly, pour evenly the saffron milk. Cover the vessel properly with aluminium foil or a tight lid (with vents closed with dough if any) so that no steam can escape. You can also apply dough to seal the lid which is the traditional method.
6. Cook the Biryani on high for 2 minutes. You will notice that a good amount of steam has built up, which is called as the pehli bhaap, meaning first steam. Then take a flat dosa tawa and keep it below the vessel (so that the bottom does not burn and it slow cooks evenly) and lower the heat to simmer and let it slow cook for 30 minutes, until done. Remove from heat. Let the Biryani sit for 15 minutes before serving. Dig a spoon into the vessel and gently mix the Biryani. Serve on a platter. For a special touch, garnish with more fried onions, finely chopped cilantro and mint leaves, toasted/fried almonds or cashewnuts or pinenuts or raisins.

Serve this Biryani along with Mirchi Ka Salan or Baghare baingan or Tamatar ki Chutney or plain and simple Dahi ki Chutney for a sumptuous Hyderabadi meal.

Note:
1. You can also add chopped paneer cubes, sliced mushrooms, and soy nuggets along with the vegetables.
2. Brocolli is not usually added to the Biryani, I added it because I love it.

Luv,
Mona

AddThis Social Bookmark Button