Ramadan Mubarak and Peach Raspberry Jam

July 31st, 2011 Mona Posted in Lemon/Nimbu, Peaches, Raspberries, Raspberries, Sugar/Shakkar 13 Comments »

Masjid-al-Haram, the holy mosque in Makkah, Saudi Arabia

The crescent moon of the month of Ramadan has been sighted and starting tomorrow is the most blessed month in Islam~Ramadan. On this occasion I send my greetings to Muslims all over the world.

Ramadan Kareem to all. May Allah (سبحانه وتعالى) grant us closeness to Him, forgiveness from sin and reverence for His Word in this month of Fard. May Allah(سبحانه وتعالى)  accept our Siam (Fasting) and our Qiam (Traweeh prayers). Ameen.

Raspberries in my Garden

Almost three years back I had bought three little raspberry canes from the local garden center and planted them in a little patch in the backyard of my home.

Raspberries in my Garden

Little did I think that after just a few years these plants would multiply and grow into thick bushes as tall as I am and I would have an abundant supply of raspberry come summer every year mashallah.

Raspberries from my Garden

I love berries of all sorts, unlike my hubby who says that berries have a tart flavor. But I love to enjoy fruit of the season, tart or not, and they are so beautiful to look at. Who can resist them.

Fresh Ontario Peaches

So the other day, after harvesting my plants, I had quite a lot of raspberries. And after a visit to the local farmers market, I also had almost a ton of fresh Ontario peaches.

Fresh Ontario Peaches

Fragrant, juicy, sweet and blush-red colored, they are my absolutely favorite stone fruits. So, what better way to use them up than to make an easy yet quick jam with beautiful flavors that screams summer.

Peach Raspberry Jam

Ingredients:

Ripe Fresh Peaches – 6, washed
Raspberries – 1 cup, washed
Granulated Sugar – 3/4 cup sugar
Juice of 1 lemon

Peach Raspberry Jam

Method:

1. Slice peaches and discard pits. (Optional: You can also peel the peaches if you want)
2. Add the sliced peaches and raspberries to a blender container and blend until smoothly pureed. (Optional: You can strain this puree if you want a clear jam)
3. In a saucepan, add the puree and bring to a boil. Lower the heat to medium and add sugar and lemon juice. Mix well. Keep stirring occasionally and simmer gently for another 20-30 minutes. To test if the jam is ready, drop a heaping teaspoonful onto a plate and slightly tilt the plate. The jam should not run off, but cling and slowly glide down. If the jam isn’t ready, put it back on the heat for a while. Once done, spoon the jam into sterilized jars and refrigerate to store.

Sending this to Meeta’s Monthly Mingle:Stone Fruit event hosted this month by Sukaina of Sips and Spoonful.

And not to forget, do remember to send your entries to ‘The Hyderabadi Ramadan Food Festival Event – Season III‘ that I am hosting this Ramadan on my blog. Click here to go through the details of the event.

Luv,
Mona

AddThis Social Bookmark Button

Pudina aur Khopra ki Chutney

July 13th, 2011 Mona Posted in Black Gram/Urad Dal, Canola Oil, Cumin seeds/Zeera, Dried Red Chillies, Dry Desiccated Coconut, Garlic/Lahsun, Ginger/Adrak, Green Chillies, Hyderabadi special, Mint/Pudina, Mint/Pudina (fresh), Mustard seeds/Rai, Salt/Namak, Tamarind/Imli 7 Comments »

I simply adore mint leaves. Its clean citrusy taste, refreshing aroma and artistic curly rich green colored leaves, all make me fall in love with it over and over again. I wait for spring/summer time every year so as to plant mint outdoors in pots. It grows easily and vigorously once established and provides me with fresh leaves all summer.

Mint from my garden

The Arabic name for mint is ‘nanaa’. The mint from the holy city of Madinah is famous for its strong and wonderful aroma. During visits to Madinah one can see people selling fresh mint leaves at every corner. The mint is kept fersh covered under wet hessian cloths. Mint that doesnt get sold is dried under the hot sun and sold. People of Madinah enjoy mint as a mouth refreshner, or in teas or in their food.

Clockwise from top: Mint leaves, Dessicated Coconut, Phulay Chane

The below verison is a mild chutney with use of phulay chane and coconut in it. I enjoy this chutney along with idli, dosa, evening snacks, or as a dipping sauce for sandwiches.

Pudina aur Khopra ki Chutney – Mint and Coconut Chutney

Phulay Chane – 1/8 cup
Dessicated Coconut/Khopra – 1/4 cup
Roasted Cumin seed/Zeera powder – 1/4 tsp
Small Green Chillies/Hari mirch – 4-5, chopped
Tamarind – walnut sized seedless ball (or) Lemon/Lime juice – 2 tbsp
Fresh Mint leaves/Pudina – 1 cup
Salt – to taste
Ginger – 1/4 inch piece
Garlic – 2 pods
Tempering/Baghaar:
Canola oil – 2 tbsp
Mustard seeds/Rai – 1/2 tsp
Dried red chillies/Baghaar ki mirch – 2, each broken into small pieces
Curry leaves – 4-5, chopped

Method:

1. In a blender, add the first nine ingredients. Pour in a little bit of water to aid in the grinding process and grind until smoothly pureed. Pour the prepared chutney into a serving bowl.
2. Prepare baghaar/tempering: In a pan at medium high heat, pour oil and as soon as it warms up add the mustard seeds, broken dried red chillies and chopped curry leaves. Immediately remove from heat and pour this baghaar hot and hissing into the chutney and mix well. Serve along with your favorite snacks. Store the left over if any in the refrigerator for upto a week.

On a different note, Megha from the ‘Food Food Maha Challenge Muqabla’ show that will be telecast on Food food channel had contacted me as they are looking for participants. She says:

“The show is about the competition between male and female cooks and Madhuri Dixit willl be representing the female cook and Sanjeev Kapoor will represent the male cook.The judge of the show is Mr. Sanjeev Kapoor . If any one is interested you can call on 02242769017 between 11 am to 6 pm.
The auditions dates are:
8th July Mumbai
10th July Nagpur
14th July Delhi
17th July Kolkata
20th july Hyderabad
You can also drop a mail at foodfood.mahachallengemuqabla@gmail.com”

This is a great opportunity to participate in a cooking show. If any one is interested, do contact her.

Luv,
Mona

AddThis Social Bookmark Button

Tala Hua Chawal

April 9th, 2011 Mona Posted in Basmati Rice/Chawal, Curry leaves (fresh), Ginger-Garlic paste, Hyderabadi special, Lemon/Nimbu, Mustard seeds/Rai, Other Hobbies, Red Chilli powder, Salt/Namak, Sewing Projects, Turmeric/Haldi 14 Comments »

I do not fancy a day or two old left over plain rice for meals. Plain rice keeps well in the refrigerator for almost a week if stored in an air tight container. And it is convenient for working people. But I am not fond of stored left over rice. Fresh cooked rice tastes so much better. However there are days when there is leftover rice and you do not know what to do with it. My Ammi makes sun dried rice crackers using the day old rice just like the dal ki badiyan and they used to be so yummy. Unfortunately the weather here in Toronto does not always favor it. So I make an another of my Ammi’s speciality. Spicy and lemony Tala hua Chawal. Serve this chawal warm at breakfast or as a mid day meal.

Tala Hua Chawal – Recycled Spicy Rice

Ingredients:

Leftover plain Rice (1 day old) – 2 cups
Canola oil – 2 tbsp
Mustard seeds – 1 1/2 tsp
Ginger garlic paste – 1 tbsp
Curry leaves – 2 sprigs
Red chilli powder – 1 1/2 tsp
Turmeric powder – 1/4 tsp
Salt – to taste
Lemon juice – 3-4 tbsp

Method:

In a non stick skillet at medium high heat pour in oil and as soon as it warms up add the mustard seeds and ginger garlic paste and stir fry until the ginger garlic paste turns golden brown and the seeds begin to pop. Immediately add the curry leaves, red chilli powder, salt and turmeric powder. As they splutter, add a few splashes of water and add the 2 cups rice. Mix well. Stir fry for 2-3 minutes until the rice is well mixed. Pour lemon juice and cover with a lid. Remove with a lid and serve warm.

Enjoy Tala hua Chawal along with Khadi dal or on its own.

***

A few days back, I was finally able to get my hands on a teeny weeny Curry leaf plant. It was quite costly but I couldnt resist buying it since I had been searching it from the past few years. Since it is almost spring, I transplanted the baby plant to a deeper pot and added manure to it as the fertilizer. It is now sitting in front of a large window in my house. Alhamdulillah it is growing nicely and I hope it will continue to flourish and hopefully will provide me soon with a fresh constant supply of curry leaves for my cooking purpose.

On an another note, hubby dear had gifted me a sewing machine this last Eid-ul-Adha, something that I had wanted since long. Sewing is an another favorite hobby of mine, so I have been doing a few sewing projects lately. There are a lot of interesting and clearly explained projects shared by very talented sewists on their blogs. Inshallah I will update my blog with projects that I will be doing.

I wanted to share with you all this project that had caught my attention a few days back, and it turned out pretty good. I used hubby’s old t-shirt and a time-worn kitchen towel instead of the chenille sock and I got 3 reusable swiffer mop pads. I plan to use them to wipe my kitchen floor and when they are soiled, just wash them and they are again good to go. How convenient is that.

Luv,
Mona

AddThis Social Bookmark Button

Mint~Pudinah

March 29th, 2010 Mona Posted in Mint/Pudina, Mint/Pudina (fresh) 15 Comments »

Regular readers of my blog might be familiar with my love for gardening. Ever since I landed here, I have always maintained a little garden come spring/summer until fall, consisting of a few basic veggies and herbs. This has been my annual spring-summer ritual that gives me immense joy. Among them all, one herb that I always plant is Mint. I love the aroma and flavor of mint, also called as pudinah in Urdu.

store bought bunch of mint leaves from an Indian store,
this is Indian variety of Mint

Alluring aroma, bright green and crinkly opposite leaves with brownish square stems are some of the characteristic features of mint plant. There exist dozens of varieties of this hardy perennial. Out of all, I usually buy and use the kind available in the Indian grocery stores for my cooking. And at times I make do with spearmint which according to me is the closest of the Indian mint in flavor.

plucked Indian variety mint leaves

To grow Mint:

Growing mint from other healthy stems is very easy. There are two ways to grow your own mint.

1. One way is to grow them through store brought saplings.
2. The other way is to grow them from stem cuttings.

1. Buy your favorite variety of mint saplings from the garden centers or nurseries or from some friendly gardeners, and transfer them to wide and deep pots. I usually buy Spearmint or Peppermint or Indian mint. Place outdoors during spring/summer and water daily. Mint loves moist soil and grows vigorously once established. Keep snipping off the tips from time to time and use them in your cooking to promote a bushy growth and avoid flowering.

2. To grow mint from stem cuttings:
I always choose mint sprigs to be used as cuttings from Indian stores, as I find their tatse to be strong and synonymous to Indian culinary preparations. You can choose any variety you like. Just cleanly snip off two sets of opposite leaves from the bottom and leave the remaining at the growing tip. Make a clean diagonal cut just below the bottommost node, and plant the cutting in soil in a small container, or you can also place the cutting in a bowl/container with fresh cool water, such that the bottommost node is covered with soil or with water, in a bright area at room temperature that receives plenty of indirect sunlight.

stem cuttings of fresh & healthy Indian variety mint
placed in a glass with some fresh cool water so that they root

stem cutting beginning to root

In a week or two you will notice that the stem cuttings will start to root and develop new leaves. These roots are very fragile. Transfer these stems to a large and deep containers and place in a partly sunny area outdoors. Keep watering regularly whenever the soil looks dry. Soon you will have enough mint to share with your neighbors. Pinch back mint tips which make beautiful garnishes, or as required. This helps to keep the plant bushy and delay flowering.

Good to Know:

I advise growing mint only in large sized pots, tubs or containers and never in ground, as it invasive and quickly spreads out like a weed taking over your entire lawn or garden. Growing mint from seed is difficult, therefore I only recommend buying small seedlings from nursery or garden centers during early spring or use a stem cutting from the store brought mint you use for cooking. If during winters it gets very cold and snows in your area, then mint will die, but do not fret, it revives once winter ends. Bring the mint pots indoors during winters and place in front of windows that receives some bright daylight. Do not crowd several varieties a single pot/container. Mint prefers partly sunny areas and a moist soil, water it frequently whenever the soil looks dry.

Indian Mint growing luxuriously outdoors in a pot on the deck

To Store Mint:

Fresh is best when it comes to mint or any herbs. Buy one can always store it by either freezing the leaves or by drying them. I do not like to dry them.

1. To store fresh leaves, make a fresh cut below each stem and place the stems in a glass. Pour a little amount of fresh cool water into the glass that acts like a vase, taking care the water does not touch any leaves. Place it on the kitchen countertop in an area away from harsh sunlight. Change the water daily. This way, the stems will root which you can also use to plant the mint, and the leaves will stay fresh for a about 2-3 weeks.

2. An another way to store fresh mint is to pluck all leaves and store them covered in a zip-lock bag or container lined with paper towel in the refrigerator until needed.

plucked mint leaves

This way the mint will stay fresh for about a week or two maximum.

3. I also freeze chopped mint, just like I do with fresh cilantro. This way you can store fresh mint indefinitely and you can add it to curries whenever you need it.

chopped mint in ice-cube tray ready to be freezed

Wash the mint leaves in fresh cool water. Spread on a kitchen towel and let dry for 30 minutes. Now chop all the mint leaves roughly. In an ice-cube tray, tightly pack roughly chopped mint into each of the molds of the tray. Cover with water and freeze overnight. The next day, working quickly, unmold the frozen mint cubes from the ice-cube tray and transfer them to a zip-lock bag. Squeeze out air from the bag and freeze immediately. To use, add the frozen cubes to the curries during the last stages of cooking.

Luv,
Mona

AddThis Social Bookmark Button

Simple Pleasures

October 2nd, 2009 Mona Posted in Basmati Rice/Chawal, Canola Oil, Caraway seeds/Shahzeera, Cardamom/Elaichi, Cilantro/Kothmir (fresh), Cinnamon/Dalchini, Cumin seeds/Zeera, Curry leaves (fresh), Dried Red Chillies, Dry Bay Leaf/Tej Patta, Ghee, Ginger-Garlic paste, Mint/Pudina (fresh), Peas/Matar, Red Chilli powder, Salt/Namak, Tomato, Tomato/Tamatar (fresh), Turmeric/Haldi, White Cauliflower/Phool Gobi, White Potato/Aloo, Yellow Onion/Pyaaz 15 Comments »

Baghara Khana (or Baghara Chawal), is an another simple and nourishing dish that reminds me of that happier era, when I was a kid. Food that reminds me of my childhood and my hometown definitely makes me immensely nostalgic every time.

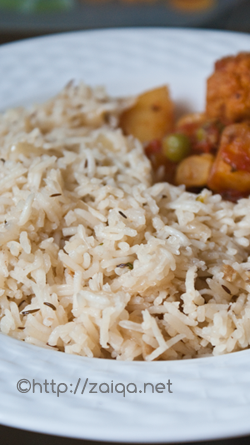
Baghara Khana along with Aloo Gobi Matar ~ was my yesterday’s lunch

Fragrant long grained basmati rice is cooked along with caramelized onion and exotic whole spices that give a delicate flavor and a wonderful aroma that will fill your house, and welcome your loved ones with open arms and a sense of home where warmth and comfort abounds. Always serve Baghara khana warm, along with the accompaniments of your choice.

To prepare Baghara Khana, use rice and water in the ratio of 1:2, i.e., for 1 cup rice, use two cups of water. Save a little amount of the water to add later on after the rice is about 3/4th cooked as described below.

Baghara Chawal/Khana
Serves: 2

Ingredients:

Long grained White Basmati Rice – 1 cup (I prefer the brands ‘Daawat’ or ‘India Gate’ or ‘Lal Qila’)
Canola Oil – 1 tsp
Ghee – 2 tsp
Onion – 1, small, finely sliced
Ginger-garlic paste – 1 tsp
Fresh Cilantro/Kothmir – 1 tbsp, finely chopped
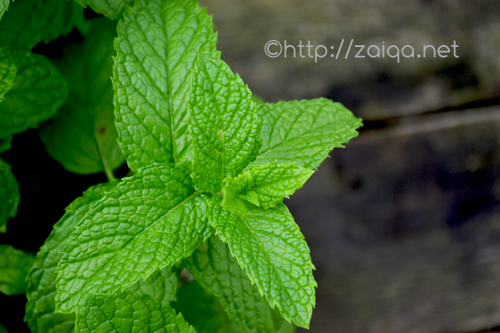
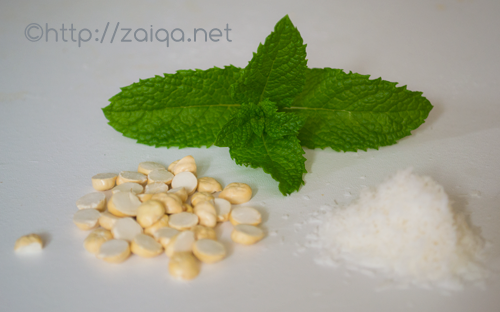
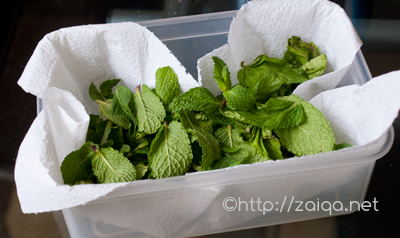
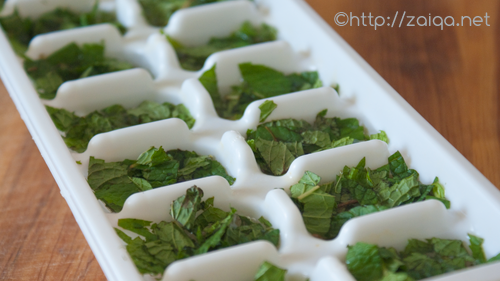
Fresh Mint/Pudina – 1 tbsp, finely chopped
Green cardamom/Elaichi – 2
Cinnamon/Dalchini – 2 inch stick
Dry bay leaf – 1, medium sized
Caraway seeds/Shahzeera – 1/2 tsp
Water – 2 cups
Salt – 1 tsp

Method:

1. Wash the rice in two changes of water and soak it in surplus cool water for 30 minutes.
2. In a saucepan at medium high heat, pour oil and ghee and as soon as it warms up, add the sliced onion and stir fry until the onion is nicely browned up. Add the ginger-garlic paste and fry it along for a minute. Add the chopped herbs, green cardamom, bay leaf, cinnamon stick and caraway seeds. Fry them for a minute more. Add 1 2/3 cup of water and salt. Cover with a lid and increase the heat to high. Let it come to a boil.
3. Meanwhile drain the soaked rice and keep ready.
4. Add the drained rice to the boiling water in saucepan and mix well. Let it come to a boil once. Lower the heat to simmer and cover with a lid. After 3 minutes using a spoon, mix the rice well, lower the heat to minimum and and cover it back again and let cook for a furthur 3 minutes. Open the lid, pour in the remaining 1/3 cup water and gently mix well. Cover and let cook until the rice is tender. Close the heat and leave the saucepan on the hot stove for about 15 more minutes to finish cooking on Dum. Serve warm.

My house smells like a potpourri every time after I prepare Baghare Chawal due to all those aromatic spices.

Note: You can also add chopped green chillies and a few whole cloves along with the other spices while frying the onions. I do not prefer to add them. Also for a special touch, garnish the cooked rice while serving with a few toasted whole cashew nuts.

Suggested Accompaniments: Baghara khana is enjoyed along with Dalcha or Baghare baingan or Mirchi ka Salan or Sem ki phalli gosht or Qimah or Qorma for a delicious Hyderabadi meal.

***

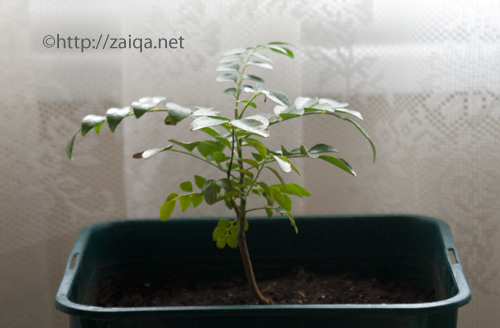
This Summer, I had planted a few tomato seeds (first time with tomatoes) and voila, I had plenty of fresh tomatoes from my lil tomato garden in the backyard. Here are a few snaps:

Tomato Variety: Moneymaker

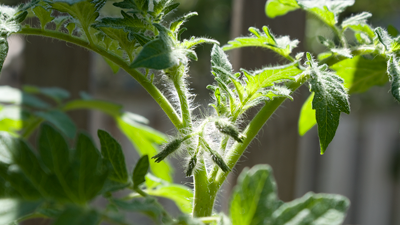
tomato budss under the warm early spring sunshine

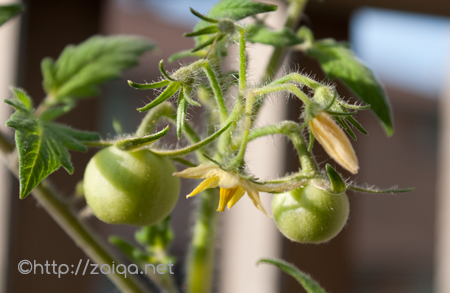
tiny tomatoes and blooms in early summer
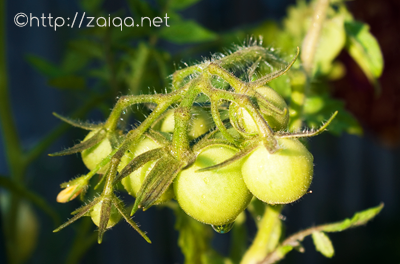
after a shower
I love the fuzzy stems and the unique strong scent of tomato foliage

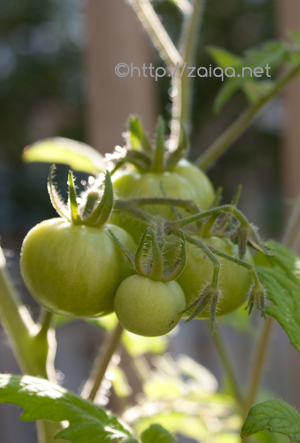
on a warm sunny evening

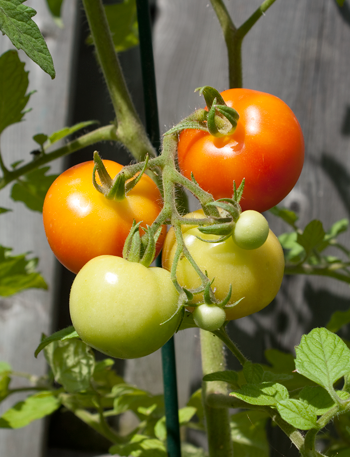
ripening on the vine

For the curry below I had used the garden ripe tomatoes from my plants. With the commenced autumn chill in the air, I do not think the plants will live much longer. To freeze tomatoes, just cut out the tough part of the core, put the whole tomatoes on a baking sheet and into the freezer. After they’ve frozen, transfer them to a plastic zipper bag and put them back into the freezer. When you want to use them, you can easily peel them if you allow them to thaw until they’re just barely soft on the outside. Then just rub off the skins. Or you can run warm tap water over them and peel them immediately. Use them in recipes for any cooked dish. Inshallah the next season, I plan/wish to grow the heirloom ribbed or beefsteak tomatoes and even more veggies. Have a look at the beautiful heirloom tomatoes here, I am sure even you all will be smitten by their beauty. Need to stock up the seeds soon for the gardening season.
For those of you interested, this book has loads of information on heirloom tomatoes and how to plant them.

Aloo Gobi Matar – Potato Cauliflower and Peas in one pot

Ingredients:

Canola Oil – 1 1/2 tbsp
Onion – 1, large, finely sliced
Cumin seeds – 1 tsp
Fresh Curry leaves – 6
Dry red chillies – 3, each broken into two
Salt – 2 tsp
Turmeric powder – 1/4 tsp
Cauliflower – 1 medium head, cut into florets, washed and drained
White Potatoes – 3, peeled and cut into quarters
Tomatoes – 2, medium sized, chopped
Red chilli powder – 2 tsp
Frozen organic peas/Matar – 3/4 cup
Fresh Cilantro – 2 tbsp, finely chopped

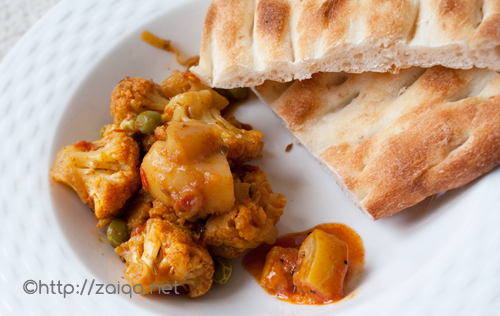
Aloo Gobi Matar along with toasted Afghani Roti, and home-made Lemon pickle ~ todays lunch

Method:

Heat oil in a wide saucepan at medium high heat and as soon as it is warm, pour in oil. Add the sliced onion and stir fry until the onion are just lightly browned. Add the baghaar ingredients~cumin seeds, curry leaves and dry red chillies. Also add salt and turmeric powder. Mix well. Add the cauliflower florets and potato quarters and mix well. Spread the vegetables so that they are in a single layer in the pan. Sear the vegetables for about two minutes. Keep stirring them occasionally. Add the chopped tomatoes, half cup of warm water and red chilli powder. Mix well and cover the lid. Let cook until the vegetables are tender and have absorbed most of the liquid. Keep stirring occasionally. Add the frozen peas and cover the lid for 2 minutes. Garnish with chopped cilantro and serve warm.

‘Aloo Gobi Matar – Potato, Cauliflower and Peas’ in one pot goes to Andera’s Grow Your Own event.

Luv,
Mona

AddThis Social Bookmark Button