Basic How To: Ghee
Ghee (Clarified Butter) (also referred to as ‘Maska’) is an essential flavoring ingredient in most of the Indian culinary preperations. It is also added as a dollop on warm Khichdi, Idli etc for delicious flavor. Ghee also is used as the culinary fat in some Indian dishes, especially sweets, for richness and lovely aroma and flavor. It is lactose free and rich in Vitamin A. I have never brought Ghee from stores. I always use my own Home-made Ghee.
Ghee is prepared from butter, butter is prepared from cream, and cream is obtained from milk. Back in India my Ammi always prepares Ghee from scratch. Accumulated cream was daily skimmed off milk brought by the doodhwallahs/door to door milk vendors, until the container with cream was full and ready to be made into Ghee (I have explained her procedure below). But here in Toronto, I prepare ghee from store bought unsalted butter for ease of use.

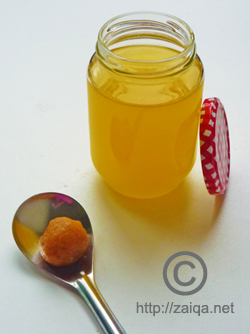
Warm Ghee,
and the strained left over milk solids in the spoon
Ghee from Scratch:
1. Boil milk and then let it cool uncovered. Once it is cool, you will observe that a layer of cream has been accumulated on the top of the milk. Transfer the vessel to the refrigerator very carefully without disturbing the top layer. After about 2-3 hours, using a spoon carefully collect the cream and transfer it to a clean and dry air tight food storage container. Cover and store the container in the refrigerator. Continue collecting cream in this way for a week to 10-15 days until the container is full.

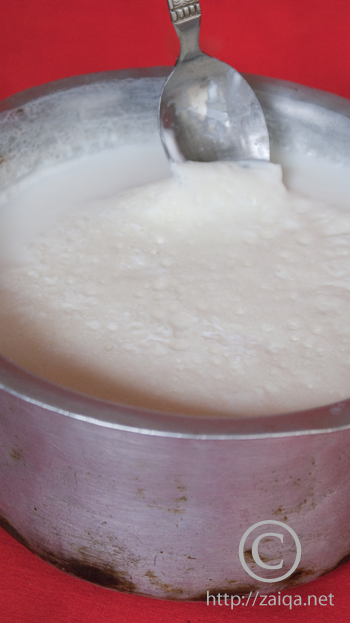
Cream accumulated as the top layer on cooled boiled Milk
2. Once the container is full, using a wood churner or a dal ghotni, or a hand mixer, churn the cream until you see that the butter and whey has started to separate. You can even churn the cream at room temperature in a mixer using ice and cold water until the soft white butter and clear whey has separated. Use this whey which is highly nutritious in other recipes instead of water. Using your hands remove the formed soft butter from the whey and place it in a clean bowl.

Churning collected cream using a dal ghotni

Butter separated from Cream after churning
3. Add the separated butter into a saucepan and follow the steps below under the heading ‘Ghee from Store Bought Unsalted Butter Blocks’.
Note: You can also skip step 2, and directly add the cream at room temperature to a stainless steel saucepan at medium heat. and continue with step 3.
Ghee from Store Bought Unsalted Butter Blocks:
The amount that I have prepared lasts for around 2-3 months in my house (although it can be stored without getting spoiled indefinitely). It may vary depending on the number of members in your house and also on the frequency of use. Always use a dry clean spoon for Ghee whenever you want to use it.
Required:
Finest Quality Organic Unsalted Butter – 1 lb, 454 grams cut into small size blocks
Fine Wire Mesh Strainer
Heat proof canning or bottling glass jar like the Mason jar, or food safe glazed ceramic jar or stone jar or a terrine or stainless steel container, with tight fitting lid

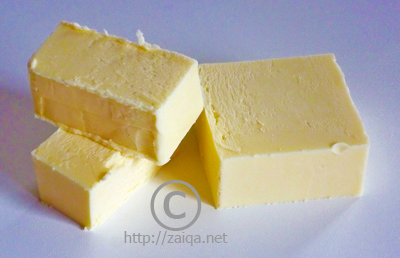
Unsalted Store Bought Butter Blocks
Method:
In a heavy bottomed medium size stainless steel saucepan, heat the butter blocks on medium high heat.
Once melted, you will observe a large amount of froth/foam on the top. This takes about 6-8 minutes on medium high heat. Immediately lower the heat to lowest and let cook uncovered for 40-45 minutes. During this time the froth/foam will slowly dissapear, the milk solids have seperated and will sink to the bottom. Using a spoon very gently push aside the foam to check the color of the milk solids in the bottom. You will notice the milk solids have begun to turn into beige brown in color. Keep a close eye and do not let the milk solids turn into dark brown in color. The Ghee will also start emanating a pleasing nutty aroma. If a drop or two of cool water is dropped into the cooking ghee, a crackling sound is produced. (This is because all the water from ghee has been boiled off)

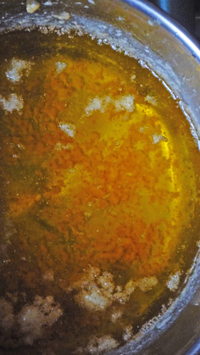
Ghee Solids turned into beige brown color and settled in the bottom.
Notice the foam has also been almost disappeared
Immediately at this stage, remove the ghee from heat and let cool slightly. Strain the ghee using a fine wire mesh into a completely dry jar to store. Reserve the left over milk solids in the strainer for later use. Do not cover the jar until the ghee is completely cooled at room temperature, it will take a few hours. The ghee solidifies into opaque beige-golden colored granulated mass when no longer warm. Ghee has a very long shelf life. Store it refrigerated in air-tight jars with care and it will last very long (during winters I store my Ghee jar at the countertop, and in summer i store the Ghee jar in the refrigerator).
You can add the reserved milk solids to any curry, rice, dessert, or to the dough while you prepare Roti/Paratha or any other flat bread for delicious flavor.
This post is my contribution to the event Back to Basics originally stated by Jaya, and currently being hosted by Aqua at Served with Love.
Luv,
Mona