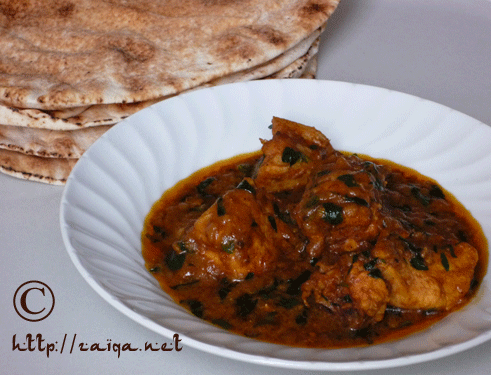
Lajawaab Hyderabadi Kachchey Gosht ki Biryani

December 1st, 2009 Mona Posted in All-Purpose Flour/Maida, Basmati Rice/Chawal, Blog Events/Entries/Polls, Canola Oil, Caraway seeds/Shahzeera, Cardamom/Elaichi, Cilantro/Kothmir (fresh), Cinnamon/Dalchini, Clove/Laung, Dry Bay Leaf/Tej Patta, Eid/Ramadhan/Iftaar, Garam masala powder, Ghee, Green Chillies, Hyderabadi special, Indian Cooking Utensil, Kiwi, Lamb/Beef/Mutton/Veal/Sheep, Lemon/Nimbu, Milk and Milk Products, Mint/Pudina (fresh), Red Chilli powder, Salt/Namak, Simple Kitchen Tips, Turmeric/Haldi, Yellow Onion/Pyaaz, Yogurt/Dahi 47 Comments »

I had prepared Kachchey Gosht ki Biryani on the second day of Eid-ul-Adha for our dinner. We had a wonderful time and enjoyed the meal to the last morsel الحمد لله.

Basically, there are two kinds of Biryani: Pakki Biryani, and Kachchi Biryani.

Pakki Biryani: where are half cooked Basmati rice is layered along with completely cooked chicken or lamb meat and then cooked till done on slow heat on dum.
1. Pakki Gosht ki Biryani
2. Pakki Murgh Biryani

Kachchi Biryaniwhich is the true Hyderabadi Biryani – where are half cooked Basmati rice is layered along with raw marinated meat and then finished on slow heat till done on dum.
1. Kachchey Gosht ki Biryani (which I am writing about today)
2. Kachche Aqni ki Dum Murgh Biryani

Raw tender and lean meat in this extraordinary kind of Biryani is allowed to first marinate in a mixture of raw papaya paste(optional)+yogurt+lemon juice+ginger+garlic, etc., all of which are natural meat tenderizers, along with several other aromatic spices for 3-4 hours. The marinating meat with all infused flavors is then layered with less than half cooked rice and allowed to slow cook, essentially in a degchi, which an Indian utensil with sloping sides and a narrow neck. The video here and here demonstrates the method and will be useful for beginners. Go through the videos once to have a good idea on the procedure before you try my recipe.
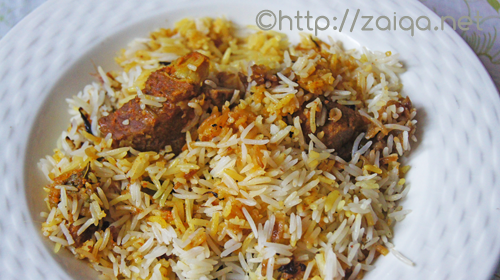
Hyderabadi Kachchey Gosht ki Biryani

The essential requirement for a good Biryani is to use good quality fragrant long grained basmati rice. The secong most important thing is to use lean meat and marinating it in a tenderizing mix before you cook. You cannot even think of preparing this Biryani without marinating it. Raw Papaya skin paste is used as the meat tenderizer back home. My Ammi however says that if the meat is tender enough, there is no need for a meat tenderizer at all. Following her advise, I have prepared Kacchi Gosht ki Biryani many times without using papaya paste and the meat is always bone tender. However, if first timers are apprehensive to try out the Biryani without the use of any meat tenderizers, please go ahead and use it. Apart from the puree of skinned unripe green papaya, peeled kiwifruit puree and pineapple puree are also powerful meat tenderizers.

My dadi(grandmother) always advised us to use rice and meat in 1:1 ratio for Kachchi Biryani. However if you like a meaty biryani, go ahead and follow meat and rice in 1.5:1 ratio, or if you prefer more rice and less meat, follow meat and rice in 1:1.5 ratio. To give time for the raw marinated meat to finish cooking along with rice, the rice is pre-soaked, and then just cooked for a minute or two, then drained and layered with the raw marinated meat and they are both cooked together. As the Biryani cooks, the steam from the meat and its marinade rises above to the rice and aids in its cooking as well. The rice also acquires flavors from the steam and the end result is piquant.
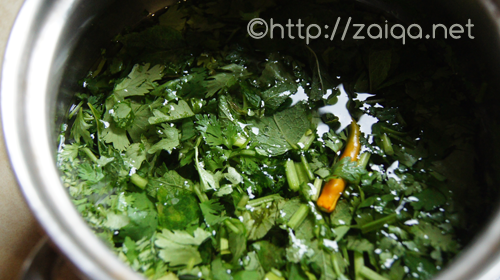
freshly chopped cilantro and mint in water

Hyderabadis prefer Kachchi Biryani over Pakki Biryani for many reasons~because this Biryani is the true Hyderabadi Biryani, for its uniqueness in the method of preparation and ambrosial taste, and also because this biryani is very simple to prepare unlike considered. All you have to do is marinate the meat for about 3 hrs, and then allow to slow cook along with half cooked basmati rice for about an hour, thats it. You do not need to stand in front of the stove stirring it the whole time. Just leave on stove to slow cook and you are free to attend to your other chores.

Make sure that you have everything ready to hand before you begin cooking rice, as you will need to assemble the layers quickly, while the rice is still warm.

Hyderabadi Kachchey Gosht ki Biryani – Hyderabadi Lamb Biryani
Serves: 6-8
Total Marinating time: 3 1/2 hrs
Total ‘Dum/slow cooking’ time: Around 1 hr and 10 mins

Canola oil – 6 tbsp
Ghee – 2 tbsp
Lean spring Lamb meat, with bone, preferably leg, cut into 5 cm cubes – 800 grams (my Ammi even adds mixed pieces like ribs, chops etc) excess fat trimmed, washed, drained and pat dried
for the tenderizing mix:
Raw Unripe Green Papaya skin –  grated or made into a paste , about 2 or 3 tbsp (or) Kiwi fruit – 1, about 50 gms, peel discarded and the pulp mashed into a smooth paste (optional)
Ginger garlic paste – 3 tbsp
Salt – 1 tsp
Turmeric powder – 1/4 tsp
for the marinade:
Thick Yogurt – 1/2 cup
Yellow onions – 3, medium sized, finely sliced
Fresh Mint leaves – 1 cup, loosely packed, roughly chopped
Fresh Cilantro – 1 cup, loosely packed, roughly chopped
Small green chillies – 4-6, slit lengthwise
Red chilli powder – 2 tsp
Salt – 1 tsp
Garam masala powder -1 tsp
Cardamom powder – 1/8 tsp
Coriander powder – 1 tsp
Lemon juice – 2 tbsp
for the rice:
Long Grained Fragrant Basmati Rice – 800 grams (old biryani rice)
Shah Zeera – 1/2 tbsp
Cardamom – 4
Cloves – 4
Cinnamon stick – one 2″ stick
Dagad Phool – 1 tbsp
Dried bay leaf –  2
Salt – 3-4 tsp
for the Biryani:(assembing layers)
Saffron threads – 2 big pinch
Warmed milk – 1/2 cup
Cilantro – 1/2 cup, loosely packed and roughly chopped
Mint leaves – 1/2 cup, loosely packed and roughly chopped
Lemon juice – 2 tbsp
additional ingredients:
Dough made with maida/all-purpose flour (flour+water) to seal the vessel(optional)

1. In a large thick walled oven-proof vessel/saucepan (if you have a thick walled degchi, please use it) (also please choose a vessel that is large enough so that there is about 1/4 amount of free headspace left after the whole biryani is assembled for the steam to collect and aid in cooking), add the tenderizing mix and the marinade and mix well. Wear gloves, add the meat and thoroughly mix the meat well. Using a knife, gash/poke the meat in the marinade. Mix once and again gash/poke it with a knife and then mix. Cover and keep aside.
2. In a thick bottomed frying pan, pour in oil and ghee. Once the oil is hot add the sliced onions. Deep fry them until evenly golden brown in color, keep a close eye and make sure you do not burn them. Once done, remove the pan from heat. Using a slotted spoon, remove half of the fried onions into a platter and spread them out. In a while, they will crisp up as they cool. The crisped fried onions will be later used for garnish. Reserve the remaining fried onions and oil in the same pan and let cool. These will be added to the marinade.
3. In a small bowl, add the warmed milk and soak the saffron threads in it.
4. Add the cooled fried onions and about 4 tbsp of the oil from the pan to the marinating meat and thoroughly mix using a spoon. Cover and keep it back in the refrigerator for 3-4 hrs.
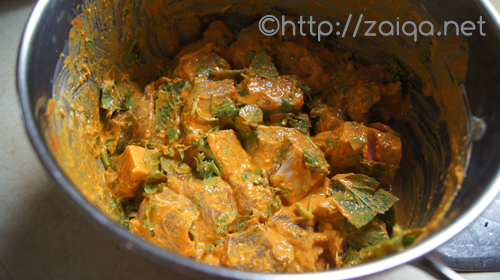
marinating meat

5. Wash the rice in 3 changes of water and soak it in surplus fresh cool water for 30 minutes.
6. In a large saucepan, pour in surplus cool water and add the shahzera, cardamom, cloves, dried bay leaf, dagad phool and salt (do not forget adding salt). Cover and bring it to a boil on high. Once the water is boiling, drain the soaking rice and add it to the boiling water and stir. Cook for just 2 minutes and drain the rice immediately.
7. Spread the drained half cooked rice over the marinating meat. Spread evenly the chopped cilantro, mint, saffron soaking in milk, remaining crisped fried onions and lemon juice. Cover the vessel properly with aluminium foil or a tight lid (with vents closed with dough if any) so that no steam can escape. You can also apply dough to seal the lid which is the traditional method.
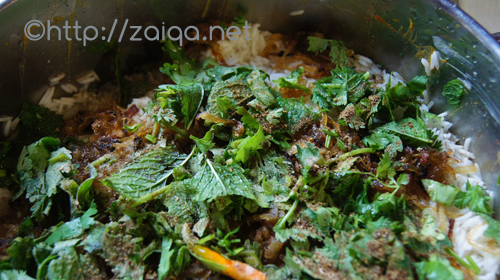
top layer of garnish just before putting it on dum

8. Cook the Biryani on high for 5 minutes. You will notice that a good amount of steam has built up, which is called as the pehli bhaap, meaning first steam.. Then take a flat dosa tawa and keep it below the vessel (so that the bottom does not burn and it slow cooks evenly) and lower the heat to simmer and let it slow cook for 30 minutes, until done. Remove from heat, and have a quick look to see if the rice has cooked and stick a fork through to test the meat (be careful as there will a lot of steam, do not burn yourselves). If it needs to cook a little longer, cover again tightly with the lid/foil again and cook for a further 10-15 minutes. when it is done and wait for 10 mins before mixing the rice with meat, and serve on a large serving platter. For a special touch, garnish with more fried onions, cilantro and mint leaves, toasted/fried almonds or cashewnuts or pinenuts or raisins and quartered hard boiled eggs.
Oven Method:
1. Follow the above steps until step 7.
2. Preheat the oven to 450°F.
3. Cook the assembled biryani in the vessel on stove-top on high heat for 5 minutes, until nice steam has built up, which is called as the pehli bhaap, meaning first steam. Immediately transfer this vessel in the pre-heated oven for 20 minutes. After that, turn the oven setting to 300°F and bake it for further 15 minutes, after which have a quick look to see if the rice has cooked and stick a fork through to test the meat (be careful as there will a lot of steam, do not burn yourselves). If it needs to cook a little longer, cover again tightly with the lid/foil again and cook for a furthur 15 minutes. Remove from oven when it is done and wait for 10 mins before mixing the rice with meat, and serve on a large serving platter. For a special touch, garnish with more fried onions, cilantro and mint leaves, toasted/fried almonds or cashewnuts or pinenuts or raisins and quartered hard boiled eggs.

Serve this Biryani along with Mirchi Ka Salan or Baghare baingan or Kaddu ka Dalcha or Tamatar ka Kut or plain and simple Dahi ki Chutney for a sumptuous Hyderabadi meal.

This lajawaab biryani is my contribution to the “The Hyderabadi Bakr-Eid Food Festival-’09” that I am hosting on my blog. The event is on and you can all send me your Bakr-Eid special recipes until December 31, 2009. Click on the link for more details.

Here are other versions of Kachchey Gosht ki Biryani from some of my fellow food blogger buddies:
1. Yasmeen’s version of Kachchey Gosht ki Biryani
2. Anjum’s version of Kachchey Gosht ki Biryani
3. Foodgoddess’s version of Kachchey Gosht ki Biryani

Luv,
Mona

AddThis Social Bookmark Button

Sheekh Kawab Series~II

March 19th, 2009 Mona Posted in Almonds/Badaam, Cilantro/Kothmir (fresh), Coriander seeds, Cumin seeds/Zeera, Egg/Anda, Green Chillies, Khoa, Lamb/Beef/Mutton/Veal/Sheep, Nuts/Maghziyaat, Raw Papaya Skin paste, Red Chilli powder, Salt/Namak, Simple Kitchen Tips, Turmeric/Haldi, Yogurt/Dahi 18 Comments »

Sheekh kawabs are quite interesting and fun finger foods to prepare, and very versatile too. I love to mix and match and play with a variety of ingredients to flavor the sheekh kawabs and alter the tastes deliciously for a change. I had also posted an another version of sheekh kawabs a few months back. The main ingredients in todays version of sheekh kawabs are dhaniya/cilantro and hari mirch/green chillies, lending a faint tangy yet fresh flavor to them. These kababs are sure to whet your taste buds.

My lunch plate – Khushka with Khatti dal and Sheekh Kawab
(Plain boiled rice with sweet and sour lentil soup and Meat Kababs)

Marinate the meat in the spice mixture for atleast 6-8 hours or overnight for the best results, so that it absorbs all the flavors and the meat gets tender. One of my close friends S was telling me that she sun-dries the peels of very raw young papaya and once completely dry, powders them to store in jars in cool dark place at room temperature. It has a long shelf life. She added that she uses about a pinch or two of this powder as a tenderizer for the meat and leaves it to marinate for delicate melt in mouth kawabs. This I thought is a useful tip to share with my readers.

Sheekh Kababs – Minced meat Kebabs (II)

Makes: 15-18, enough for a large gathering

Ingredients:

Dry roasted and powdered Cumin seeds/Zeera – 1/2 tsp
Dry roasted and powdered Coriander seeds/Dhaniya – 1/2 tsp
Green chillies/Hari mirch – 8, roughly chopped
Lean Lamb meat (boneless) – 900 gms, cubed into bite size pieces (or) Minced Lamb/Veal meat – 900 gms
Thick yogurt – 2 tbsp
Chopped blanched almonds – 1 tbsp
Turmeric/Haldi – 1/4 tsp
Salt – 2 tsp
Red chilli powder – 1/2 tsp
Egg -1, large
Ginger garlic paste – 2 tbsp
Khoa – 1 tbsp
Raw papaya skin paste – 2 tbsp
Roughly chopped Cilantro/Kothmir – 1 cup, loosely packed
Lemon zest – 1/2 tsp

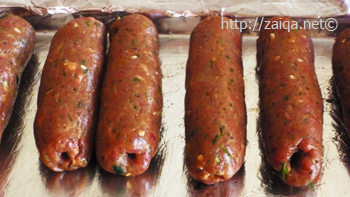
Kawabs ready to be grilled

Method:

1. Wash the meat and drain it well till all the water has been removed completely and the meat is dry. This is important or else the shape does not come out very well.
2. If using meat cubes, add the meat to a food processor along with all the other ingerdients and pulse just until the meat is minced. Do not make it into a paste. Transfer the minced meat into a mixing bowl and add all the other ingredients and mix/knead well using hands. If using minced meat, simply mix/knead it with all other ingredients until well combined in a mixing bowl. Cover and let it marinate in the refrigerator overnight for for minimum 2 hours.
3. The next day bring it back to room temperature. Dip your fingertips in a little canola oil and smear you palms with it. Take a large lemon size ball of the meat mixture in your hands and shape it into a sausage. Insert a metal skewer into it to make hole all the way through it. Enlarge the hole by rotating the kawab a few times around the skewer. Remove the skewer and place the kawab on a greased baking pan lined with aluminium foil. Keep repeating until the whole mixture is used up.
4. Preheat the oven to 350°F. Place the baking tray uncovered in the middle rack. Turn the kawabs once after 15 mins. Let cook for a furthur 15 mins. Serve warm.

Suggested Accompaniments: For a simple meal, serve these kawabs warm along with Khatti dal and Khushka. You could also serve it along with Dalcha, Baghara khana and a salad for a party meal, or simply along with a chutney as a snack.

Tip: Leftovers? Chop up the two Kawabs roughly and keep aside. Warm a pita bread, cut it onto halves, open it up and add some chopped fresh lettuce, cucumber, sliced avocado, tomato, and the chopped kawabs. Add a few drops of Chipotle hot sauce and some low-fat yogurt as topping. Serve these delicious pita pockets immediately.

Luv,
Mona

AddThis Social Bookmark Button

Basic How To’s: Series IV ~ Home made Yogurt, Dahi

February 26th, 2009 Mona Posted in Milk and Milk Products, Simple Kitchen Tips, Yogurt/Dahi, Yogurt/Dahi 9 Comments »

Basic How To: Yogurt/Curd/Dahi

Preparing yogurt, also referred to as ‘curd’ by Indians, or dahi in Urdu language, the wonder food, a natural antibiotic, at home is quite a simple task. Just like milk, yogurt is packed with good nutrients including protein, calcium, magnesium, potassium, zinc and B vitamins. Probiotic yogurts with active cultures helps reduce constipation and bloating, and boosts immune system function. Yogurt is one of the essential ingredients in Indian cuisine. Its sweet-sour flavor is used in marinating the meats, and to prepare gravies for curries, as a dessert, in face-packs or hair-packs etc.

I often prepare yogurt at home and use store brought yogurt only if I need to get a new starter, or at times when I am out of yogurt and need it immediately for my cooking. Store bought yogurt often has gelatin/pectin mixed in it to enhance the thickness consistency of it, which is very bad news for both non-vegetarians as well as Muslims, because gelatin is not Halal.

Homemade Yogurt

To prepare yogurt you can either use full fat whole milk or skimmed milk, or milk prepared from milk powder, it is your wish. Yogurt from whole milk or full fat milk is definitely thicker and much creamier. The proportion I use to make yogurt is 2 tablespoons of starter yogurt to every 1 litre of milk.

Homemade Yogurt/Dahi:
Makes-2 cups
Note: Make sure you sterilize all the containers and utensils you are using while preparing yogurt

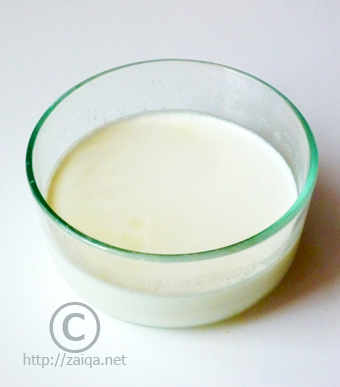
Heat milk until it reaches 180°F/80°C either in the microwave or on stove. Set aside for a few minutes. Let it cool down until the milk is just lukewarm, you should be able to tolerate the heat of the milk on your finger for about 20 seconds or a thermometer inserted should read between 115°F/46°C  (if the milk is too hot or cold, yogurt/dahi will not properly set). Stir in yogurt, either commercial or some of your previous batch, 2 tbsp for each quart or liter of milk. Cover and wrap the container in kitchen towel . Keep it undisturbed to ferment in a constant warm and dark place for around 2-4 hours or overnight. Once set, refrigerate the yogurt to store. Its consistency will firm as it chills in the refrigerator and then slowly continues to acidify. The longer the yogurt is stored, the sourer it becomes
Always save some yogurt as it can be used as a starter for the next batch.

In places where it is warm and humid, making yogurt is quite easy and does not require much attention. You can cover the bowl with the yogurt starter and leave it on your countertop, undisturbed for it to set in around 8 hours.

***

Tip: As I currently live in Toronto where the temperatures are usually very chilly during winters, what I do is put the bowl of lukewarm milk on a heating vent and add the yogurt starter, mix it well and cover the bowl with a lid. Wrap the bowl in a towel and leave it to set, undisturbed, for about 6-8 hours or overnight. You will get thick and creamy yogurt by morning.
Some of my friends even use a heating pad at medium heat, below the container in which you are setting the yogurt for a constant supply of heat to aid in its formation.

***

Tip:  Many a times it happens that you end up with failed yogurt. You discover that the yogurt has not set at all, and it is just like milk, and you discard the whole thing.
Instead of discarding it, you can prepare two Indian milk products from it:
1. Daan-e-daar Khoa (Granular Khoa): Pour the failed yogurt in a saucepan at medium heat and add about 1 tbsp of lemon juice (to 2 cups of failed yogurt) to curdle the milk and continue cooking. Keep stirring the milk and cook until most of the moisture has been evaporated and the milk is reduced to dry lumpy texture. Remove from heat and transfer to a cup and let cool. Once cool, refrigerate it for a hour so that it thickens/hardens. Remove the prepared Khoa from the refrigerator transfer to a zip-lock sandwich bag and freeze to store for future use, or use immediately.
2. Paneer: Pour the failed yogurt in a saucepan at medium heat and add about 1 tbsp of lemon juice (to 2 cups of failed yogurt) to curdle the milk and continue cooking milk for a few minutes until you see the milk has curdled completely. Carefully strain the curdled milk through the sieve lined with the muslin cloth. Let the whey collect in the bottom saucepan. The whey is highly nutritious. Store it to use later on in other curries instead of water (at this stage if you wish, you can experiment and add a few flavors that you like to the curds in the muslin cloth, like dried herbs, etc. Mix the dried herbs well with the curds and continue). Later, lift the edges of the cloth and tie the corners of the cloth into a bag completely enclosing the curds. Remove the sieve from saucepan and place it in the sink. Place the bag of curds back in the sieve. Set aside under a heavy weight for about 3-4 hours to press to a flat shape about 2 cm thick. Later, transfer the Paneer block to a zip-lock packet and store refrigerated. Use within a week.

This post is my contribution to the event Back to Basics originally stated by Jaya, and currently being hosted by Aqua at Served with Love.

Luv,
Mona

AddThis Social Bookmark Button

Maash ke Wade

September 13th, 2008 Mona Posted in Black Gram/Urad Dal, Canola Oil, Cilantro/Kothmir (fresh), Curry leaves (dried), Eid/Ramadhan/Iftaar, Ginger-Garlic paste, Green Chillies, Hyderabadi special, Salt/Namak, Simple Kitchen Tips 14 Comments »

Crisp Wadas (Wada-singular, and Wade-plural) with hot sambar or soconut chutney are an another favorite of the Hyderabadis and all South Indians. These are available at almost all the food stalls and tiffin restaurants. I remember I had the most delicious of the Wada-Sambar and Dosas at Shadaab restaurant at Charminar in Hyderabad.

Maash ke Wade – Indian Soft and Spicy Donuts

Wadas are quite simple to prepare. I always used to be so amazed at the ease by which my mother used to get a perfect hole in the centre and deep fry these yummy and spicy, crisp outside and soft inside Indian donuts aka wadas. The trick is not to add excess water and wet your hands before you prepare each vada in your palm to drop into the hot oil carefully. Once you will get a hang of it with some practice, it will be easy as pie.

Wadas are a common sight as street food or tiffin in India, usually had at breakfasts or as snacks in the evenings. An another variety of a dish prepared with wadas is the famous Dahi-Wada, an another favored snack of Hyderabadis.

I often prepare these wadas for Iftaar along with Kothmir-Pudina ki Chutney along with other light snack items, or enjoy them as a snack in the evenings during normal days.

Maash ke Wade – Indian Spicy Donuts

Ingredients:

Split Black Gram/Urad dal – 1 cup
Green chillies – 6-8, small
Ginger garlic paste – 1 tsp (optional)
Dried and crushed Curry leaves – 1 tsp (optional)
Salt – 1/2 tsp
Cilantro/Kothmir – 1/4 cup (optional)
Dry desiccated Coconut – 1/4 cup (optional)
Water – 1/4 cup

Vada Batter

Method:
1. Wash and soak the dal for about 4-6 hours in surplus water.
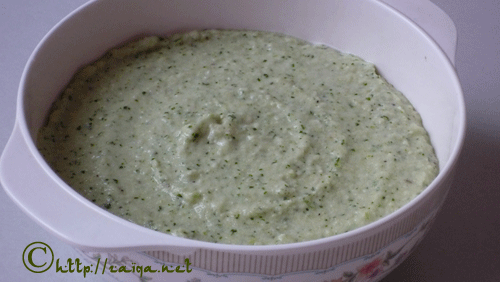
2. Drain and add the dal and the rest of the ingredients to a food processor container or a blender container and process/blend till smooth. Only add a little water to make the batter smooth. Do not make the batter watery, or else they will not be able to hold their shape.
3. In a wok or kadai at medium high heat, add oil for deep frying and let it heat up.
4. Wet your hand, take a portion of the mixture and make a hole in the center with your thumb. Upturn your hand and drop the wada in hot oil.
5. Deep fry about 4-6 wadas depending upon the size of the kadai or wok. They need to be turned for even frying. Once they are golden brown in colour, remove them on a tray lined with paper towel. Continue doing this until all the batter is used.

Suggested Accompaniments: Enjoy them along with Kothmir-Pudina ki Chutney.

Note: Inspite of deep frying, they do not have oil in them as the air inside the Wadas pushes the oil out while they deep fry, hence they are relatively oil-free.

This goes to ‘Joy from Fasting to Feasting’.

Luv,
Mona

AddThis Social Bookmark Button

Murgh Methi

September 1st, 2008 Mona Posted in Canned Tomato paste, Canola Oil, Coriander seeds, Cumin seeds/Zeera, Eid/Ramadhan/Iftaar, Fenugreek leaves/Methi, Ginger-Garlic paste, Hyderabadi special, Methi (fresh), Poultry/Murgh, Red Chilli powder, Salt/Namak, Simple Kitchen Tips, Turmeric/Haldi 29 Comments »

Inshallah the holy month of Ramadhan begins from tomorrow here, I wish all my readers Ramadhan Mubarak! May the choicest blessings of ALLAH (سبحانه وتعالى) shower upon us all, and grace our home with peace joy and happiness.

Ramadhan Mubarak to you all!

This month inshallah, like the last year, I will try to take some time out and post about the Ramadhan special dishes, some authentic, and some daily recipes, with tips to make life easier.

Tip: In my current daily schedule, I do not get time to sit at home and cook leisurely for Iftaar or the dinner afterwards, or for Seher for that matter. So what I do is, I stock up my refrigerator and freezer with cooked food that I prepare as and when I get time. Lots of curries in the freezer- both vegetarian, non-vegetarian and dals., Rice for the week in the refrigerator. When I have to serve food, I reheat them all for a few minutes in the microwave and serve it all piping hot on the Dastarkhaan. This way I stay peaceful and get ample time for my studies and prayers. This a great tip that I learnt from my MIL.

Mature/Full-grown Fenugreek leaves/Methi in pot

Mature Funugreek Leaf/Methi

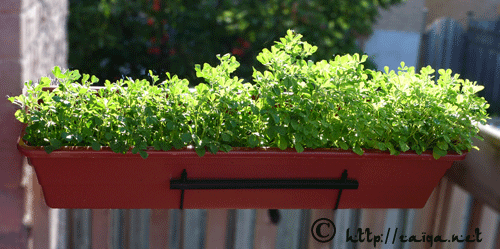
To Grow Methi: This Summer, I had planted Fenugeek leaves/Methi along with the others. Methi is very easy to grow and the quickest to germinate. Just sprinkle a few fenugreek/methi seeds on wet soil and cover them up lightly using damp soil. Keep watering them everyday a little bit, you will soon see small seedlings in about a week time. Usually we Hyderabadis do not use the full grown mature Fenugreek leaves/Methi leaves in cooking. We pluck the leaves when they are at the two-leaves stage, tender, young and full of flavor. Click here to have a look at the tender baby methi available in Indian farmers markets. This time however I let it grow and used mature leaves to prepare Murgh Methi.

Murgh Methi is a delicious and well-known Hyderabadi chicken curry. I prepare it usually in the oven when I cannot devote my time to attend to the chicken cooking on stove top. But I have tried both the methods, the stove top method and the Oven method, and the curry was just as delicious both the ways.

Murgh Methi – Chicken with Fenugreek leaves

Ingredients:

Chicken with bone – 1.3 kgs, cut into medium size pieces
Onions
Canola Oil – 1 tbsp (optional)
Canned Tomato paste – 1/2 cup
Ginger -Garlic paste – 2tbsp
Red Chilli powder – 2 tsp
Turmeric – 1/4 tsp
Salt – 2 tsp
Dy roasted Cumin seed powder – 1 tsp
Dry roasted Coriander seed powder – 1 tsp
Fenugreek leaves – fresh, roughly chopped, 1 cup

Oven Method-The following is a quick method, where you do not have to stand in front of the stove attending to the chicken and tiring your legs. You have to simply marinate it and then let it slow cook in you oven, saving you lots of time:

1. Wash the chicken pieces, pull off the skin and excess fat and leave to drain in a colander.
2. In a large flat baking dish, add 100 gms of store brought fried onions. Add the chicken along with all the other ingredients except the fenugreek leaves and mix well so that all the chicken pieces are coated with the marinade. Cover the dish with aluminium foil and keep in the refrigerator for 30 minutes to 3 hrs.
3. Pre-heat the oven to 350° F.
4. Bring the marinated chicken to room temperature and keep the dish, covered, in the oven and let it cook for about 35 minutes. Later, carefully remove the aluminium foil (hot steam can burn your fingers) and throw in the fresh chopped fenugreek leaves. Gently stir to mix without breaking the chicken pieces. Cover once again with the aluminium foil and put it back into the oven and let it cook for a further 10 minutes. Serve warm.

Stove-Top Method-If you do not happen to have an Oven in your house, You can always prepare this curry on stove-top. The following is the procedure for it:

1. Wash the chicken pieces, pull off the skin and excess fat and leave to drain in a colander.
2. Pour oil into a large frying pan and fry two large finely sliced onions till golden brown. Add ginger garlic paste, and chicken pieces and stir fry them till they are lightly browned on all sides.
3. Add salt, red chilli powder, cumin seed powder, coriander seed powder, turmeric and canned tomato paste. Close the lid and let it cook for 15-20 minutes for until the chicken is tender and fully cooked and oil floats on surface. Add a little water if needed to cook.
4. Add the chopped fenugreek leaves and gently stir to mix well, taking care not to break the chicken pieces. Let it cook uncovered for 5 more minutes. Serve warm.

Suggested Accompaniments: Khatti Dal/Sojni Ki Phalli Ki Patli Dal, Khushka/Roti for a filling delicious meal.

Luv,
Mona

AddThis Social Bookmark Button