Tarkari ki Biryani

November 9th, 2010 Mona Posted in Almonds/Badaam, Broccoli, Canola Oil, Carrot/Gajar, Cashewnuts/Kaaju, Cilantro/Kothmir (fresh), Cinnamon/Dalchini, Clove/Laung, Cumin seeds/Zeera, Eid/Ramadhan/Iftaar, Ghee, Ginger-Garlic paste, Green Chillies, Green Onion/Hari Pyaz, Hyderabadi special, Mint/Pudina (fresh), Peas/Matar, Red Chilli powder, Saffron/Zafraan, Salt/Namak, Tomato/Tamatar (fresh), Turmeric/Haldi, White Potato/Aloo, Yellow Onion/Pyaaz, Yogurt/Dahi 22 Comments »

I was immensely thrilled to learn just a few months back during this last Ramadan that Haleem is the first Hyderabadi delicacy to be granted the Geographical Indication Certificate (GI status) along the lines of the famous Tirupati laddu, Darjeeling tea, Goan feni and Banarasi silk. So it will only be referred to as ‘Hyderabadi Haleem’ from now on. How cool is that. I wish that Biryani and many other such iconic dishes of the city too get the recognition as soon as possible.

Biryani is a dish of royalty, of the nizams of the Hyderabad and the Moghuls, known for its cooking method, delicate flavor, heavenly aroma and the use of many spices in the right proportion. In Persian “Birian” means ‘fried before cooking’. There exist two kinds of Biryani, the non-vegetarian and the vegetarian versions. I have already blogged about both the kachchi (raw) and pakki (cooked) method of the Chicken and Mutton Biryani. You can find the recipes here. Apart from the Hyderabadi Biryani, many other versions also do exist, like the Iranian Biryani, the Khaibari Biryani (from Afghanistan) and Pakistani Biryani, all with a few regional variations that change with religion, geography and culture, but all under the same name Biryani. Today Hyderabadi Biryani caters to palates all over the world.
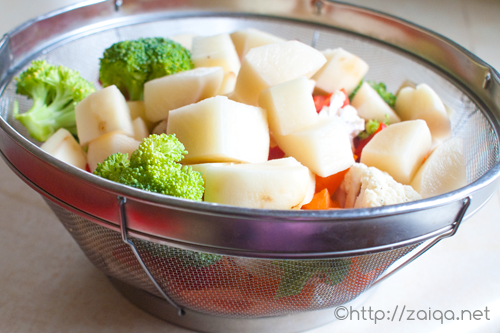
Chopped Mixed Vegetables

Like I had mentioned in my last post, I love to prepare traditional dishes like Nihari, Biryani and Haleem during the cold season. So the last weekend, I prepared Hyderabadi Vegetable Biryani along with Tomato Chutney as the main course for a dinner party.

Tarkari in Urdu language means vegetables. Just like the non-vegetarian version, the vegetarian version is just as ambrosial and a delightful crowd pleaser. All my guests loved it. I do not know how I missed writing about this Biryani all this while. So without further ado, for all those who were waiting for the Hyderabadi version of the Vegetable Biryani, here goes. Following is my Ammi’s recipe.

Hyderabadi Tarkari ki Biryani – Vegetable Biryani
Serves: 6- 7

Ingredients:

Fragrant long grained Basmatic Rice – 3 cups
Warm milk – 3/4 cup
Saffron strands – two pinches
Canola oil – 5 tbsp (or Ghee)
Yellow Onions – 2, large, finely sliced
Ginger garlic paste – 1 tbsp
Long Green chillies – 2, each slit lengthwise and chopped into half
Mixed Vegetables – large cauliflower florets, large broccoli florets, carrots cut into 2″ long thick sticks, capsicum (any color) cut into long and thin strips, green beans cut into 2″ long pieces, boiled/frozen green peas, quartered potatoes, quartered firm red tomatoes – 5 cups
Cumin seeds – 2 tsp
Red Chilli powder – 2 tsp
Salt – 4 1/2 tsp
Turmeric powder – 1/4 tsp
Cilantro – 1/2 cup, loosely packed, roughly chopped
Yogurt – 250 ml, 1 cup
Caraway seeds/Shahzeera – 1 tsp
Dried Bay leaf – 2
Cloves – 4
Green cardamoms – 5
Mint leaves – 1 cup, loosely packed, roughly chopped
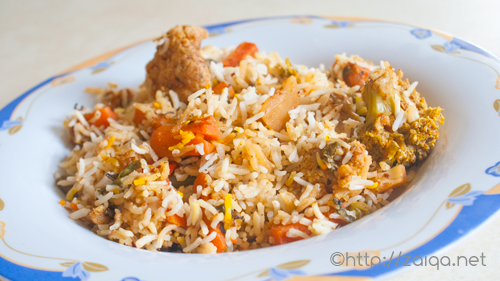
Tarkari Biryani – Vegetable Biryani

Method:

1. Wash the rice in several changes of water and let soak in cool surplus water in a vessel.
2. In a small cup, pour in warm milk and saffron strands. Keep aside.
3. In a large and wide saucepan, add oil and as soon as it warms up add the sliced onions and fry them while stirring frequently until evenly golden brown in color. Remove the pan from heat and using a slotted spoon transfer half of the fried onion into a platter and reserve for garnish.
4. In the same saucepan, add the cumin seeds, ginger-garlic paste and green chillies, stir fry for a minute. Immediately add all the mixed vegetables. Also add red chilli powder, 1 1/2 tsp of salt and turmeric powder and chopped cilantro. Mix well very gently. Increase the heat to high and let the vegetables sear. Give the vegetables a stir every two minutes, until they get seared on all sides. Now add the yogurt and mix. Lower the heat to medium high and let cook covered for 3-5 minutes. Once the vegetables are cooked, (but not mushy) (do not overcook the vegetables) (pierce a knife into a potato and check if it is done) uncover and cook on high while stirring whenever required until the vegetables are almost dry. Keep aside.
5. In a large heavy bottomed vessel pour in surplus water and add shahzeera, dried bay leaf, cloves, green cardamoms and cover with a lid. Let it come a rolling boil. Once boiling, drain the soaking rice and add to the boiling water. Let it cook until the rice if half done. Once done, drain the rice and keep ready. Now starts the layering process of the Biryani. Working quickly, in the same vessel, add half of the drained rice. Now add the cooked mixed vegetables. Spread over the rice evenly. Now spread the reserved fried onions meant for garnish, and the chopped mint leaves evenly over the vegetables. Next, arrange the left over rice evenly covering the vegetables. Lastly, pour evenly the saffron milk. Cover the vessel properly with aluminium foil or a tight lid (with vents closed with dough if any) so that no steam can escape. You can also apply dough to seal the lid which is the traditional method.
6. Cook the Biryani on high for 2 minutes. You will notice that a good amount of steam has built up, which is called as the pehli bhaap, meaning first steam. Then take a flat dosa tawa and keep it below the vessel (so that the bottom does not burn and it slow cooks evenly) and lower the heat to simmer and let it slow cook for 30 minutes, until done. Remove from heat. Let the Biryani sit for 15 minutes before serving. Dig a spoon into the vessel and gently mix the Biryani. Serve on a platter. For a special touch, garnish with more fried onions, finely chopped cilantro and mint leaves, toasted/fried almonds or cashewnuts or pinenuts or raisins.

Serve this Biryani along with Mirchi Ka Salan or Baghare baingan or Tamatar ki Chutney or plain and simple Dahi ki Chutney for a sumptuous Hyderabadi meal.

Note:
1. You can also add chopped paneer cubes, sliced mushrooms, and soy nuggets along with the vegetables.
2. Brocolli is not usually added to the Biryani, I added it because I love it.

Luv,
Mona
AddThis Social Bookmark Button

Moong ki Dal Kay Pakoday

August 23rd, 2010 Mona Posted in Cilantro/Kothmir (fresh), Curry leaves (fresh), Ginger-Garlic paste, Green Chillies, Green Gram/Moong ki Dal, Green Onion/Hari Pyaz, Onion/Pyaaz, Red Chilli powder, Salt/Namak 10 Comments »

Pakoday and bhajiye are the usual Iftaar snacks that I serve during ramadan other than chanay ki dal and fruit chaats. Deep fried, this kind of snacks are perfect for this monsoon season when served as a snack at tea time as well.

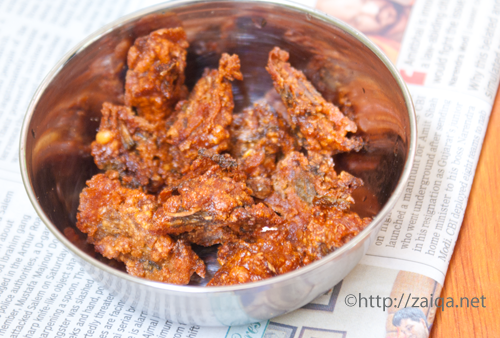
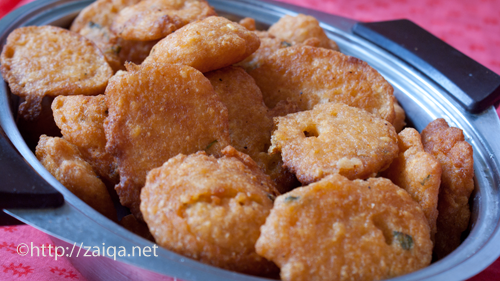
Moong ki Dal Kay Pakoday – Green gram fritters

Ingredients:

Dhuli moong ki dal (skinless split green gram) – 1 1/2 cup
Onion – 1, finely chopped
Ginger garlic paste – 1 heaped tbsp
Red chilli powder – 1 tsp
Green chillies – 3-4, finely chopped
Cilantro – 3 tbsp, finely chopped
Chopped curry leaves -1 tbsp
Chopped spring greens – 1/2 cup (optional)
Salt – to taste

Method:

Soak the dal for 4-6 hours. Drain and grind it adding little or no water. Transfer the mixture to a bowl, add the rest of the ingredients and mix well. Heat oil to deep fry in a kadai. Drop spoonfuls of the mixture into the hot oil and deep fry on both sides until golden. Continue until the mixture is finished. Drain on paper towels. Enjoy the pakoday along with mint and cilantro chutney.

This is my third entry to the The Hyderabadi Ramadan Food Festival that I am hosting on my blog: and the first entry to the event- Joy from Feasting to Fasting being hosted at Lubna’s blog-Yummy Food.

Luv,
Mona

AddThis Social Bookmark Button

Sun-Dried Food Products Series ~ III: Dal ki Badiyan

July 30th, 2010 Mona Posted in Ginger-Garlic paste, Green Gram/Moong ki Dal, Green Onion/Hari Pyaz, Hyderabadi special, Red Chilli powder, Salt/Namak, Turmeric/Haldi 12 Comments »

Among all those amazing dried products that one can make during hot Indian summer days making use of the strong sunshine, dal ki badiyan are the ones I really love.

Badiyan are tiny sun dried lentil nuggets, which are nutritious and an excellent substitute for meat in curries. Many varieties of badiyan are available ready made in stores. But nothing compares to these homemade variation that I am addicted to since childhood.

Dal ki Badiyan ~ Sun Dried Lentil Nuggets

Split and skinned green gram/Moong ki Dal – 500 gms
Hari Pyaz/Spring greens, finely chopped – 3 cups (only the greens, not the white)
Ginger-garlic paste – 1 tbsp
Turmeric powder – 1/4 tsp
Salt and Red chilli powder – to taste

Method:

1. Soak the dal for 2 hours in fresh cool water. Later, drain and wash the dal in several changes of water. Once washed and drained, puree the dal in blender adding just enough water to aid in the process. (Note: Do not add too much water, or else the badiyan will not form properly)
2. In a mixing bowl, add the pureed dal, chopped spring greens, ginger garlic paste, turmeric powder, red chilli powder and salt. Mix thoroughly.
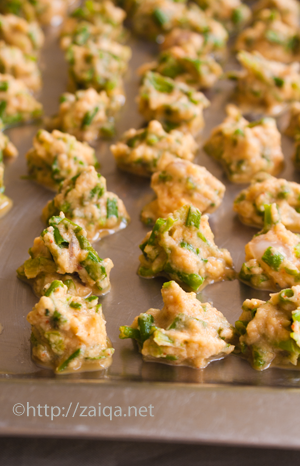
3. Drop blobs of the prepared mixture on a clean and dry tray or a rimmed baking sheet using your hands or a spoon. Leave the tray in the sun during daytime and bring the tray indoors when dark. On the first night, gently scrape the partially dried badiyan and invert them so that the next day the bottoms also get nicely dried up in the sun. It usually takes 3-5 days under hot sun for the badiyan to completely get dried.
4. When completely dried, transfer the badiyan to an air tight container and store at room temperature or in the refrigerator. Be careful and keep away from moisture.
5. Always shallow fry a few needed badiyan in some oil until the color changes to golden brown just before consumption. Do not burn them or else their taste will worsen. Consume the crunchy shallow fried badiyan on the side to your meals, or add the shallow fried badiyan to any of your favorite curries or soups and cook for just a few minutes.

Dal Ki Badiyan Pictorial

Blobs of the mixture on tray, ready to be sun dried

Badiyan – Sun drying

Shallow fried Badiyan, ready for consumption

Preparing Dal ki Badiyan in Oven:

If you live in areas where sunlight is scarce and plays hide and seek with you, you can even prepare badiyan in the oven. Just lightly spray or brush the tray with a little bit of cooking oil, then drop the batter on the tray as shown above and place the tray in the oven pre-heated at the lowest setting. Let it bake for around 2-3 hours. Shake the tray after every hour. Keep a close eye and as you observe they are completely dried up, remove and let them cool on a rack. Once completely cool, transfer to air tight containers and store until needed. Shallow fry a few needed the badiyan in a little oil and enjoy when fancied.

Other Amazing sun dried Indian food products from this series are:
1. Sukhi Dahi Mirch – Sun dried Yogurt Chillies
2. Dhoop Nimbu ~ Sun Preserved Lemons

AddThis Social Bookmark Button

Spring rolls

March 3rd, 2009 Mona Posted in Black pepper powder, Cabbage/Patta Gobi, Canola Oil, Carrot/Gajar, Eid/Ramadhan/Iftaar, Green Onion/Hari Pyaz, Hyderabadi special, Poultry/Murgh, Prawns/Shrimp, Salt/Namak 19 Comments »

Indo-Chinese cuisine is every Hyderabadi foodie’s favorite. Infact all Indians love this fusion food. You are bound to come across many small Indo-chinese restaurants and food stalls at every corner in Hyderabad.  

Spring Rolls

Spring rolls are an another appetizer items that is predominantly being seen at the menu tables at most of the Hyderabad weddings nowadays. I for one like this finger food immensely and miss those that are served at the Hyderabadi weddings. They are so delectable and have a unique taste.

These spring rolls are my take on them. They are simple to prepare and enjoyed as a snack by all age groups. They can also be served at Iftaar during Ramadhan.

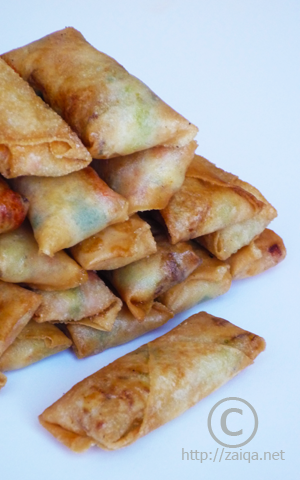
Spring Rolls

Makes-22

Shredded carrots – 3/4 cup
Shredded green cabbage (I used ‘Taiwanese cabbage’) – 1 cup
Shredded cooked boneless Chicken (or) finely diced cooked Shrimp (or) cooked Minced meat/Qimah – 1 cup 
Spring onion stalks – 3
Salt – to taste
Black pepper – 1/4 tsp
Egg wash -1 egg, lightly beaten along with 1 tbsp water
Thawed Spring rolls wrappers – store bought
Canola Oil – to deep fry

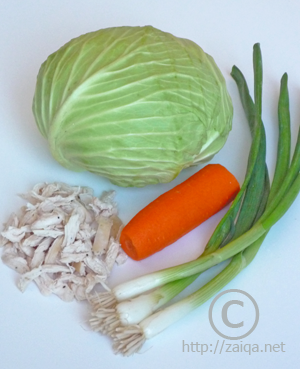
Clockwise from top – Taiwanese green cabbage, carrot,
green onions, shredded chicken

Method:

-In a large pan, pour 1/2 cup water, and add the shredded carrots, cabbage, spring onions and chicken/shrimp/qimah. Cover and let cook for 8 minutes. Drain and reserve the water for later use. Put the drained vegetables in a bowl, add salt and black pepper and toss to mix well.

Pictorial tutorial to help you wrap up a Spring roll

-Gently seperate the spring roll wrappers from the pack. Place a wrapper on a flat surface with a ponited edge towards you. Keep the rest of the wrappers under a dampened towel. Place about 2 tbsp of the filling in the lower third of the wrapper. Moisten the edges with egg wash. Fold the bottom of the wrapper up and over the filling to enclose it and form a cylinder. Fold the right and left sides of the wrapper into the middle. Then roll the wrapper tighty up to the top. Make sure the roll is tightly sealed and the filling completely enclosed from all sides. Arrange them all, seam side down on a platter. Continue making the rolls until the filling is completely used up.
-Deep fry the prepared rolls in hot oil until lightly browned. Serve them once cooled along with your favorite dip.

I am sending these rolls to Sunday Snacks-Grab and go event and Meals on Wheels event.  

Luv,
Mona

AddThis Social Bookmark Button

Hari Pyaaz aur Malai wale Jhinge

June 9th, 2008 Mona Posted in Canned Tomato paste, Canola Oil, Cardamom/Elaichi, Cinnamon/Dalchini, Clove/Laung, Coriander seeds, Cumin seeds/Zeera, Dry Desiccated Coconut, Fruits/Phal (fresh), Ginger/Adrak, Green Onion/Hari Pyaz, Lemon/Nimbu, Light Cream, Non-Vegetarian/Gosht, Prawns/Shrimp, Red Chilli flakes, Red Chilli powder, Salt/Namak, Sea-food, Sesame seeds/Til, Simple Kitchen Tips, Spices & Seasonings/Masaale, Turmeric/Haldi, Vegetables/Tarkariyaan 13 Comments »

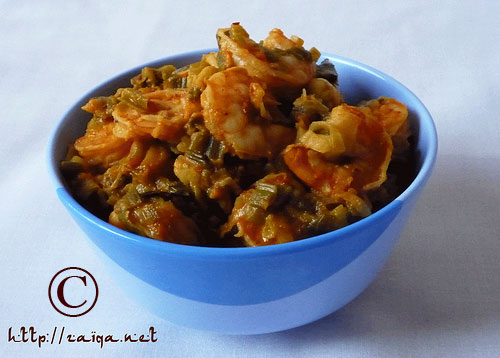
This is one of the dishes that I prepare when I do not have much time to spend in my kitchen. These creamy prawns with scallions get prepared quite quickly and contain all the goodness.

Hari Pyaz aur Malai wale Jhinge – Shrimp with Scallions and Cream

Prawns are my favorite among the Seafood. These little crustaceans are devouring. In this dish I have used hari-pyaz/scallions and light cream along with some other ingredients as well, each one of them imparting their own special flavor to the dish, but keeping the flavor of the prawns the dominant.

I have also used the Salan Masala which I came across from the cookbook Regional Indian Cooking by Ajay Joshi and Alison Roberts. This masala has now become a very important ingredient in many of my daily recipes and I find it very flavorful. I’m sharing the recipe of the masala with you all which I found in the cookbook.

Salan Masala

Makes about 2/3 cup

Ingredients:

  • Dry Dessicated Coconut – 1/3 cup
  • Sesame seeds – 1 1/2 tbsp
  • Coriander seeds – 1 tbsp
  • Cinnamon stick – 1 insh piece
  • Whole cloves – 4
  • Green Cardamom pods – 6 green
  • Cumin seeds – 1 tsp
  • Red Chilli powder – 2 tsp
  • Turmeric – 1 tsp

Method:

  • Dry roast the coconut and sesame seeds at medium heat until golden forn 3-4 minutes. Set aside to cool, then in a spice grinder, grind it to a fine powder. Transfer to a bowl.
  • Add coriander, cinnamon, cloves, cardamom and cumin to the same pan. Dry roast at medium heat, stirring, until fragrant, 4-5 minutes. Set aside, cool and gring to a fine powder. Add to the coconut mixture along with chilli powder and turmeric. Stir well to combine.
  • Transfer to an airtight container. Store in refrigerator forupto 6 months. Use a clean dry spoon each time to us ethe masala to prevent mold from forming.

I usually get frozen prawns as they are easy to keep and are available for me to prepare and have them whenever I want. You can even use fresh prawns if available. I miss all the freshly available food in abumdance in India so much. Here, I do not get most of my Indian ingredients, and miss many of the Indian delicacies.

Hari Pyaz aur Malai wale Jhinge – Shrimp with Scallions and Cream

Ingredients:

  • Fresh or Frozen Prawns – 400 gms, deshelled; tails, legs and veins removed
  • Canola Oil – 2 tsp
  • Scallions – 3 cups, chopped with both the green and white parts
  • Tomato Paste – 2 tsp
  • Red Chilli Flakes – 1 tsp
  • Turmeric – 1/4 tsp
  • Salt – to taste
  • Light Cream – 2 tbsp
  • Lemon Juice – 2 tbsp
  • Grated Ginger – 1 tsp
  • Salan Masala – 2 tsp

Method:

  • Pour oil into a large frying pan with lid at medium heat and as soon as it warms up, add the scallions and saute them for 3-5 minutes. Add tomato paste, red chilli flakes, turmeric, salt and shrimp. Mix, cover with lid and let it cook for 3 minutes.
  • Later, add light cream, lemon juice, grated ginger and salan masala. Gently mix well and cover and let it cook for 5 more minutes. Serve warm.

Suggested Accompaniments: It tastes wonderful along with warm Rotis, or Basmati Chawal and any Vegetable side dish.

Luv,
Mona

AddThis Social Bookmark Button