Phulay Chane ki Chutney

March 15th, 2010 Mona Posted in Canola Oil, Chutneys and Pickles, Dried Red Chillies, Dry Desiccated Coconut, Roasted Gram/Phula Chana, Salt/Namak 16 Comments »

Finally, spring is almost here. I cant wait to see life on dead trees and cheerful colors bursting all around me inshallah.

There are two kinds of chutney’s that I usually prepare along with along with Dosa or Idli, in addition to the quintessential Sambar. One kind that has the sourness as well as the spice/hotness, and an another kind that is mild with just a hint of spice sans any sort of tartness in it; all this because of the individual taste preferences in my house.

This particular chutney falls into the latter category. The phula chana (details of this dal below) which is the star ingredient for this chutney, imparts a mild taste, while the dried red chillies contribute the spiciness, and the dried roasted coconut render a creamy and nutty flavor to the chutney.

Roasted Split Gram:
Other names: Bhuna Chana; Chutney dal;
In Marathi: Dalia (Dalia is a Gujarati word for pappulu or bhuna chana. Usually broken wheat is referred to as Dalia); Phutana dal;
In Urdu: Phula Chana (phulay chane is plural, and phula chana is singular)
In Telugu: Putnala pappulu
In Tamil: Pottu Kadalai

Phula Chana is obtained when Black chickpeas/Kala Chana are roasted in special places called as bhattis in India. These are then skinned and split, then packed and sold ready made in packets at stores (Note that this cannot be done at home). There is no need to cook this dal, you can pop phula chana directly in your mouth as a healthy, crunchy, guilt free snack too.

Easy to prepare and dainty to taste, this chutney is a good choice for all those who do not possess an affinity for a sour taste.

Phulay Chane ki Chutney – Roasted Split gram Chutney

Ingredients:

Dried Red Chillies/Baghaar ki mirch – 6-8
Roasted split gram/Phula Chana – 1/3 cup
Desiccated Coconut – 4 tbsp
Salt – 1/2 tsp
Canola oil

Method:

In a small frying pan or a tawa, heat 2 tsp of oil at medium heat. As soon as it is hot, add the dried red chillies and roast the dried red chillies, phula chana and dessicated coconut individually one by one just for a few seconds. Do not burn the spices. Remove into a platter and let cool. Once cool, grind them all together adding just enough water to aid in the process (I added about 1/2 cup-3/4 cup) until smooth. Add salt and mix. Serve along with dosa, idli or any snacks.

Luv,
Mona

AddThis Social Bookmark Button

Rishte Ka Achaar

April 1st, 2008 Mona Posted in Canola Oil, Chutneys and Pickles, Curry leaves (fresh), Dried Red Chillies, Fats and Oils/Tel, Fruits/Phal (fresh), Green Chillies, Hyderabadi special, Mango/Aam, Mustard seeds/Rai, Red Chilli powder, Salt/Namak, Simple Kitchen Tips, Spices & Seasonings/Masaale, Turmeric/Haldi, Vegetables/Tarkariyaan 26 Comments »

Home-Made Mango Pickles are my favorite. And among all the kinds, I realy love this pickle a lot. It is so simple to prepare, hot as a pickle should be and absolutely delicious.

The first time I had this pickle was at my Aunt’s-Khala’s house I fell in love with it the moment I had tasted it at her place. And used to have it like a curry along with Chawal or Parathas.

Unripe green mangoes ~ Kairi

I love blog hopping, and a few days back, on Priya’s blog, I had seen this pickle, which reminded me so much of Rishte Ka Achaar that my mouth was watering, and I was so much craving for it, just like a pregnant lady would! Somedays ago, I had been to an Indian store where I saw some very young and large sized Raw Sour and Green Pickle Mangoes, and I quickly bought three of them, came home and prepared this pickle. I was so happy.

Rishte Ka Achaar – Mango Pickle

I do not have any idea why this pickle is named as ‘Rishte Ka Achaar’. I have no clue. But it is called so by everyone in my contacts, and even they do not have any idea about this. If anyone of you know why it is called so, please let me know. I will be very happy to come to know about it from my dearest Readers.

Try and get some very sour raw green mangoes for this pickle. And do not use the green mangoes for this pickle if they are not very sour.

Rishte Ka Achaar – Mango Pickle

Ingredients:

Unripe and Sour Green Pickle Mangoes – 3, large
Dry Roasted Black Cumin Seed Powder – 1 1/2 tbsp
Red Chilli Powder – 1 tbsp
Salt – 1 1/2 tbsp
Mustard Seeds – 2 tsp
Dry Red Chillies – 4
Turmeric – 1/3 tsp
Curry leaves (fresh) – 6
Green Chillies – as per your taste, chopped or slit (optional)
Canola oil – 3 tbsp

Rishte ka achar

Method:

1. With a damp towel, wipe the raw green mangoes clean and dry them with a paper towel throughly. Throughly dry your hands and knife. Carefully, peel the skin, deseed them and cut into very small pieces.
2. In a flat glass container with a tight lid, put the cut raw mango pieces and add salt and turmeric and mix well. Cover the lid tightly and put the container aside for 24 hours in a cool dark place.
3. The next day, you will see that the mango pieces have released a lot of juice. In a pan on medium high heat, pour oil and add the mustard seeds, curry leaves and dry red chillies. As soon as they begin to pop, remove from heat. Let it cool completely. This is the tempering/baghaar.
4. After the baghaar has cooled off completely, pour it into the container with mango pieces, and also add red chilli powder, black cumin seeds powder and green chillies, if using, and mix well. Adjust the salt and red chilli powder according to your tastes. The Achaar is ready. You can now relish upon it.

Store it in a glass jar with an air tight lid. It keeps very weel if kept away from water. Always use a dry spoon when you have it and keep it covered and refrigerated.

Tip: After you have cut the mango into small pieces and deseeded it, do not throw away the seed, use it in Khatti Dal instead of using the tamaring or lemon as the souring agent. It makes your Dal khatti/sour and gives a very good flavor to it.

Luv,
Mona

AddThis Social Bookmark Button

Kothmir aur Pudina Ki Chutney

March 13th, 2008 Mona Posted in Canola Oil, Chutneys and Pickles, Cilantro/Kothmir (fresh), Curry leaves (fresh), Dry Desiccated Coconut, Eid/Ramadhan/Iftaar, Fats and Oils/Tel, Garlic/Lahsun, Green Chillies, Hyderabadi special, Mint/Pudina (fresh), Red Chilli/Lal mirch, Salt/Namak, Sesame seeds/Til, Spices & Seasonings/Masaale, Sunflower oil, Tamarind/Imli, Vegetables/Tarkariyaan 19 Comments »

This is one of the most cherished recipes very close to my heart. I love this chutney immensely, and it goes very well along with almost all snacks like pakode, samosas, bhajiye, and tastes heavenly especially along with Khichdi. It has got all the goodness in it. I remember, my beloved Dadi (Grandmother) always used to ask a second helping of this chutney.. some times more than once! Memories are always associated with food.. many many memories with each and every dish on your table and I know everyone can agree with that.

I cherish this recipe because this is my humble mother’s recipe which was taught to her by her mother. My Nani (Grandmother) is a very nice soul, she is a great cook too. Now, but due to age, both my Nani and Dadi, my paternal and maternal grandmothers cannot cook much today, but I can always ask them for the treasured tips, and recipes which are priceless to me.

Hara Dhaniya aur Pudine Ki ChutenyCoriander and Mint Chutney

I have slightly modified the recipe here, and used thai red chillies too. They are optional. Use them if you like, you can substitute them by adding a few more green chillies depending how spicy you want this chutney to be. Also, you can add a few roasted groundnuts to the Chutney, makes it more flavorful, but here I haven’t.

Store this Chutney in an airtight small glass jar in the refrigerator for upto a week.

Hara Dhaniya aur Pudine Ki Chutney – Coriander and Mint Chutney

Ingredients:

Fresh Cilantro/Kothmir/Hara Dhaniya – 1 cup, packed tightly, washed and dried on paper towels, roughly chopped along with the tender stems
Fresh Mint Leaves/Pudina – 1 cup, packed tightly, washed and dried on paper towels, roughly chopped, only leaves
Garlic pods – 4, large, roughly chopped
Thai Red Chillies – 3, washed and chopped
Green Chillies – 4, washed and chopped
Curry leaves – 6-8, washed
Tamarind ball – without seeds, about the size of a golf ball (or) Tamarind Concentrate – 3 tbsp
Sesame seeds – 1 tbsp
Dry Desiccated Coconut – 1/2 cup
Salt – 1 1/3 tsp or according to taste
Canola/Sunflower Oil – 1/2 tsp

Method:

1. In a non stick pan at medium high heat, pour oil and as it warms up, add the shredded coconut and the sesame seeds, and roast them both together till light brown and aromatic. Let it cool. Keep aside.
2. Put the tamarind ball in a cup of warm water. Once the tamarind pulp is all soft, sieve the pulp and keep it aside.
3. In a blender container put the coriander leaves, mint leaves, garlic pods, red and green chillies, curry leaves, tamarind pulp, sesame seeds, shredded coconut and salt. Blend it till nice and smooth. You can add about half cup of water to aid in the blending if needed.

Serve chilled along with Khichdi, Idli, Dosa, Pakodas, Bhajiyas, Samosas, Croquettes, Kababs, Baghara Chawal, Aloo Paratha.. Or anything you like.

Updated on April 30 ’09: I am sending this Chutney over to Jhiva for Ingredients/JFI event, initiated by Indira originally. I am a great admirer of Indira’s efforts towards inspiring people about Indian Cuisine. Her blog with simple Indian vegetarian recipes is a sea of knowledge. Kudos to her work.
The theme for JFI is the most used asian herb ‘Cilantro’, known for its very aromatic and refreshing flavors, being hosted by Cilantro herself at her blog.

Whenever you are free, listen to this song ‘Luka Chuppi’ from the bollywood movie ‘Rang De Basanti’.

[audio:Luka_Chuppi.mp3]

Its a very beautiful, touching, soulful song hindi song, sung by the great Lata Mangeskar and A.R Rahman, never fails to bring tears in my eyes.

Luv,
Mona

AddThis Social Bookmark Button

Pakki Gosht Ki Biryani, and Dahi Ki Chutney

March 4th, 2008 Mona Posted in Almonds/Badaam, Basmati Rice/Chawal, Blog Events/Entries/Polls, Butter/Makhan, Canola Oil, Caraway seeds/Shahzeera, Cereal Grains, Chutneys and Pickles, Cilantro/Kothmir (fresh), Eid/Ramadhan/Iftaar, Fats and Oils/Tel, Fruits/Phal (fresh), Ghee, Ginger-Garlic paste, Green Chillies, Hyderabadi special, Lamb/Beef/Mutton/Veal/Sheep, Lemon/Nimbu, Milk and Milk Products, Mint/Pudina (fresh), Non-Vegetarian/Gosht, Onion/Pyaaz, Raisins/Kishmish, Red Chilli powder, Red Chilli/Lal mirch, Saffron/Zafraan, Salt/Namak, Spices & Seasonings/Masaale, Sunflower oil, Tomato/Tamatar (fresh), Vegetable Oil, Vegetables/Tarkariyaan, Yellow Onion/Pyaaz, Yogurt/Dahi 25 Comments »

Dear readers, today I present you with renowned Hyderabadi Lamb Biryani. Biryani is one of the most famous Hyderabadi one-dish meals craved and devoured by people from all over the world. The basic process of preparing Biryani involves the layering of raw marinated or cooked meat along with half cooked long grained aromatic Basmati rice, and a range of fresh spices and herbs for exceptional flavor and aroma.

Basically, there are two kinds of Biryani: Pakki Biryani, and Kachchi Biryani.

Pakki Biryani: where are half Basmati cooked rice is layered along with completely cooked chicken or lamb meat and then cooked till done on slow heat on dum.
1. Pakki Gosht ki Biryani
2. Pakki Murgh Biryani

Kachchi Biryaniwhich is the true Hyderabadi Biryani – where are half cooked Basmati rice is layered along with raw marinated meat and then finished on slow heat till done on dum.
1. Kachchey Gosht ki Biryani
2. Kachche Aqni ki Dum Murgh Biryani

Biryani always reminds me of my wedding, when I wore a very beautiful Khada Dupatta. It was on that day that I had best Biryani ever! This dish is so important in the Hyderabadi Muslim community that it is served along with Mirchi Ka Salan and Baghare Baingan and Dahi Ki Chutney, as the main dish at almost all gatherings, occasions, parties, all kinds of merry making get togethers. Essentially all weddings in Hyderabad are suposed to have Lamb Biryani and Mirchi Ka Salan in the menu.

My lovely sister had prepared this dish on the weekend. We were all in a mood to treat our family and ourselves with something special, and we immediately thought of this dish. What could be a more better meal to delight ourselves than this flavorsome fare.

Gosht Ki Biryani, Dahi Ki Chutney

***

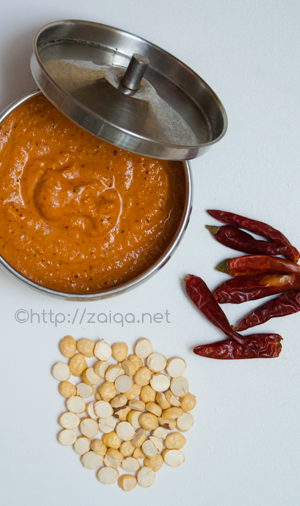
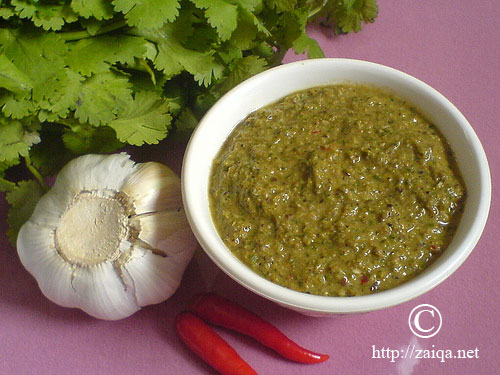
Dahi Ki Chutney – Yogurt Chutney
Makes:One small bowl

Ingredients:

Plain Yogurt (low-fat or full-fat)- 375 ml
Salt – 2/3 tsp or according to taste
Thai Red Chillies – 2, chopped (optional)
Green Chillies – 2, chopped
Yellow Onion – 1, medium, finely chopped
Mint leaves – 1/2 cup, finely chopped
Coriander leaves – 1/2 cup, finely chopped
Firm Red Tomato (fresh) – 1, small, deseeded and chopped finely (optional)

Method:

1. To the yogurt in a bowl, add salt and half a cup of water and whip it till smooth, and creamy for approx 2-3 minutes.
2. Add the remaining ingredients and fold them into the yogurt gently. Adjust salt according to your taste and cover the bowl with a plastic wrap.
3. Put it in the refrigerator to serve it later along with Biryani.

You can store Dahi Ki Chutney in the refrigerator in an air tight food storage box for only one more day in a refrigarator, it doesnt last long. It is always better if you have an idea how much your family memebers will have it and you prepare it in only the required amount.

***

Hyderabadi Dum Pukth Pakki Gosht Ki Biryani – Fragrant Flavored Meat and Rice Casserole
Serves:5-8

Ingredients:

For the Marinade
Canola/Vegetable/Sunflower Oil (or) Butter/Makhan (or) Clarified Butter/Ghee – 90 ml/6 tbsp
Yellow Onion/Pyaz – 2, large, thinly sliced
Lean Lamb leg meat – 1 kg, washed and cubed into 3 cm pieces approx (with bones preferably if available, I have used only boneless here)
Plain Yogurt/Dahi – 500 ml, lightly whipped
Red Chilli Powder/Lal mirch powder – 1 1/2 tsp
Salt/Namak – 1 1/2 tsp
Lemon Juice/Nimbu Ras – 4 tbsp
Garam Masala – 1 tbsp
Turmeric/Haldi – 1/2 tsp
Ginger Garlic paste – 2 tbsp
Water/Meat Stock – 1/2 cup
For the Garnish
Green Chillies/Hari Mirch – 2, each slit into two
Thai Red chillies/Choti Lal Mirch – 2, each slit into two (optional)
Fried Onion reserved for garnish earlier
Mint Leaves/Pudina – 1/2 cup
Cilantro/Kothmir – 1/2 cup
Toasted sliced Almonds/Bareek Kata Badaam – 2 tbsp
Fried Red Raisins and Cashwnuts/Tala-huwa Kishmish – 3 tbsp
Pinch of Saffron threads/Zaafraan soaked in 1/2 cup warm Milk
A dollop of Butter/Makhan or Clarified Butter/Ghee (optional)
For the Rice
Long Grained Basmati Rice/Chawal (preferably ‘Lal Qilla’ Brand) – 4 cups
Salt/Namak – 4 tsp
Black Cumin seeds/Shah Zeera – 1 tsp

Method:

1. Wash and soak the rice in a big bowl for about 30 minutes.
2. In a pressure cooker at medium high heat, fry the onions in oil/butter until they are golden brown in colour. Remove with a slotted spoon on a kitchen towel and reserve half for garnish. Blend the other half in 2 tbsp water inoi a paste.
3. In the same pressure cooker, with oil/butter in it, add the washed cubed meat pieces, Stir fry till the meat has browned on all sides. Add the fried onions paste and the ginger garlic paste and turmeric. Saute them for 2 minutes. Throw in the red chilli powder, salt, garam masala, half cup water, and yogurt. Mix well and pressure cook for about 15-20 minutes until the meat is tender.
4. Meanwhile drain the soaking rice and keep aside. Bring 9 cups of water in a to boil in a large saucepan with Black cumin seeds and salt (do not forget to add salt to the rice!!) in it. As soon as its boiling, add the drained rice and let it cook till the rice grains are just done. Drain and keep aside.
5. Now, open the lid of the cooker and cook the meat mixture well without covering the lid on medium high heat until the meat mixture is done and most of the liquid has dried up. It should be a little bit dry mixture.
Add lemon juice to the meat and mix. Remove from heat.
6. Preheat the oven to 350°F.
7. In a large oven proof baking dish, add half of the rice in a layer at the bottom of the dish. Now add the whole meat mixture in one layer. Then cover it with the remaining rice completely and work gently, try not to break the rice kernels.
8. Garnish the layered rice with the reserved fried onions, mint and coriander leaves, slit red and green chillies, toasted and fried nuts, and sprinkle the milk with saffron threads in it. You can also add a dollop of butter if you wish.
9. Cover the dish with a tight lid or aluminium foil and keep it in the preheated oven for about 10-15 minutes, till a nice steam has formed inside.
10. Before serving, dig the spoon into the dish till the base and take the rice and meat in a bowl. mix it and serve it hot.

Tip: Adding salt to the water in which you cook rice is essential, or else the whole taste of Biryani turns upside down. One tip if you have forgotten to add salt to the water while boiling rice is – stir the required amount of salt in a little quantity of hot water, about half cup or a few tablespoons, and pour this on the biryani evenly. Warm the biryani in microwave and serve immediately.

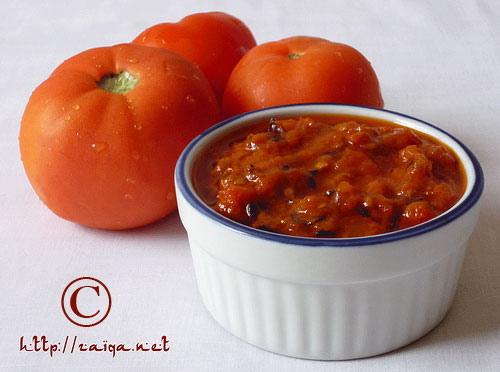
Suggested Accompaniments: Mirchi Ka Salan or Baghare Baingan or Dahi Ki Chutney or Tomato Chutney.

This is my entry for Meeta’s Monthly Mingle-One Dish Dinners

Luv,
Mona

AddThis Social Bookmark Button

Tamatar Ki Chutney

July 25th, 2007 Mona Posted in Canola Oil, Chutneys and Pickles, Cumin seeds/Zeera, Curry leaves (fresh), Eid/Ramadhan/Iftaar, Garlic/Lahsun, Green Chillies, Hyderabadi special, Mustard seeds/Rai, Red Chilli powder, Salt/Namak, Simple Kitchen Tips, Tomato/Tamatar (fresh), Turmeric/Haldi 10 Comments »

Tomato Chutney is the Indian condiment that you can prepare and store in air-tight food storage containers in the refrigerator for days together. It has a very long life if used with care and can be enjoyed as a dip or spread along with many snacks or even with meals.

Tomato chutney is spicy, tangy, and this is the reason it is complimentary to almost all other dishes as a side-dish. My Mom is an expert and she always made the perfect Tomato chutney. I have never tasted a Tomato chutney as tasty as hers. My cousin sister who used to come to live with us during holidays when I was a kid, used to lick her fingers endlessly after having that chutney and would appreciate my Mom for the culinary treasures she possessed. I’m proud I got to learn from her the procedures of some of her known dishes.

Fresh Ripe Tomatoes and Tamatar Ki Chutney – Tomato Chutney

Its spicy, its tangy, its tasty, a perfect Indian Chutney. You can have this as a side dish or with any of your favourite Manchuria’s or snacks you love. Go ahead and try it out.

Tamatar Ki Chutney – Tomato Chutney
Serves: 6

Ingredients:

Tomatoes (fresh) – 4, large, red and ripe, washed and quartered
Green chillies – 2-4, washed and slit (optional)
Red chilli powder – 2 tsp
Salt – 1 1/2 tsp
Canola Oil – 2 tbsp
Cumin seeds/Zeera – 1 tsp
Black Mustard seeds/Rai – 1 tsp
Ginger Garlic paste – 1 tsp
Turmeric powder – 1/4 tsp
Curry leaves (fresh) – 6 leaves
Garam masala powder – 1/4 tsp
Dry roasted Cumin seed powder – 1/2 tsp

Method:

  • In a saucepan, add the quartered tomatoes and the red chilli powder, turmeric powder, green chillies, salt and and give it a nice stir. Cover and let it cook on medium low heat for about 5-10 minutes, stirring it occasionally, until the tomatoes are all mushy.
  • Meanwhile, prepare baghaar~pour oil in a pan at medium heat and as soon as its warm, throw in the cumin seeds and mustard seeds. Cover with a splatter screen and as the seeds begin to pop, add the curry leaves and the ginger garlic paste as well and stir for about 15-30 more seconds until the galic pods are slightly reddish in colour. This is the baghaar, or the tempering. Remove from heat and keep aside.
  • When the tomatoes are all cooked and most of the moisture has been evaporated and the consistency has reduced to a thick pulp as shown in the picture, add the garam masala powder, cumin seed powder and mix well. Add baghaar and mix well. Cook for 3-5 more minutes. Let cool, and serve.

Tip: You can store Tomato Chutney in an air tight glass jar in the refrigerator for almost a week, or freeze it in (microwavable) food storage containers for months together. When you want to have it, just microwave it for a few seconds or if you do not have a microwave, leave it outside at room temperature for a few hours, or in the refrigerator overnight and its ready to serve.

Suggested Accompaniments: ChickenDum Biryani, Gosht Ki Biryani, Tarkaari Ki Biryani, Qubuli or Tahari(Minced Meat Rice)

Luv,
Mona

AddThis Social Bookmark Button