We desi people tend to eat unhealthy especially during the month of Ramadan. We should all be making a great effort to cook healthy meals for our family and take care of our loved ones instead. Inshallah from this Ramadan onwards, I will posting healthy meal ideas for Iftaar and Suhoor. Keep watching this space for more healthy recipes and meal ideas to come.

The following recipe is just something I made on a whim. It is easy, healthy, and makes a perfect meal for ramadan.
Baked Chicken with Vegetables, Couscous and Tatziki
Chicken Legs/thighs pieces – 12-15 pieces
Black Pepper powder – 1/4 tsp
Salt – 1 tsp
Turmeric – 1/4 tsp
Onion – 1, roughly chopped
Ginger garlic paste – 1 tbsp
Mixed Chopped Vegetables – 4 cups, carrots, grape tomatoes, peppers, potatoes, olives, green beans, broccoli, radish, baby bok choy etc
Garam masala – 1/2 tsp
Olives – pitted, 1/4 cup
Olive oil – 2 tbsp
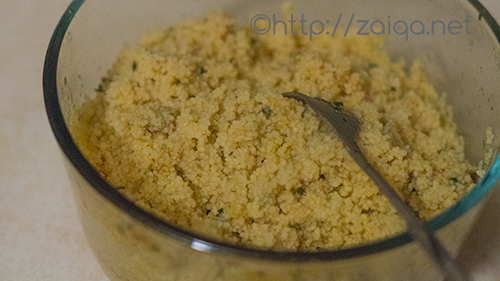
for Couscous:
Couscous – 1 cup
Olive oil – 1 tbsp
Tomato paste/Pasta sauce (store bought) – 1 tbsp
Fresh leaves and Cilantro – 1 tbsp, finely chopped
Water/Chicken/Vegetable stock – 2 cups, very hot
Salt – 1 tsp
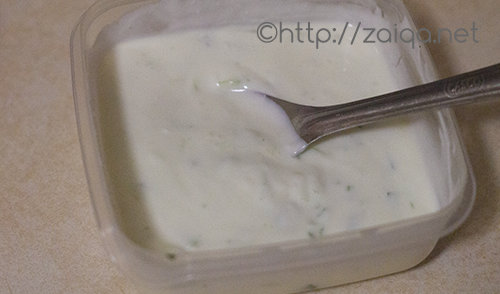
for Tatziki
Cucumber – 1/2, peeled and grated
Garlic clove – 1, mashed
Salt – 1/2 tsp
Fat-free Yoghurt – 1 cup
Juice of half lemon
Fresh mint – 4-5 leaves, finely chopped
Ingredients:
Preheat the oven to 350°F. In a mixing bowl bowl, add chicken, black pepper powder, turmeric, salt, ginger garlic paste, onion, garam masala, olives, olive oil and mix well. In a baking dish with high sides, add the vegetables in a layer. Over them add the marinated chicken again a layer. Cover with aluminium foil and bake for 35-45 minutes covered, then the next 15-20 minutes uncovered until the chicken is juicy and done.
Add pasta sauce/tomato paste, chopped herbs, olive oil, and water/chicken stock in a kettle and let it come to a boil. Add couscous in a bowl. Once the water/chicken stock is boiling, pour over the couscous in the bowl and cover with a tight lid. Keep adise and let rest for 10 minutes. Then fluff with fork.
Using a box grater, coarsely grate the cucumber. Sprinkle it with a 1/2 tsp of salt. Let rest for 10 minutes. Then squeeze and scrunch with clean hands to get rid of the excess salty water. Add it to a bowl. Also add yogurt, mashed garlic, lemon juice, chopped mint leaves and salt. Tatziki is ready.
In a serving dish, add the couscous in a layer. Top it with baked chicken and vegetables. Serve along with tatziki on the side.
Healthy Desi Meals Ideas for Iftaar/Suhoor:
For Iftaar
~ Chanay ki Dal – Lemony Boiled Split Bengal Gram
~ Jaam ka Kachalu – Guava Chaat
~ Fruit Chaat – Fruit Salad
~ Baked Samosas – bake the samosas instead of deep frying
~ Ragda Cutlet – alter the recipe by not adding any oil to cook the onions, just saute them in a pan until they get a nice brown color; bake the potato cutlets instead of shallow frying; also do not sweeten yogurt
~ Pita Pockets made using Sheekh Kebabs
Luv,
Mona