Kurkure Chanay

November 19th, 2009 Mona Posted in Amchur powder, Canola Oil, Curry leaves (fresh), Kabuli Chana, Quick fix meals, Red Chilli powder, Salt/Namak 9 Comments »

Kurkuray Chanay – Crunchy Chickpeas

Curled up in my cozy comforter and browsing through food blogs on this gloomy, rainy and cold autumnal evening, I satisfied my cravings for something crunchy with these very addictive tale huwe chanay along with a cup warm chai.
Pure Bliss!

Kurkure Chanay – Crunchy Chickpeas

Ingredients:

Dried White Chickpeas/Kabuli Chanay – 1 cup, washed and soaked in surplus cool water overnight
Canola oil
Red chilli powder – 1/4 tsp
Amchur powder – 2 pinch (or) MDH Chaat Masala powder – to taste
Salt – to taste
Curry leaves – 8-10, fresh

Method:

1. Drain the soaked chickpeas and transfer them to a pressure cooker. Add 1/2 cup water and a dash of salt and pressure cook until they are soft but not mushy. Boil away the remaining water, or if there is too much water left and the chickpeas are thoroughly done, drain the remaining water and use it while preparing dal. Let the boiled chickpeas cool down for 10-20 minutes. Once cooled, spread them out on a paper towel for about 10 minutes so that they dry up a little bit.
2. Pour Canola oil to deep fry in a kadai. Once hot, add the cooled boiled chickpeas and deep fry for 5-8 minutes at medium high heat until they are golden brown in color and crisp. Remove using a slotted spoon into a wire mesh strainer.
3. Pour 1 tsp Canola oil in a frying pan and add the curry leaves. As they crisp up, remove using a slotted spoon into a platter and crush them using your hands. In the same warm oil, add the red chilli powder and remove the pan from heat. Add the fried chickpeas into the pan, also add the amchur powder and salt. Toss to coat evenly. Serve them as a snack.

Alternatively, if you want to avoid deep frying, after step 1: add 1 tsp canola oil/olive oil and the boiled chickpeas, red chilli powder, salt, amchur power and curry leaves in a mixing bowl and toss well so they thoroughly get coated with the mixture. Now spread these masala coated chickpeas in an aluminium foil lined rimmed baking sheet and bake in 425°F pre-heated oven for 15-20 minutes until they are nicely browned, keep a close eye and do not burn them. Once done, cool the baking sheet, crush the toasted curryleaves and enjoy the baked chickpeas.

Luv,
Mona

AddThis Social Bookmark Button

Nimbu ka Achaar

September 24th, 2009 Mona Posted in Canola Oil, Coriander seeds, Cumin seeds/Zeera, Dried Red Chillies, Garlic/Lahsun, Green Chillies, Kabuli Chana, Lemon/Nimbu, Mustard seeds/Rai, Nigella seeds/Kalonji, Red Chilli powder, Salt/Namak, Turmeric/Haldi 21 Comments »

Pickles are Indian specialities, enjoyed at breakfasts, at meals, or as an accompaniment to a snack . Each household has their own twist on the pickles that they prepare yearly using freshly available seasonal fruits and vegetables. Among those pickles, mango pickle and lemon or green lime pickle are the two classic indian pickles prepared most commonly in every household, and also easily available at the stores in various varieties.
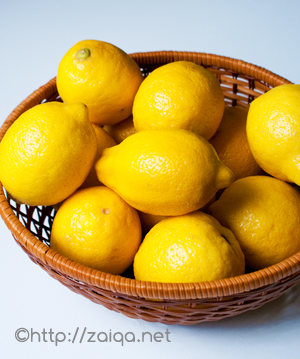
Fresh Lemons

In todays express lifestyle, the art of making pickles at home is slowly sinking into the mists of time. It only takes a little time, effort and love to prepare these indulgences at home, with your own control on the amount of spices as well as the quality of the product. The following is my mothers recipe for Lemon or Lime pickle.

Note: Pickling is a bacteriostatic method of food preservation, in which the micro-organisms are unable to grow in food. Salt is the main ingredient used as the preservative. Throughout the preperation, take precautions and use only dry spoons for mixing and transfering purpose. Make sure the utensils you are using for making the pickle are absolutely moisture free. Otherwise the pickle will spoil and there are chances of fungus/mould formation. Pickles should never be sored in glazed jars.

Enjoy about a teaspoon of this pickle along with your meals, as an accompaniment to your breakfast or a snack.

Nimbu ka Achaar – Lemon/Lime Pickle
Makes: about 2.5 lb

The procedure includes the following steps which are later described in detail below:

1. Wash and wipe lemons or limes. Chop the 10 lemons or limes, add juice of 2 lemons or limes, mix salt and turmeric and keep aside for 3 days covered in a glass jar with tight lid at room temperature. Shake the bottle gently twice everday so that all the pieces are soaked in the juices.
2. After 3 days, add the powdered pickle spices and the tempering/baghaar to the pickle. Mix well.  Transfer to air tight pickle jars and store in the refrigerator for 1 or 2 weeks for the lemon or lime pieces to ferment. The pickle is ready to be used once the skin of the lemons or limes is soft.

Detailed Procedure:

Lemon or Lime – 10, blemish free, ripe and juicy
Juice of fresh lemons or limes
Iodine free Salt – 2 tbsp
Turmeric powder – 1/3 tsp

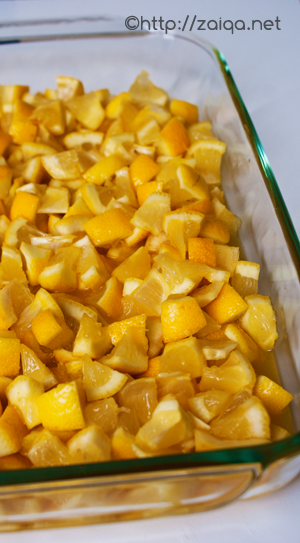
Cut lemons mixed with turmeric powder, lemon juice and salt in a large glass dish

Choose blemish free, good quality, preferably organic lemons or limes. I am never able to find thin-skinned lemons where I live, so I prepare pickle using thick skinned lemons or green limes, and have kind of got used to them. Infact the thick pickled lemon skin tastes delicious! Wash them and pat them completely dry using a dry cloth. You can also spread them out on a tray and place it under the sun to complately air dry for 1 or 2 hours. If the skin of the lemons you are using is thick (like mine, see the pictures), discard the thick top stalk part and bottom of the lemons and chop up 10 lemons into small quarters and put into a sterilized glass jar with a tight non-metallic lid. This need not be done for limes as they have a thinner skin. Cutting off the top and bottom is also not required if the skin of the lemons you are using is thin. The skin of Indian lemons is usually thin, whereas the lemons that are available elsewhere are quite thick. Discard the seeds. Add salt, turmeric powder and lemon/lime juice to the jar so that all the pieces are covered in the juice and mix well. Keep the jar in a dark place at room temperature for 3 days. Gently shake the jar twice every day.

Red chilli powder – 2 tbsp
Dry Roasted Cumin seed powder – 2 tbsp
Dry Roasted Coriander seed powder -1 tbsp
Dry Roasted Black Mustard seed powder – 1 tsp
Dried Chickpeas/Kabuli Chana – washed and pat dried completely (optional)
Garlic pods – 3
Small green chillies – 4, washed, and completely pat dried, roughly chopped

After 3 days, the lemon/lime pieces will have released a lot of juices. Add and mix all the above ingredients into the chopped lemon/lime quarters with its juices in the glass jar using a dry spoon and keep aside. Now prepare the baghaar or the tempering. (the dried chickpeas and garlic pods turn soft, suitable for eating, upon fermentation and acquire a tangy taste in the pickle).

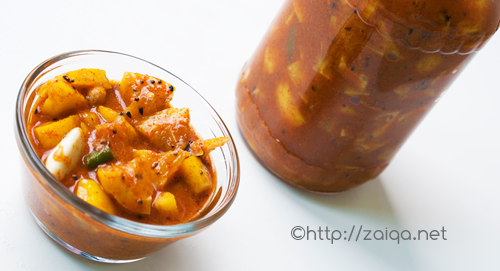
Freshly prepared Lemon pickle ready to be set aside in the refrigerator to mature

Baghaar or the Tempering:

Canola oil – 1/2 cup
Nigella seeds/Kalonji – 1 tsp
Black mustard seeds – 1 tsp
Cumin seeds – 1 tsp
Dried red chilli – 2

In a pan, heat oil at medium high heat and as soon as it warms up add the remaining ingredients and mix well. In a few seconds they start to splutter. Remove from heat and keep aside. Take care not to burn the spices. Let it cool down and come to room temperature. This is the baghaar or tempering. Once the baghaar is cooled, carefully pour it into the lemon/lime pickle jar.

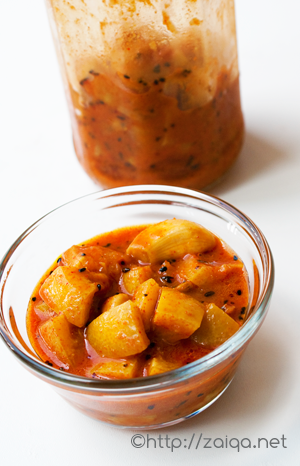
Lemon pickle ready to be eaten with its skin all nicely softened after 2 months

Store this freshly prepared lemon/lime pickle in the refrigerator to slowly ferment for about a week or two. Fermentation process renders fruits soft and and the fruits take on an additional aroma and flavor of spices. Mould growth is prevented by the use of a tight lid, by which air is prevented from coming in contact. Make sure that you use a completely dry spoon to use the pickle when you feel like eating it, and cover it and store in the refrigerator as soon as possible for a long life. Keep rotating and turning the jar frequently in the refrigerator. Check if the skin of the lemon/lime is soft enough. If you have used thick lemons, you might have to wait a little longer. I kept the pickle jar unopened for 3 months in the refrigerator, before I used it.

Luv,
Mona

AddThis Social Bookmark Button

Khatti Dal

June 20th, 2008 Mona Posted in Canola Oil, Cumin seeds/Zeera, Curry leaves (dried), Curry leaves (fresh), Dals (Pulses & Legumes), Dried Red Chillies, Eid/Ramadhan/Iftaar, Garlic/Lahsun, Green Gram/Moong ki Dal, Hyderabadi special, Kabuli Chana, Red Chilli powder, Red Lentils/Masoor ki Dal, Salt/Namak, Spices & Seasonings/Masaale, Tamarind/Imli, Turmeric/Haldi, Yellow Lentil/Tuvar ki Dal/Toor dal 16 Comments »

Hyderabadi Khatti Dal is kind of like a lentil soup with a slight tangy flavor due to the addition of tamarind concentrate. Tamarind is the traditional souring agent used for the Khatti dal. Sometimes upon its unavailability, lemon/lime juice or raw green mango puree is also used. This distinct and popular dal preparation is usually a side dish at meals in most Hyderabadi households to wet their rice and enjoyed with an another vegetarian or a non-vegetarian side dish.

Tamarind pods – Imli

Hyderabadi Khatti dal is distinct and different from other Indian dals. Khatti dal has origins from the Mughal era of the Qutub Shahs. The North Indians use whole grain dals (sabut dal), and Andhra dals are usually thin and the baghaar (tadka) consists of mustard seeds, whereas Khatti dal has the baghaar of dried red chillies and cumin seeds, and the consistency of the dal is neither too thick or too thin.

***

Baghaar:
The technique of baghaar (in Urdu) reminiscent to Indian cuisine, also often referred to as seasoning/tempering or chaunk/tadka in Hindi is an important step towards flavoring a dish. It helps brings out the best flavors from dry spices. The process involves heating some oil in a small frying pan, to which dry spices are added one by one and stir fried until they pop. This hot oil with spices is then poured, hissing over the partially cooked or completely cooked dish to impart flavors and aroma. As soon as this is done, cover the dish with a lid so as to trap all the aroma and flavor inside. Different spices are used for different dishes. Usually baghaar is done at the end of cooking, but sometimes it is also done right at start or in the middle of cooking a dish.

Baghaar for khatti dal – sliced garlic, curry leaves, dried red chillies and cumin seeds

Below are a few precautions to be taken while doing baghaar:
1. The process requires attention, and takes just a few minutes.
2. Take care not to overheat oil or else spices will burn.
3. Keep a splatter screen nearby before you start the process as few spices begin to pop and jump.

***

Adding garlic in the baghaar or tempering process for this dal gives it a unique flavor and makes it even more delicious. I like to prepare this dal using Tuvar dal/Yellow lentils or Masoor Dal/Red Lentils.

Imli ki Khatti Dal – Tangy Tamarind Dhal

Ingredients:

For the Dal:
Tuvar dal/Yellow lentils or Masoor Dal/Red Lentils – 1 cup
Salt – to taste
Red chilli powder – 1 1/2 tsp
Small green chillies – 4, roughly chopped
Haldi/Turmeric powder – 1/4 tsp
For Sourness:
Raw tamarind juice or tamarind concentrate – 2 to 3 tbsp or according to taste (if tamarind is unavailable, you can even add lemon/lime juice to taste for sourness)
For the Baghaar(tadka)/Tempering:
Canola Oil – 2 tsp
Garlic Cloves – 2, large, each cut lenghwise into two
Cumin seeds – 2 tsp
Dred Red chilliies – 2, each broken into two
Fresh/Dried Curry Leaves – 8
Fresh Cilantro – 2 tbsp, finely chopped


Khatti Dal – Sweet and Sour Lentils

Method:

1. Wash and soak the dal in surplus water for 2-3 hrs. Later, drain the dal and wash it in fresh changes of water. Drain and add it to a pressure cooker along with 3 cups of fresh cool water, turmeric powder, red chilli powder, chopped green chillies and salt and pressure cook it till the dal is very soft. Pour the contents of the pressure cooker into a blender container and blend it till pureed. (My Ammi used a Dal Ghotni to mash the dal) Or you can even simply puree it using an immersion blender.
2. Meanwhile in a small non stick frying pan at medium heat, pour oil and as soon as it gets warm, add the cumin seeds. As they begin to splutter, cover with a splatter screen and reduce heat to medium low, and throw in the remaining ingredients for baghaar/tempering and remove from heat.
3. Pour the contents of the blender container back into the pressure cooker and bring it to a boil. Add the tamarind juice (or lemon/lime juice), the baghaar, and stir to mix. You can add more water if you want to achieve the consistency you desire. Some people like a thin consistency and some prefer a slightly thick consistency. Adjust salt and serve warm.

Suggested Accompaniments: Khatti dal goes very well along with Tala hua Gosht and Khushka.

This delicious dal is my entry to the event ‘Delicious Dals from India’ being hosted by Suma at her blog Veggie Platter.

A list of few other delicious dals from the Hyderabadi repertoire:

1. Khadi Dal
2. Daalcha
3. Tamatar ki Dal
4. Kairi ki Dal
5. Mitthi Dal

***

Suggested Accompaniments: It is a side dish to meals to wet rice and had along with a vegetarian or non-vegetarian side dish.

A while ago Meeso of For the Love Of Food! awarded me with the ‘Rockin Girl Blogger’ award. I rock! 🙂 Thanks Meeso.

I pass on this award to all those talented bloggers in this ever growing world of food blogosphere.

Luv,
Mona

AddThis Social Bookmark Button

Dahi Ki Kadi

January 8th, 2008 Mona Posted in Canola Oil, Cilantro/Kothmir (fresh), Cumin seeds/Zeera, Curry leaves (fresh), Dried Red Chillies, Eid/Ramadhan/Iftaar, Garlic/Lahsun, Ginger-Garlic paste, Gram Flour/Besan, Hyderabadi special, Kabuli Chana, Red Chilli flakes, Salt/Namak, Turmeric/Haldi, Vegetables/Tarkariyaan, Yellow Onion/Pyaaz, Yogurt/Dahi 24 Comments »

I miss my uncle a lot whenever I prepare this curry at my house. He loves this curry to no extent and would always pour some tablespoons of the silky bright sunny colored yogurt gravy into his plate after he finished his meal to savour upon it in the end. I always enjoyed seeing him doing so. It feels so nice to see someone enjoy food to the last morsel.

Dahi Ki Kadi – Gram Flour Dumplings in a silky yogurt gravy

Dahi ki Kadi is an another dish prepared in most Hyderabadi houses very commonly. It is a simple curry with a thick yogurt gravy with a bright gold tint due the added spice especially for the color, turmeric. Gram flour is also added to give it a little volume. Be careful while you add turmeric to it, as too much turmeric will give a bitter taste to the curry. So be very careful while using this spice for color in this dish.

The dumplings are made of gram flour, chopped onions, spices and herbs. This is the customary method of preparing the bhajiyas for the dahi ki kadi. I sometimes substitute onion with cauliflower florets, and add the cauliflower fritters to the kadi for a new and different taste. You can try it, with different vegetables too.

This curry is usually is not reheated later. The left over is generally had cold from the refrigerator, with plain boiled rice or Khushka. I prepare this curry along with an another dry curry as a side dish.

Serves : 6-8

Dahi Ki Kadi – Gram Flour Dumplings in a silky yogurt gravy

Ingredients:

For the Kadi (Kadi is the thick yellow coloured yoghurt gravy in which the Bhajiya are added later)
Yogurt – 750 ml
Turmeric – 1/2 tsp
Water – 3 cups
Besan/Gram Flour – 1/4 cup
Red chilli powder – 1 tsp
Salt – 1 tsp
Onion – 1, small, finely chopped
For the Baghaar (Baghaar is the Tempering. It is the flavored oil added to curries in the end for garnishing and flavoring the dish)
Canola Oil – 4 tbsp
Cumin seeds/Zeera – 1 tsp
Dried Red Chillies – 2, each cut into half, seeds shaken away
Garlic – 1
Curry leaves – 6
Canola/Sunflower Oil – 3 tbsp
For the Bhajiya (Bhajiyas here are the fritters/dumplings added to the yogurt gravy)
Gram Flour – 1/2 cup
Water – to make paste
Red chilli flakes or Finely chopped small green chillies – 3/4 tsp
Salt – 1 tsp
Cilantro and Mint leaves – 1/2 cup, finely chopped
Ginger-Garlic paste – 1 tsp
Canola/Sunflower Oil – for deep frying

Dahi Ki Kadi – Gram Flour Dumplings in silky yogurt gravy

Method:

1. In a bowl, whisk the yogurt till smooth and creamy and keep aside. Mix in the gram flour,water, turmeric powder, salt and red chilli powder, and pass the mixture throw a strainer into a deep and heavy bottomed non stick saucepan. Mix well using a spoon and let cook at medium low heat and keep stirring constantly and gently until it comes to a boil once. Once it is boiling, let it simmer uncovered for about 30-45 minutes or until the raw smell of the gram flour goes away. Keep stirring it occasionally to avoid it getting burnt at the bottom.
2. In the meantime, put a kadai or wok on medium high heat with oil enough to prepare the gram flour bhajiyas/fritters. Now, in a small bowl, mix together the gram flour, the ginger garlic paste, red chilli flakes/green chillies, cilantro, salt and water just enough to make a thick paste. Drop teaspoons of this paste at a time into the hot oil,leaving space between them, and deep fry the bhajiyas/frittes till they swell up and are golden in colour. Remove with a slotted spoon and keep aside on a paper towel.
3. Now in a small non stick pan, pour oil and throw in the cumin seeds, crushed garlic pod, curry leaves once the oil is hot. Stir fry the seeds till they splutter and change colour for abour a minute. Add the dried red chillies, and remove from heat. This is the Baghaar.
4. Finally, check the deep pan in which the kadi has been cooking. If it has attained a consistency of a loose gravy, it is done (make sure it not very thin, and also not too thick in consistency or else later on when it gets cooled, it will become like a cake. If it has become thick, add a little water, and if it is thin, cook it for a little more time). Now add the chopped onion and the fried bhajiyas to the kadi and give a stir to dip them in the curry. Pour the prepared baghaar over the curry and serve it warm.

Note: While preparing Kadi, one has to take a few precautions in order to avoid getting the yogurt curdled:
1. Once you mix the yogurt with all the ingredients and strain it, make sure that the yogurt is well blended.
2. When you begin cooking the kadi, make sure you cook it at a medium low heat and keep it stirring it until it comes to a boil.

Suggested Accompaniments: Talahuwa Gosht and Chawal

I am sending this as an entry to ‘Think Spice, Think Turmeric‘ event being hosted by Sudeshna.

Luv,
Mona

AddThis Social Bookmark Button

Poori aur Cholay

August 19th, 2007 Mona Posted in Blog Events/Entries/Polls, Canned Tomato paste, Canola Oil, Cumin seeds/Zeera, Eid/Ramadhan/Iftaar, Hyderabadi special, Kabuli Chana, Lemon/Nimbu, Red Chilli powder, Salt/Namak, Turmeric/Haldi, Vegetables/Tarkariyaan, White Potato/Aloo, Whole Wheat Flour/Durum Atta, Yellow Onion/Pyaaz 11 Comments »

Soft deep fried Pooris along with delicious spicy Cholay was my breakfast today, or call it a lazy weekend brunch.

There’s something about Poori’s that everyone loves. This breakfast is a favorite in my house. The prepared dough is rolled into a circular disc just like it is done for parathas or chapatis, but instead of being cooked on a hot griddle, they are deep fried till nicely puffed like a baloon.

I had posted the last time about the Palak Poori, in which spinach in added to the dough of poori for a different flavor. Today’s poori’s are plain poori’s, which people usually enjoy alongside a potato curry, or a chickpea curry called cholay. It is a classic Indian breakfast.

This recipe goes as a contribution to Anita of ‘A Mad Tea Party’ for holding this Party of Poori’s.

Poori – Deep Fried Puffed Bread
Makes: 14 pooris

Ingredients:

Durum Wheat Flour – 3 cups (or) 1 1/2 cups whole wheat flor + 1 1/2 cups all purpose flour
Salt – 1/4 tsp
Canola oil – for deep frying
Lukewarm Water – about  1 1/2 cups

Golden deep fried puffed Pooris ready to be eaten

Method:

1. Add flour and salt in mixing bowl and mix. Add water a little at a time and mix to form a kneadable but stiff dough. Soft dough will absorb more oil while deep frying. Knead the stiff dough for 5-8 minutes until soft. Divide the dough into 3 parts. Roll each part into a cylinder. Cut/pinch each cylinder into 8 pieces. Roll each piece into smooth and even balls between palms of your hands. Cover the balls with a damp towel.
2. Roll out all the dough balls one by one on a lightly floured board to a circular disk (approx 12 cm diameter) and arrange them on a tray. Turn the disk several times to make even circles. Use as less flour as possible while rolling the pooris. Do not roll the poori’s too thin, or else they will not puff up like a baloon.
3. Heat approximately 2 inch of oil in a deep frying pan or kadai/wok. (Never use non-stick pan for deep frying). Drop a tiny ball of dough into the hot oil, if it rises quickly then the oil is ready to deep fry the pooris. Slip a rolled out poori into the hot oil, making sure it does not fold over. Using a slotted spoon gently press the poori in the centre into the oil while rotating it and spoon hot oil continually over the cooking poori. Within seconds it puffs and swells and turns into a lovely light golden color. Turn over and fry other side in the same way. When both sides are pale golden brown, remove to a paper lined tray and continue frying until all the pooris are cooked. Do not stack them. Stacking deflates the puffed up pooris and makes them soft. My hubbby likes soft pooris so I stack a few especially for him. Serve immediately while still hot along with Cholay. Pooris can be kept warm for a few minutes in 200°F oven if stood on their sides without crushing them. The pooris will deflate eventually if left uneaten, but they will still taste great. You can also use them as a great snack along with any curry of your choice for picnics and while travelling.

Cholay – Chickpeas in a spicy sauce

Ingredients:

Dried whole Chickpeas/Garbanzo beans/Kabuli Chana – 1 cup
Ginger garlic paste – 2 tsp
Salt – to taste
Turmeric – 1 tsp
Dry roasted Ground Cumin seed powder – 1 tsp
Dry roasted Ground Coriander seed powder – 1 tsp
Turmeric powder – 1/4 tsp
Red Chilli powder – 1/2 tsp
Green chillies – 3, finely chopped
Tomatoes – 3, medium sized, finely chopped
Yellow Onion – 2, medium sized, chopped
Oil – 2 tbsp
Cilantro – 1 tbsp, for garnishing
MDH Chana Masala – 1 tsp
MDH Chaat masala – 1 tsp

Cholay – Chickpeas in a spicy sauce

Method:

1. Soak dried chick peas overnight in plenty of water.
2. Next day, drain the old water and add about 4 cups fresh water, 1 tsp salt and pressure cook until soft. Drain the chickpeas in a colander but reserve the liquid in a bowl.
3. In a heavy bottom pan, pour oil and add the onions, reserving a little amount for garnishing. Cook until they are lightly golden bown. Add the ginger garlic paste and fry along for a minute. Add tomatoes, salt, turmeric, red chilli powder, chana masala, chaat masala, green chillies, cumin powder, coriander powder and cook until the tomatoes are mushy and well cooked. Add the boiled chickpeas, 2 cups of the reserved water and mix well. Mash up a few of the chickpeas to impart a gravy consistency. Let it cook for 10 minutes and remove from heat. Garnish with chopped coriander leaves and chopped onions. Serve along with poori or just as a snack.

Luv,
Mona

AddThis Social Bookmark Button