I had prepared Kachchey Gosht ki Biryani on the second day of Eid-ul-Adha for our dinner. We had a wonderful time and enjoyed the meal to the last morsel الحمد لله.
Basically, there are two kinds of Biryani: Pakki Biryani, and Kachchi Biryani.
Pakki Biryani: where are half cooked Basmati rice is layered along with completely cooked chicken or lamb meat and then cooked till done on slow heat on dum.
1. Pakki Gosht ki Biryani
2. Pakki Murgh Biryani
Kachchi Biryani – which is the true Hyderabadi Biryani – where are half cooked Basmati rice is layered along with raw marinated meat and then finished on slow heat till done on dum.
1. Kachchey Gosht ki Biryani (which I am writing about today)
2. Kachche Aqni ki Dum Murgh Biryani
Raw tender and lean meat in this extraordinary kind of Biryani is allowed to first marinate in a mixture of raw papaya paste(optional)+yogurt+lemon juice+ginger+garlic, etc., all of which are natural meat tenderizers, along with several other aromatic spices for 3-4 hours. The marinating meat with all infused flavors is then layered with less than half cooked rice and allowed to slow cook, essentially in a degchi, which an Indian utensil with sloping sides and a narrow neck. The video here and here demonstrates the method and will be useful for beginners. Go through the videos once to have a good idea on the procedure before you try my recipe.
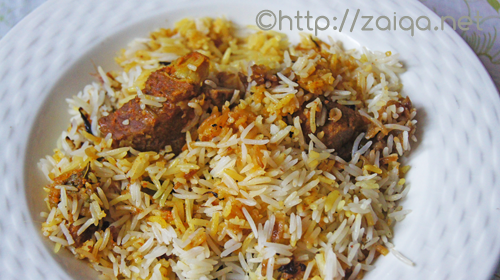
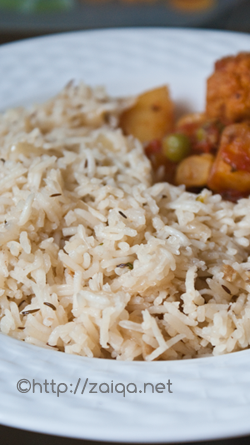
Hyderabadi Kachchey Gosht ki Biryani
The essential requirement for a good Biryani is to use good quality fragrant long grained basmati rice. The secong most important thing is to use lean meat and marinating it in a tenderizing mix before you cook. You cannot even think of preparing this Biryani without marinating it. Raw Papaya skin paste is used as the meat tenderizer back home. My Ammi however says that if the meat is tender enough, there is no need for a meat tenderizer at all. Following her advise, I have prepared Kacchi Gosht ki Biryani many times without using papaya paste and the meat is always bone tender. However, if first timers are apprehensive to try out the Biryani without the use of any meat tenderizers, please go ahead and use it. Apart from the puree of skinned unripe green papaya, peeled kiwifruit puree and pineapple puree are also powerful meat tenderizers.
My dadi(grandmother) always advised us to use rice and meat in 1:1 ratio for Kachchi Biryani. However if you like a meaty biryani, go ahead and follow meat and rice in 1.5:1 ratio, or if you prefer more rice and less meat, follow meat and rice in 1:1.5 ratio. To give time for the raw marinated meat to finish cooking along with rice, the rice is pre-soaked, and then just cooked for a minute or two, then drained and layered with the raw marinated meat and they are both cooked together. As the Biryani cooks, the steam from the meat and its marinade rises above to the rice and aids in its cooking as well. The rice also acquires flavors from the steam and the end result is piquant.
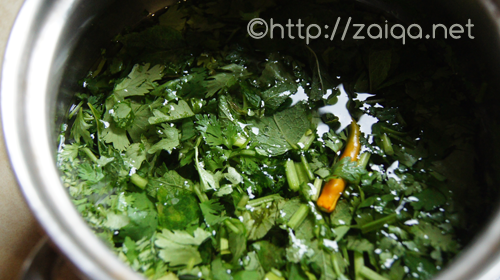
freshly chopped cilantro and mint in water
Hyderabadis prefer Kachchi Biryani over Pakki Biryani for many reasons~because this Biryani is the true Hyderabadi Biryani, for its uniqueness in the method of preparation and ambrosial taste, and also because this biryani is very simple to prepare unlike considered. All you have to do is marinate the meat for about 3 hrs, and then allow to slow cook along with half cooked basmati rice for about an hour, thats it. You do not need to stand in front of the stove stirring it the whole time. Just leave on stove to slow cook and you are free to attend to your other chores.
Make sure that you have everything ready to hand before you begin cooking rice, as you will need to assemble the layers quickly, while the rice is still warm.
Hyderabadi Kachchey Gosht ki Biryani – Hyderabadi Lamb Biryani
Serves: 6-8
Total Marinating time: 3 1/2 hrs
Total ‘Dum/slow cooking’ time: Around 1 hr and 10 mins
Canola oil – 6 tbsp
Ghee – 2 tbsp
Lean spring Lamb meat, with bone, preferably leg, cut into 5 cm cubes – 800 grams (my Ammi even adds mixed pieces like ribs, chops etc) excess fat trimmed, washed, drained and pat dried
for the tenderizing mix:
Raw Unripe Green Papaya skin – grated or made into a paste , about 2 or 3 tbsp (or) Kiwi fruit – 1, about 50 gms, peel discarded and the pulp mashed into a smooth paste (optional)
Ginger garlic paste – 3 tbsp
Salt – 1 tsp
Turmeric powder – 1/4 tsp
for the marinade:
Thick Yogurt – 1/2 cup
Yellow onions – 3, medium sized, finely sliced
Fresh Mint leaves – 1 cup, loosely packed, roughly chopped
Fresh Cilantro – 1 cup, loosely packed, roughly chopped
Small green chillies – 4-6, slit lengthwise
Red chilli powder – 2 tsp
Salt – 1 tsp
Garam masala powder -1 tsp
Cardamom powder – 1/8 tsp
Coriander powder – 1 tsp
Lemon juice – 2 tbsp
for the rice:
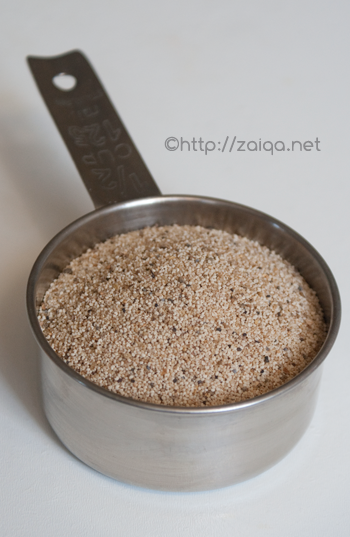
Long Grained Fragrant Basmati Rice – 800 grams (old biryani rice)
Shah Zeera – 1/2 tbsp
Cardamom – 4
Cloves – 4
Cinnamon stick – one 2″ stick
Dagad Phool – 1 tbsp
Dried bay leaf – 2
Salt – 3-4 tsp
for the Biryani:(assembing layers)
Saffron threads – 2 big pinch
Warmed milk – 1/2 cup
Cilantro – 1/2 cup, loosely packed and roughly chopped
Mint leaves – 1/2 cup, loosely packed and roughly chopped
Lemon juice – 2 tbsp
additional ingredients:
Dough made with maida/all-purpose flour (flour+water) to seal the vessel(optional)
1. In a large thick walled oven-proof vessel/saucepan (if you have a thick walled degchi, please use it) (also please choose a vessel that is large enough so that there is about 1/4 amount of free headspace left after the whole biryani is assembled for the steam to collect and aid in cooking), add the tenderizing mix and the marinade and mix well. Wear gloves, add the meat and thoroughly mix the meat well. Using a knife, gash/poke the meat in the marinade. Mix once and again gash/poke it with a knife and then mix. Cover and keep aside.
2. In a thick bottomed frying pan, pour in oil and ghee. Once the oil is hot add the sliced onions. Deep fry them until evenly golden brown in color, keep a close eye and make sure you do not burn them. Once done, remove the pan from heat. Using a slotted spoon, remove half of the fried onions into a platter and spread them out. In a while, they will crisp up as they cool. The crisped fried onions will be later used for garnish. Reserve the remaining fried onions and oil in the same pan and let cool. These will be added to the marinade.
3. In a small bowl, add the warmed milk and soak the saffron threads in it.
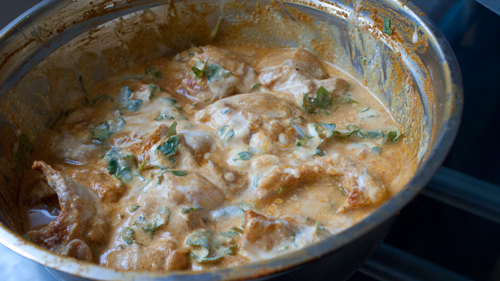
4. Add the cooled fried onions and about 4 tbsp of the oil from the pan to the marinating meat and thoroughly mix using a spoon. Cover and keep it back in the refrigerator for 3-4 hrs.
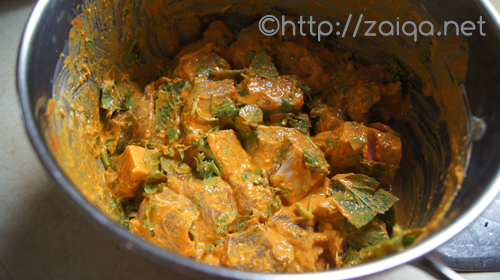
marinating meat
5. Wash the rice in 3 changes of water and soak it in surplus fresh cool water for 30 minutes.
6. In a large saucepan, pour in surplus cool water and add the shahzera, cardamom, cloves, dried bay leaf, dagad phool and salt (do not forget adding salt). Cover and bring it to a boil on high. Once the water is boiling, drain the soaking rice and add it to the boiling water and stir. Cook for just 2 minutes and drain the rice immediately.
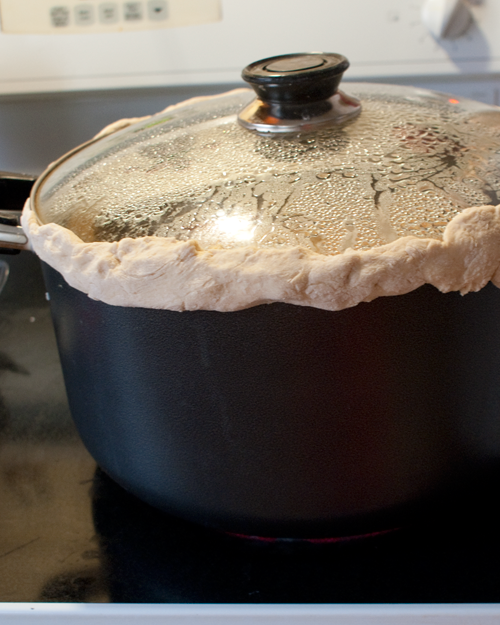
7. Spread the drained half cooked rice over the marinating meat. Spread evenly the chopped cilantro, mint, saffron soaking in milk, remaining crisped fried onions and lemon juice. Cover the vessel properly with aluminium foil or a tight lid (with vents closed with dough if any) so that no steam can escape. You can also apply dough to seal the lid which is the traditional method.
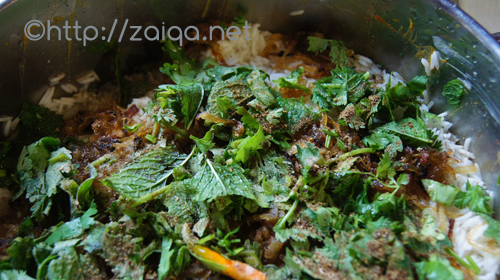
top layer of garnish just before putting it on dum
8. Cook the Biryani on high for 5 minutes. You will notice that a good amount of steam has built up, which is called as the pehli bhaap, meaning first steam.. Then take a flat dosa tawa and keep it below the vessel (so that the bottom does not burn and it slow cooks evenly) and lower the heat to simmer and let it slow cook for 30 minutes, until done. Remove from heat, and have a quick look to see if the rice has cooked and stick a fork through to test the meat (be careful as there will a lot of steam, do not burn yourselves). If it needs to cook a little longer, cover again tightly with the lid/foil again and cook for a further 10-15 minutes. when it is done and wait for 10 mins before mixing the rice with meat, and serve on a large serving platter. For a special touch, garnish with more fried onions, cilantro and mint leaves, toasted/fried almonds or cashewnuts or pinenuts or raisins and quartered hard boiled eggs.
Oven Method:
1. Follow the above steps until step 7.
2. Preheat the oven to 450°F.
3. Cook the assembled biryani in the vessel on stove-top on high heat for 5 minutes, until nice steam has built up, which is called as the pehli bhaap, meaning first steam. Immediately transfer this vessel in the pre-heated oven for 20 minutes. After that, turn the oven setting to 300°F and bake it for further 15 minutes, after which have a quick look to see if the rice has cooked and stick a fork through to test the meat (be careful as there will a lot of steam, do not burn yourselves). If it needs to cook a little longer, cover again tightly with the lid/foil again and cook for a furthur 15 minutes. Remove from oven when it is done and wait for 10 mins before mixing the rice with meat, and serve on a large serving platter. For a special touch, garnish with more fried onions, cilantro and mint leaves, toasted/fried almonds or cashewnuts or pinenuts or raisins and quartered hard boiled eggs.
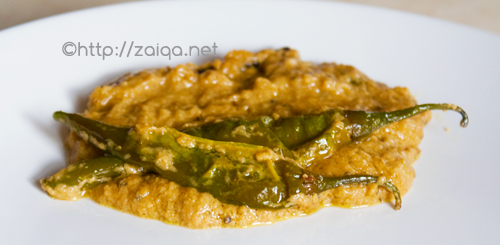
Serve this Biryani along with Mirchi Ka Salan or Baghare baingan or Kaddu ka Dalcha or Tamatar ka Kut or plain and simple Dahi ki Chutney for a sumptuous Hyderabadi meal.
![]()
This lajawaab biryani is my contribution to the “The Hyderabadi Bakr-Eid Food Festival-’09” that I am hosting on my blog. The event is on and you can all send me your Bakr-Eid special recipes until December 31, 2009. Click on the link for more details.
Here are other versions of Kachchey Gosht ki Biryani from some of my fellow food blogger buddies:
1. Yasmeen’s version of Kachchey Gosht ki Biryani
2. Anjum’s version of Kachchey Gosht ki Biryani
3. Foodgoddess’s version of Kachchey Gosht ki Biryani
Luv,
Mona