Basic Chocolate Cake

September 11th, 2009 Mona Posted in All-Purpose Flour/Maida, Baking powder, Baking soda, Blog Events/Entries/Polls, Butter/Makhan, Canola Oil, Chocolate and Cocoa, Egg/Anda, Milk and Milk Products, Salt/Namak, Sugar/Shakkar 24 Comments »

A week back, I had lost all hope of blogging again on Zaiqa and the world seemed profoundly altered to me. Someone had probably hacked my blog and installed a new wordpress on it. Thankfully, I was able to retrieve it all, and I thank my god immenesely for that. I wish that no blogger has to go through such agony ever.

Chocolate Cake

I decided to bake a rich chocolate cake to celebrate the the recovery of my blog with you all. I always bake this lovely dense chocolate cake for parties and other occasions and it is always loved by everyone. Who doesn’t love a delicious chocolate cake?

Bittersweet Chocolate

Basic Chocolate Cake
Recipe adapted from: Cakes – 1,001 recipes from around the world

Ingredients:

Bittersweet Chocolate – 9 oz
All-Purpose flour – 2 cups
Unsweetened Cocoa powder – 1/3 cup
Baking powder – 2 tsp
Baking soda – 1/2 tsp
Salt – 1/4 tsp
Butter – 1 cup, softened
Granulated Sugar – 2 1/2 cups
Eggs – 4, large
Milk – 1/2 cup
Canola oil – 2 tbsp

Chocolate cake Batter ~ yummy

Method:

1. Preheat the oven to 350 C
2. Butter and flour a 9-inch springform pan.
3. Melt the chocolate in a double boiler over barely simmering water. Set aside to cool.
4. Sift the flour, baking powder, baking soda, cocoa and salt into a large bowl.
5. Beat the butter and sugar into a large bowl with a electric mixer at medium speed until creamy. Add the eggs, one at a time, until just blended after each addition.
6. With mixer at mow speen, gradually beat in the dry ingredients, alternating with chocolate, milk and oil.
7. Spoon the batter into the prepared pan. Bake for 50-60 minutes, or until a toothpick inserted into the center comes out clean.
8. Cool the cake in the pan on a rack for 15 minutes. Loosen the sides and let cool completely. You can store the cake for 3-4 days.

This goes to CFK: Chocolate event being hosted by Hema at her blog.

Luv,
Mona

AddThis Social Bookmark Button

The Hyderabadi Ramadan Food Festival ‘09~Season I-Roundup

August 22nd, 2009 Mona Posted in Blog Events/Entries/Polls, Eid/Ramadhan/Iftaar 20 Comments »

Wishing everyone a very happy and blessed Ramadan’09 Ramadan Mubarak!

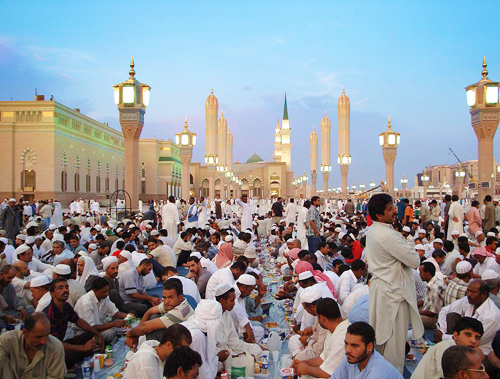
Moments before Iftaar time at ‘MASJID-AL-NABWI~The Mosque of PROPHET MOHAMMED (صَلَّى اللَّهُ عَلَيْهِ وَسَلَّمَ) in Madinah Al-Monawwarah, KSA~The place in the entire world that is very dear to me only next to Makkah.Source

May our prayers be answered, our fast accepted and our homes blessed with Allah’s (سبحانه وتعالى) mercy inshallah, Ameen.

“Call on Me; I will answer your Prayer (Quran – 40:60)

Ramadan (Sawm) is the ninth month of the Islamic Calender, a solemn time of prayers and reflection, when the holy book of Al-Quran was revealed to the Prophet Mohammad (ﷺ). Month long fasting, one of the five pillars of Islam, is observed from sunrise till sunset, on every day of Ramadan. The meaning of Sawm is ‘to abstain’. Abstinence from bad behavior and bad language, sensual pleasures, hunger and thirst is a requirement of a proper fast. Ramadan teaches us moderation and spiritual discipline. Paying Zakat, or alms, to the needy or poor, is another of the five pillars of Islam, is essential during Ramadan.

During Ramadan, we basically have two meals, the Iftaar and Suhoor. Iftaar is after the sunset, when we break our fast eating a few dates, fruits or light Iftaar snacks, a drink or water, and then offer our evening prayers and have a bountiful dinner later. Suhoor, usually lighter than Iftaar, is had before the daybreak. Al-Quran is read with much regard and special lengthy prayers in the night called Taraweeh are observed. The du’as of a person who is fasting is never refused.

Life during Ramadan is slightly harder for us all Muslims living in non-Muslim countries I believe. In most Islamic countries, the whole daily routines of the general population changes to accommodate the observance of fast. Offices and work places open late and close earlier. Nevertheless, the Islamic spirit during Ramadan is the same throughout the world. Everyone shares Iftaar, either by sending what they have prepared to the local mosques, or sending a share to the fellow neighbors.

Ramadan is the best time to be in Hyderabad. The city seems to be abounding with food and people buying food from street vendors and road side food stalls from later afternoon to late in the night or until early mornings.Some typical Hyderabadi foods and dishes associated with Ramadan are: Haleem, Dahi wade, Fruit salads, Khatti Chane ki dal, Samosa, Cholay, etc.

I thank all the participants~bloggers as well as non-bloggers, for taking time out to participate and share their yummy Ramadan entries with us all.
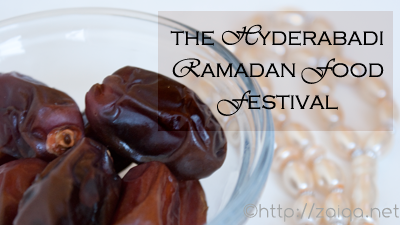
Here’s presenting you all, the roundup of ‘The Hyderabadi Ramadan Food Festival ‘09‘. Hope you all enjoy the delicious recipes sent by my friends and beloved readers. May god bless you all!

1. Rizruby, one of the readers of my blog has shared with us all some of the delicious Ramadan dishes that she prepares for her family. These include~Haleem, Chicken 65 with gravy, and Cherry IceCream cake. Lets go through her recipes in her words:

Hyderabadi Haleem:
This is my mom’s recipe. I get many complements from family and freinds. It is a bit lengthy procedure, approx 2-3 hrs of cooking time but worth it. I do not add many dals, and usually like the taste and consistency of bawarchi/sherewan haleem back home in Hyderabad.

To prepare Daliya:

Daliya/Cracked wheat – 2 cups (8ounce size each)
Split and husked Black gram~Mash/Urud dal – 1/3 cup
Cooking oil – 1 tsp
Black peppercorns – 1 tsp
Caraway seeds/Shahzeera – 1 tsp
Loung/Clove – 4
Elaichi/Cardamom – 4
Cinnamon Stick – 1/3 inch

Wash wheat and dal. Add to pressure cooker. Add oil and rest of the above ingredients. Add water about your index finger level and pressure cook on med-low for 1/2 hour. Make sure wheat is cooked and soft when done.

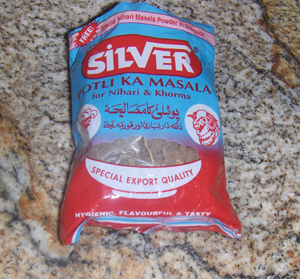
Potli Masala packet (available in Hyderabad stores)

To prepare Masala water curry:

Potli masala bag -1 (You get Potli Masala packets in hyderabad stores)
Yogurt – 1/2 cup
Red Chilli powder – 1 tsp
Ginger garlic paste – 1 tsp
Salt – 1 1/2 tsp
Oil – 4 tbsp

Take a sauce pan add 7 cups water. Add raw potli masala bag contents. Do not add any powder from bag. Boil for 20 mnts. Strain and reserve the water and keep aside. Take saucepan . Add oil and fry ginger-garlic paste. Later add salt and red chilli powder. Add yogurt and cook for 5 mins on low heat until yogurt is evaporating. Add drained potli masala water and cook for 10 mnts on med flame. Once done, remove from heat and keep aside.

To prepare Mutton gravy:

Mutton, with bone – 2-3 pounds (I use ribs and patla ghost mostly and regular ghost)
Ginger-garlic paste – 2 tsp
Caraway seeds/Shah zeera – 1 tsp
Loung/clove – 5
Elaichi/Cardamom – 5
Cinnamon Stick – 1/3 insh
Garam masala powder -1/2 tsp
Cooking oil – 2 tbsp.
Red chilli powder – 1 tsp
Salt – 1 tsp

Take a pressure cooker and add the above ingredients. Pour 1 1/2 cups water and pressure cook meat till is very tender and falls off the bone. Feel with your hand if u can seperate meat from bones~if yes, let mutton cool down and remove the meat from the gravy into a bowl. Seperate meat from bones using your fingers. I do not prefer using boneless mutton and grinding, this kills the taste of haleem. So use your hand, its worth it. Keep aside the meat. Do not dry leftover gravy in cooker. Remove from heat and keep the gravy aside.

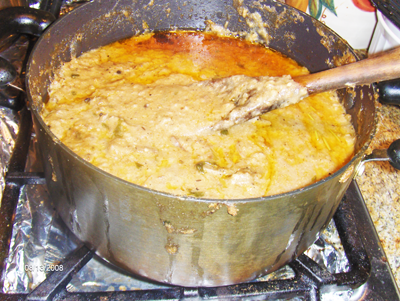
Haleem, in the cooking stage

Blending:

Add  1/3 amount of cooled potli masala water to cooked cracked wheat. Blend the mixture and keep adding another 1/3 amount of potli water during grinding process. Do not blend to fine paste but keep it a bit coarse. Keep aside remaining 1/3 potli masala water.

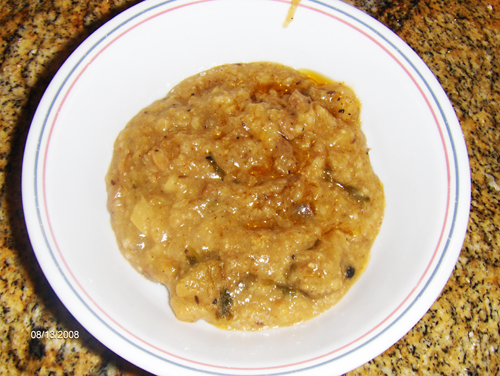
Haleem, served in individual platters

Dum~Final part

Take 2 average size onions and slice them thin. Fry till golden brown in oil. Keep aside.
Take a heavy bottomed 8 quart size non-stick sauce pan. Add blended wheat and cook for 10 mnts on low flame. Keep stirring every 2 minutes. Add remaining 1/3 amount of potli masala water and cook for 5 minutes. Now add pulled mutton, the mutton gravy and cook for 10 minutes on low flame. Keep stirring as mutton usually sticks to bottom. Also add finely chopped cilantro~1/2 cup, garam  masala powder~1/2 tsp ,and the fried onions.
Remember~try to adjust cooking time according to consistency you like~thick or thin or average.
Keep tasting in between always. Never add raw red chilli powder to haleem at this stage. You can add black peppercorns~1 tsp according to your tastes if required .
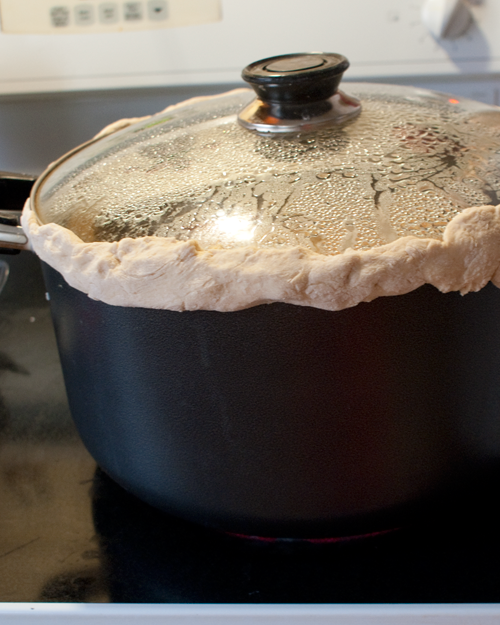
Now add 3 tbsp cooking oil and keep on dum/cover lid and cook for next 5 minutes on low flame. Then remove pan from stove.
Garnish every serving with minced cilantro, mint, lime juice and fried onions.

Yummmmmmmmmmmy.

I usually freeze leftover haleem sameday in freezer in ziploc bag or yogurt cups. You can freeze for 2 weeks. It helps to save time in parties or when family or friends drop in.
When reusing from freezer, thaw for four hours at room temp and microwave later. I have already done the same for coming ramazan.

Chicken 65
Servings – 5-6

For Chicken:

Ingredients-

Boneless chicken – 1  pound , cut into 1 inch size pieces, I use breast chicken meat
Salt -1/2 tsp
Ajinomoto salt -1/2 tsp
Black pepper powder – 1/4 tsp
Red Chilli powder – 1/2 tsp
Shan tandoori chicken powder – 3/4 tsp
Lime juice – 1/2 tsp  or  white vinegar 1/2 tsp
Ginger garlic paste – 2 tsp
Corn starch powder – 1/2 tsp (do not use plain corn powder paste, starch powder makes chicken crunchy)
Egg white, beaten – 1 egg, no yolk
Salt free soya sauce – 1/2 tsp (optional)
(no coloring agents please)

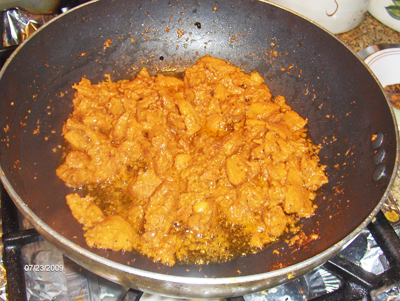
Chicken 65, in the cooking stage

Take a mixing bowl. add above ingredients . add chicken pieces and marinate for 1 hr.

Method-

Take a non stick pan/karhai. Add 4 tbsp oil and let it warm up. Add marinated chicken and stir fry. Cook on medium flame for 15 -20 minutes till chicken is tender.

For Gravy:

Ingredients-

Yogurt – i/2 cup whipped
Salt – 1/4 tsp
Zeera/cumin powder – 1/2 tsp
Slit green chillis – 4-5
Curry leaves – 10 leaves
Cilantro – 1/4 cup for garnishing
Shan tandoori chicken masala – 1/4 tsp for coloring
Ginger-garlic paste -/2 tsp
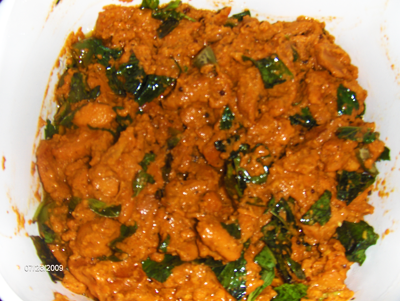
Chicken 65

Method-

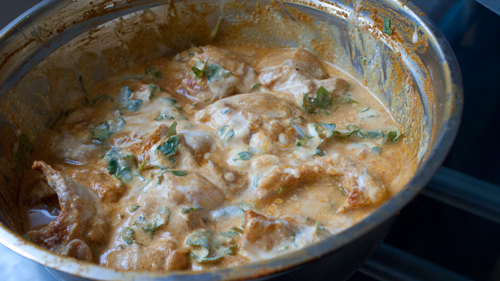
Remove chicken from pan. Add 1-2 tbsp oil if necessary to pan and add green chillies, ginger garlic paste and fry. Now add curry leaves and when u smell the curry leaves add yogurt first, salt and zeera powder. Stir fry and saute for 7-10 minutes on medium flame. Add chicken and cook for more 5 minutes. Garnish with cilantro.

Serving suggestion – Rumali roti. I use ‘Tortillaland’ brand uncooked wheat tortilla. I buy from smith grocery stores, it really tastes like homemade Rumali rotis. I never liked other brand of tortillas.

Cherry Icecream Cake
I always loved backhomes cakes from bakeries. Because they are soft and made with icecream, yummy.
I find very few choices in USA because of halal and wine factor. and also I do not like caramel and  dark chocolate. So I tried this recipe recently and boy it was yummy, very tasty.
I usually love cakes from wholefood market stores and smith grocery stores. You can use any cake mix and icecream for this recipe, like strawberry cake and dark cherries icecream, and fresh strawberries or peach or berries. One tip~do not add cut fruits to icecream but to cake mix.

Cherry Icecream Cake

Serves 5-6
Calories – approx 150 -200, from fat -60 %

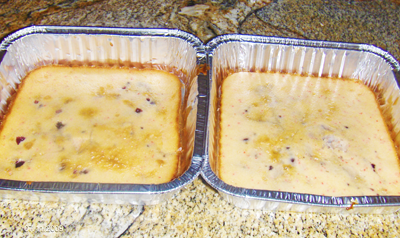
Two cakes, baked in aluminium trays

Ingredients:

Bettycrocker cakemix- supermoist cherry flavor -1/2 box (this is halal and I got from walmart. You can use any flavor preferably supermoist variety)
Fresh cherries – 1/2 cup, cut into 1/4 pieces size
Fresh cherries – 1/4 cup pureed in blender (Add 1 tsp sugar if a bit sour)
Sliced almonds – 1/5 cup (I use readymade cut almonds from indian/desi store)
Eggs – 2
Olive/Canola oil – 1/4 cup
Water – 2/3 cup
Regular frozen Icecream – 1 1/2 or 2 cups (I used strawberry+vanilla combo)

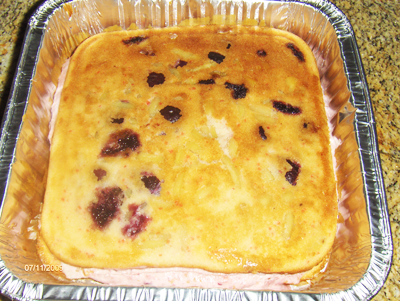
Cakes sandwiched with the cherry Icecream

Method:

Take a mixing bowl. Add eggs and whip using a beater. Add oil and whip. Now add betty cake mix and water and whip for 2 minutes. Add sliced almonds and cut cherries to cake mix and mix. Take 2 aluminium foils trays, 12 inch size square, or as u wish. Aluminium foil is always good for baking. Grease them with oil lightly. Pour the mix in 2 separate trays equally. Bake together in oven at 325°F for 25 minutes. Now remove the cakes and cool them for 10 minutes. Place both trays in refrigerator (not freezer) for 1 hour. After 1 hour, blend the remaining cherries. Take icecream and make it smooth with spoon, making sure you do not melt icecream so that u can spread evenly on cake. Add blended cherries to icecream. Now spread soft icecream evenly on top of cake in 1st tray. Spread only on top not sides. Now remove cake carefully from 2nd tray and place above icecream in 1st tray. Freeze cake tray in freezer for 2 hrs. My freezer temp is 0°F. After 2 hrs remove and ice the cake with store bought icing and cherries and nuts. This is optional. I do not do because of the calories it adds. Cut the cake into slices and enjoy.
You can store the leftover cake in fridge, and not in freezer.

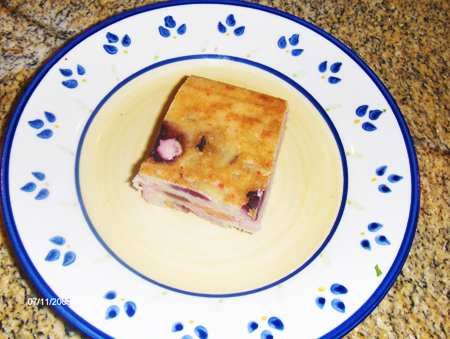
A slice of Cherry IceCream cake

You can use this recipe for birthdays or any occasions, I usually bake my biryani and cakes together and save time.

2. Jyothi, a Hyderabadi food blogger has shared with us all the following Ramadan delicacies:

3. Humaira, an another Hyderabadi food blogger has sent:

4. Yasmeen, the Hyderabadi healthnut has contributed:

5. Varunavi, fellow Hyderabadi food blogger sends her Shikampuri Kabab.

6. Muneeba also sends her delectable Zucchini Pakoras or Pancake.

7. Not to forget, the following the my entries for the event:

For more choices, refer to the Recipe Index on my blog.

All those who were unable to send me their entries this year, feel free to send me your Hyderabadi Ramadan delicacies for the coming Ramadan 2010 inshallah.

Here are some amazing pictures of Ramadan 2009 from all around the world.

Cheers!

Enjoy,
Mona

AddThis Social Bookmark Button

Announcing ‘Hyderabadi Ramadan Food Festival ’09’ (Season I)

July 1st, 2009 Mona Posted in Blog Events/Entries/Polls, Eid/Ramadhan/Iftaar, Hyderabadi special 21 Comments »

Inshallah Ramadan 2009 is not very far from now. It is only a matter of around 50 days from today, that the barakat ka maheena~Ramadhan will inshallah commence.

Food is an important part of Ramadan. The daytime in Ramadan is spent fasting, and after dawn, the fast is broken and traditional treats and memorable feasts are cooked up and served.

I announce the event ‘The Hyderabadi Ramadan Food Festival’ and invite all Hyderabadis from all around the world to join and participate in the celebrations of Ramadan, by preparing and sending me as many traditional family Hyderabadi Ramadan delicacies that you prepare in Ramadan for your family.

Above is the logo that I have created for the event. Hyderabadi bloggers who are participating can use the logo.

Each year I plan to host this event on my blog two months before Ramadan commences so that people can try and prepare the dishes in Ramadan, that you all have sent me for the event when I publish the grand Roundup of all the entries in the first week of Ramadan. (Update: This has changed. I am no longer hosting this event two months before Ramadan. From Season II onwards, I will inshallah announce this event each year just before Ramadan commences and post the round up after Eid-ul-Fitr, so that you can all send me your recipes throughout Ramadan as and when you are preparing them)

The rules of the event are as follows:

1. Both bloggers as well as non-bloggers can send me Hyderabadi special recipes of the food with pictures that you prepare in Ramadan for your family, for both Iftaar and Suhur (snacks, curries, etc).
2. There is no limit to the number of entries per person. Bloggers should link their post to this announcement page. Mail me the entries to zaiqa.mona@gmail.com by 20th August ’09 with following details :

  • Your Name and blog/website title (if you have one)
  • Recipe link (non-bloggers include the complete recipe)
  • A Picture of the food (300 pixels width)

I will not accept entries once Ramadan starts. Inshallah I will post the round-up of all the recipes I have received in the first week of Ramadan 2009.

Update: The grand round-up of all the entries has been published here. Enjoy the delicacies!

Luv,
Mona

AddThis Social Bookmark Button

Baghare Baingan

September 19th, 2008 Mona Posted in Blog Events/Entries/Polls, Canola Oil, Cilantro/Kothmir (fresh), Coriander seeds, Cumin seeds/Zeera, Curry leaves (fresh), Dry Desiccated Coconut, Eggplant/Baingan, Eid/Ramadhan/Iftaar, Ginger-Garlic paste, Groundnut/Moomphalli, Hyderabadi special, Poppy seeds/Khus-Khus, Red Chilli powder, Salt/Namak, Tamarind/Imli, Turmeric/Haldi, Vegetables/Tarkariyaan, Yellow Onion/Pyaaz 38 Comments »

‘Baghare Baingan’ (in Urdu) when translated into english language means ‘Tempered Eggplants’. Baghaar or tempering is an Indian process of flavoring the oil with spices which is used in the preperation of a curry to impart added taste and aroma.

Aubergines, Peanuts and a large sized Onion (One of the Aubergines has an ‘X’ shaped incision at its base)

This is a lovely and delicious brinjal side dish, a hallmark and peculiar to the state of Hyderabad, usually seen being served at Daawat – weddings, parties and large gatherings. It is generally had as a side dish along with Biryanis or some people even enjoy it along with a Roti/Paratha.

Baghare Baingan – Tempered Aubergines in a rich Sauce

The eggplants are cooked twice, once they are shallow fried and then later simmered in a fragrant sweet and spicy sauce of sauteed onions and roasted spices. The tamarind imparts a tangy kick to the sauce consisting of roasted nutty and buttery peanuts, poppy seeds and coconut, a range of aromatic spices and caramelized onions.

Only Indian eggplants that are small, shiny deep purple and fresh are used for this curry. These are easily available at many Indian stores. Brinjal/Eggplant/Aubergines or Baingan are not a favorite of many people, but I suggest you all try this dish once and you will definitely love it. It is one of the best aubergine dishes I have ever had.

The procedure to prepare Mirchi Ka Salan or Tamatar ka Salan is also almost the same as this curry. Also, you can also add any firm fish fillets (Red snapper, Haddock, Cod, etc) to the gravy instead of brinjal to make it a fish curry/Machli ka Salan; or halved tomatoes to the gravy to make it Tamatar ka Salan. There is no difference, except for the fact that in Mirchi ka Salan, green chillies are used; in tomato curry, tomatoes are used; in fish curry, fish fillets are used; and in this curry, the brinjals are used.

Baghare Baingan – Tempered Aubergines in a Spicy Nutty Tangy Sauce
Cooking time: around 45 minutes; Serves: 6

Ingredients:

Eggplants/Baingan – 6-8, indian variety~small sized, fresh, and deep purple in colour
For dry masala paste:
Khus Khus/White Poppy seeds – 1 tbsp
Till/Sesame Seeds – 1/2 cup/50 gms
Peanuts/Groundnuts/MoomPhalli – 1/2 cup/50 gms
Dry Desiccated Coconut – 3/4 cup/50 gms
Coriander seeds/Dhania – 1 tsp
Cumin seeds/ Zeera – 1 1/2 tsp
For baghaar/tempering:
Cumin seeds/ Zeera – 1 tsp
Curry leaves/ Kariyapaak – 2 sprigs
Mustard seeds/ Rai – 1/2 tsp
Nigella seeds/ Kalaunji – 1/3 tsp
Fenugreek seeds/ Methi dana – 1/8 tsp
For gravy:
Canola oil
Yellow Onions – 4, large, sliced slightly thick into semi circular rings
Ginger garlic paste – 2 tsp
Salt – 1 tbsp
Red Chilli Powder – 2 tsp
Turmeric/ Haldi – 1/4 tsp
Cilantro/ Kothmir – 2 tbsp, finely chopped
Thick tamarind pulp – 4 tbsp

Method:

1. Wash the eggplants and make four incisions, perpendicular cuts (an X) from the base of each eggplant, taking care the stem end is intact. Soak them in a bowl of cold water with 1tbsp salt to prevent discoloration. Keep aside. In a kadai pour oil to deep fry. When the oil is hot, drain the brinjals. Deep fry the brinjals for about 10-15 minutes until they are tender and well cooked. Gently remove them in a platter and keep aside.
2. Heat a small non-stick frying pan or a cast iron skillet at medium high heat and once it is hot, dry roast the desiccated coconut, sesame seeds, khus khus, peanuts, coriander seeds and cumin seeds, all one by one separately for just 2-3 minutes until they are a few shades darker and remove them into separate bowls. Do not burn the spices. Once cool, rub off the skins of the peanuts. Grind them all separately in a spice grinder to a fine powder or a smooth paste without adding any water and keep aside.
3. Heat a large non-stick frying pan or a cast iron skillet at medium high heat, and as soon as it warms up add the sliced onions. Let the onions sweat and keep stirring them until they are just starting to brown up. Once the onions are soft and lightly browned in color, remove them to a platter and keep aside. Once the dry roasted onions are cool, puree them in a grinder until smooth. Keep aside.
4. Heat 1/4 cup oil in a heavy non-stick pan at medium heat and as soon as it is warm, add the ingredients under the heading ‘for baghaar’ – cumin seeds, mustard seeds, curry leaves, nigella seeds and fenugreek seeds. Let the spices splutter for a minute. Then add the pureed roasted onion paste and immediately cover the pan with a lid for a minute. Lower the heat to medium low and shake the pan to thoroughly mix. This is done for the mixture to absorb all the flavour from the baghaar(tempering). Uncover, lower the heat and add ginger garlic paste and fry for 3-4 minutes. Add the desiccated coconut paste, sesame seed paste, khus-khus paste and peanut paste and stir fry it for 2-5 minutes or until you see that the mixture comes together and starts leaving oil. Add the red chilli powder, salt and turmeric. Mix well and keep stir frying it for a further 2 minutes on medium low heat. Once the raw odor of the peanuts, ginger-garlic paste and coconut is no longer coming, add the dry roasted coriander and cumin seed powder and chopped cilantro and mix well. Pour in 3 1/2 cups warm water and the tamarind pulp. Mix well. Add the fried brinjals and stir. Cover the lid and let cook on simmer for 20-25 minutes while stirring frequently, until the oil has all separated and the brinjals are soft and completely done in the masala gravy. Remove from heat and serve the curry along with Pulao or Biryani or Naan.

Suggested Accompaniments: Biryani, Roti, Paratha

Varieties of Eggplant

This goes to the Monthy Mingle event currently being hosted by Ruth. The theme this time is Sensational Sides, and Baghare Baingan fits perfectly for the title of the event.

Inshallah my next post is going to be the round up for RCI:Authentic Hyderabadi Cuisine which I will publish in just a few days from now. So keep checking on it. Take care of yourselves everyone and Have a good weekend!

Luv,
Mona

AddThis Social Bookmark Button

Kachchi Aqni ki Dum Murgh Biryani

August 23rd, 2008 Mona Posted in Almonds/Badaam, Basmati Rice/Chawal, Blog Events/Entries/Polls, Canola Oil, Caraway seeds/Shahzeera, Cardamom/Elaichi, Cashewnuts/Kaaju, Cilantro/Kothmir (fresh), Cinnamon/Dalchini, Clove/Laung, Coriander seeds, Cumin seeds/Zeera, Dry Bay Leaf/Tej Patta, Egg/Anda, Eid/Ramadhan/Iftaar, Garam masala powder, Ghee, Green Chillies, Hyderabadi special, Lemon/Nimbu, Milk and Milk Products, Mint/Pudina (fresh), Poultry/Murgh, RCI:Authentic Hyderabadi Cuisine, Red Chilli powder, Rose water/Gulab jal, Saffron/Zafraan, Salt/Namak, Tomato/Tamatar (fresh), Turmeric/Haldi, White Potato/Aloo, Yellow Onion/Pyaaz, Yogurt/Dahi 69 Comments »

Note – Read the whole post very carefully (also watch the video link I have posted at the end of the post) before you try preparing the Biryani, Please do not be overwhelmed by the length of the post. I have tried to explain each and every step briefly and as efficient as possible. Do write to me, if you have any queries. I will be glad to help you out.

Biryani is one of the most famous Hyderabadi one-dish meals craved and devoured by people from all over the world. The basic process of preparing Biryani involves the layering of raw marinated or cooked meat along with half cooked long grained aromatic Basmati rice, and a range of fresh spices and herbs for exceptional flavor and aroma.

Basically, there are two kinds of Biryani: Pakki Biryani, and Kachchi Biryani.

Pakki Biryani: where are half Basmati cooked rice is layered along with completely cooked chicken or lamb meat and then cooked till done on slow heat on dum.
1. Pakki Gosht ki Biryani
2. Pakki Murgh Biryani

Kachchi Biryaniwhich is the true Hyderabadi Biryani – where are half cooked Basmati rice is layered along with raw marinated meat and then finished on slow heat till done on dum.
1. Kachchey Gosht ki Biryani
2. Kachche Aqni ki Dum Murgh Biryani (which I am writing about today)

The preparation process of Kachchi Biryani is rather simple compared to the Pakki Biryani. In Kachchi biryani all you have to do is to marinate the chicken for overnight preferably and the next day layer it along with half cooked Basmati rice and leave it cook on slow heat/dum until completely done; whereas in Pakki Biryani you have to stand in front of your stove attending the chicken as it cooks completely, and then layer it with half cooked Basmati rice and finish it until done on slow heat/dum.

As you use the raw marinated chicken in this method, while you slow cook the Biryani on dum, the flavor of the chicken intensifies and infuses with the rice and other aromatic fresh herbs and spices giving you a heavenly aroma in the end which will fills your kitchen and your entire house.

*****

Here is the outline of the steps involved in the preparation, so that it is simpler for you all to understand the detailed method, follow these steps while you prepare the Biryani:

Outline of the steps:

Day 1:
Marinate Chicken.
Day 2:
1. Add Fried onions to the Marinated Chicken.
2. Give a smoked flavor to the Marinating Chicken with Fried Onions (
optional, but gives a very good flavor to the Biryani).
3. Prepare Basmati Rice, also called as Adhaan.
4. Arrange layers and garnish.

*****

The Detailed method:

Kachchi Aqni ki Dum Murgh Biryani
Serves – 8-10Day 1Marinate Chicken:

Chicken marinating in a bowl

Ingredients:

Chicken – 1.4 kg, with bone, cut into medium size pieces
Red chilli powder – 1/2 tsp
Green chilli paste – 1 1/2 tsp
Salt – 2 tsp
Turmeric/Haldi – 1/2 tsp
Tomato – 2, medium sized, pureed (optional)
Ginger-Garlic/Adrak-Lahsun paste – 2 tbsp
Yogurt – 2/3 cup, lightly whipped
Freshly squeezed Lemon Juice – 1/2 cup
Garam masala – 2 tbsp
Green Cardamom powder – 1 tsp
Dry roasted Cumin seed powder – 1 tsp
Dry roasted Coriander seed powder – 1 tsp
Fresh Cilantro and Mint – 2 tbsp, roughly chopped

Method:

In a large bowl marinate the chicken with all the ingredients. Make sure all the pieces of chicken are coated in the marinade. Cover and leave in the fridge overnight.

Day 2.

1) Adding Fried onions to the marinated chicken:

Ingredients:

Canola Oil – 3/4 cup
Finely sliced Yellow Onions – 800 gms
Salt – 1 tsp

Method:

1. Remove the marinating chicken from the fridge and let it come to room temperature.
2. Meanwhile, pour oil into a large non-stick frying pan at medium high heat. As soon as it gets warm, throw in the sliced onions and add salt. Stir fry until they are evenly golden brown in color. Make sure they do not burn them. Using a slotted spoon, remove the onions from the oil into a platter. Divide the fried onions into two equal parts and add one half of the fried onions to the marinating chicken and mix well. Spread the other half on a tissue lined platter to be used later for garnish, until cool. Once they are cool, they crisp up. Also divide the oil in which the onions were fried into two equal parts. Add one part of the oil into the marinating chicken and mix well. Reserve the other half to be added to the rice as the top layer along with garnish later on.

2) Give a smoked Flavor to the Marinating Chicken (optional step, but gives a really good flavor to the Biryani. I recommend you try this atleast once. Skip to the step 3 if you want to avoid)

Ingredients:

3 or 4 Burning Charcoal briquettes
Canola oil/Ghee – 1 tsp
Disposable aluminium foil tray/loaf pan

Method:

1. Make a well in the center of the marinating chicken in the bowl so that the mini aluminium loaf pans fits into it perfectly. My Ammi uses an onion skin for this purpose. With the help of tongs, carefully put the burning charcoal briquettes into the aluminium loaf pan.
2. Pour about a teaspoon of oil/ghee onto the charcoal. You will see that dense fumes start forming.
3. Immediately cover the bowl with a lid, so that the fumes do not escape. Keep it aside until you prepare the rice.

3) Preparing Basmati Rice/Adhaan:

Ingredients:

Long grained Basmati Rice (preferably ‘Lal Qilla’ Brand) – 4 cups, presoaked in water for 30 minutes
Salt – 3 tsp
Bay leaf/Tej Patta – 1
Cloves – 3
Green cardamom – 4
Cinnamon stick – 3/4 inch
Caraway seeds/Shah Zeera – 1 1/2 tsp
Water – 9 cups

Method:

1. Wash the rice and soak it in surplus water for about 30 minutes.
2. In a large cooking pot pour in water along with cloves, bay leaf, cardamom, cinnamon, caraway seeds and salt. Give it a stir, cover and let it come to a boil. (While the rice is boiling, follow the steps below under ‘Arranging layers and Garnish’ until step 4 and be ready)
3. Once boiling add the rice and mix gently, let the rice cook until it is half done, 2-3 minutes. Drain the rice and keep aside.

4) Arranging layers and Garnish: (Work fast while the rice is still hot! and try not to let the rice cool down)

Ingredients:

Marinating Chicken
Boiled, Quartered and shallow fried Potatoes – 2 cups (optional)
Mint leaves/Pudina – 1/2 cup, loosely packed, roughly chopped
Half cooked rice prepared earlier
Cilantro/Kothmir – 1 cup, loosely packed, roughly chopped
Ghee – 2 tsp (optional)
Reserved Fried Onions for garnish
1/4 Saffron strands, crushed and steeped in 1/4 cup warm milk
Rose water/Gulab Jal – 1 tsp (optional)
Green Cardamom seed powder – 1/2 tsp (optional)
Toasted Almonds and Cashewnuts – 1/2 cup total (optional)
Shelled Hard Boiled Eggs – 6-8 (optional)
Dough to seal the edges of the Casserole dish (optional)

(I use the ingredients stated as ‘optional’ only during parties when guests are invited)

Method:

1. Preheat the oven to 550°F (only if using an oven to prepare it on Dum, read below)
2. Carefully lift the loaf pan containing the charcoal briquettes from the marinating chicken, and discard it.
3. In a heavy bottomed casserole dish (which can be used in Oven-if using the Oven method (or) which can be used on stove-top-if using the Stovetop method – read below), arrange the marinating chicken along with all its juices in a single layer. Do not crowd it. (Use two casserole dishes if needed)
4. Spread the chopped mint leaves and the shallow fried potatoes (if using) over it.
5. Now add the drained warm half cooked rice prepared earlier and spread it nicely to cover the chicken all over. Reserve about 1 1/2 cups cooked rice for the top most layer.
6. Next, spread the chopped cilantro, toasted almonds and cashewnuts, hard boiled eggs (if using), reserved fried onions, cardamom seed powder and pour ghee (if using) and the saffron soaked in milk and rose water all over the rice. Add the 1 1/2 cup reserved rice and spread as the top most layer to cover evenly. Now pour the reserved oil in which the onions were fried evenly all over the rice.( I do not add fried onions over the top layer of rice to avoid getting the onions and herbs blackened or burned by steam).
7. Cover the dish with an aluminium foil or a tight lid (or) seal the edges with a dough and cover with the lid tightly, you can use some weight over the lid, so that no steam escapes.

Lid sealed with dough and being cooked on stovetop

If using an oven to cook:
Put the sealed casserole in the preheated oven at 550°F for 20 minutes. Later, lower the heat to 300°F and leave the casserole dish in the oven for about 30 minutes. Remove from dish from oven once done.

If you are cooking on stove top:
1. Take a flat Dosa Tawa or a griddle pan and put it on the stove at high heat. As it gets warm, put the casserole dish on the tawa and let it cook for about 5 minutes on high heat.
2. Later, lower the heat to medium and let it cook for about another 15 minutes.
3. Now, reduce heat to very low and let cook for another 15-20 minutes and your Biryani will be done by now.

Once done, let the dish rest for 30 minutes. Later, open the lid and a heavenly aroma fills your house inviting all your house members. Carefully dig your spoon deep into the casserole dish until it touches the bottom, and gently mix the rice with the chicken until it is all completely mixed. Serve immediately.

Tip: Adding salt to the water in which you cook rice is essential, or else the whole taste of Biryani turns upside down. One tip if you have forgotten to add salt to the water while boiling rice is – stir the required amount of salt in a little quantity of hot water, about half cup or a few tablespoons, and pour this on the biryani evenly. Warm the biryani in microwave and serve immediately.

Suggested accompaniments: I enjoy my Biryani with Mirchi Ka Salan or Baghare baingan and Dahi ki Chutney as a side dish, and glass of chilled coke alongside. Yumm-O!

Note: You can also go through this video of ‘Khan Biryani’ showcased by VahChef, one of my favorite chefs, to get an idea on how to prepare Kachchi Murgh Biryani. His method for Khan Biryani is a bit different but quite interesting though.

I shared this recipe as part of the RCI:Authentic Cuisine of Hyderabad Event that I am hosting this month on my blog.

Be sure to read all the rules for the event and drop me your entries. The last date to send me your entries is September 15th’ 07.

Luv,
Mona

AddThis Social Bookmark Button