A week back, I had lost all hope of blogging again on Zaiqa and the world seemed profoundly altered to me. Someone had probably hacked my blog and installed a new wordpress on it. Thankfully, I was able to retrieve it all, and I thank my god immenesely for that. I wish that no blogger has to go through such agony ever.

Chocolate Cake
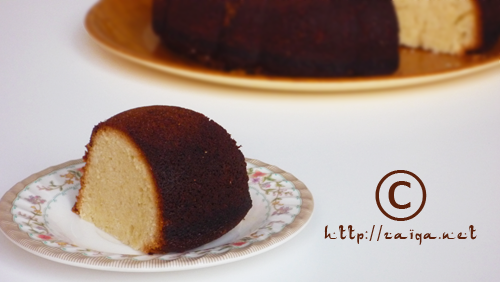
I decided to bake a rich chocolate cake to celebrate the the recovery of my blog with you all. I always bake this lovely dense chocolate cake for parties and other occasions and it is always loved by everyone. Who doesn’t love a delicious chocolate cake?
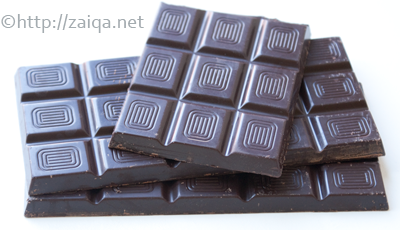
Bittersweet Chocolate
Basic Chocolate Cake
Recipe adapted from: Cakes – 1,001 recipes from around the world
Ingredients:
Bittersweet Chocolate – 9 oz
All-Purpose flour – 2 cups
Unsweetened Cocoa powder – 1/3 cup
Baking powder – 2 tsp
Baking soda – 1/2 tsp
Salt – 1/4 tsp
Butter – 1 cup, softened
Granulated Sugar – 2 1/2 cups
Eggs – 4, large
Milk – 1/2 cup
Canola oil – 2 tbsp

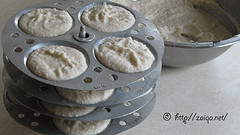
Chocolate cake Batter ~ yummy
Method:
1. Preheat the oven to 350 C
2. Butter and flour a 9-inch springform pan.
3. Melt the chocolate in a double boiler over barely simmering water. Set aside to cool.
4. Sift the flour, baking powder, baking soda, cocoa and salt into a large bowl.
5. Beat the butter and sugar into a large bowl with a electric mixer at medium speed until creamy. Add the eggs, one at a time, until just blended after each addition.
6. With mixer at mow speen, gradually beat in the dry ingredients, alternating with chocolate, milk and oil.
7. Spoon the batter into the prepared pan. Bake for 50-60 minutes, or until a toothpick inserted into the center comes out clean.
8. Cool the cake in the pan on a rack for 15 minutes. Loosen the sides and let cool completely. You can store the cake for 3-4 days.
This goes to CFK: Chocolate event being hosted by Hema at her blog.
Luv,
Mona