BlueBerry Muffins

May 12th, 2008 Mona Posted in All-Purpose Flour/Maida, Baking powder, Blueberry, Butter/Makhan, Cereal Grains, Egg/Anda, Flours/Aata, Fruits/Phal (fresh), Milk and Milk Products, Orange/Santra, Salt/Namak, Spices & Seasonings/Masaale, Sugar/Shakkar 22 Comments »

There’s colour everywhere finally after a long peroid of snow when you only get to see endless sheets of white everywhere. That is a beauty in itself too. I love the seasons in Canada. Each has its own splendour and gorgeousness. Its spring here, with frequent showers of rain and colorful blooms on almost every tree. The markets are also full of fresh produce and lots and lots of fruits and vegetables. I happened to find some Blueberries a few days back and thought of preparing some muffins. 

Blue Berry Muffins and a mup of Warm Coffee

Any kind of blueberry-frozen or unfrozen, is good for you. The fruit is filled with immune-boosting Vitamin C and antioxidants said to improve brain function. Research shows that blueberries can help to increase the number of cells in the area of the brain responsible for memory.

Blue Berry muffins are my favorite breakfast for a change. These muffins were soft and delicious. I had them along with a mup of warm coffee. And as the author of New Baking Book from which I have adapted this recipe says:

There’s nothing better than a fresh-baked blueberry muffin with your favorite cup of coffee or tea.

I totally agree!

Ingredients:

  • All-Purpose Flour – 2 cups
  • Granulated Sugar – 1 cup
  • Baking Powder – 2 1/2 tsp
  • Salt – 1/2 tsp
  • Eggs – 2, beaten
  • Milk – 3/4 cup
  • Melted Unsalated Butter or Cooking Oil – 1/2 cup
  • Orange Zest – 1 tbsp
  • Fresh or Frozen blueberries – 1 cup, thawad
  • Coarse Sugar (optional)

Method:

  • Grease twelve 2 1/2-inch muffin cups for medium size muffins or you can grease six 3 1/2 inch muffin cups for giant size muffins. Set aside.
  • In a medium mixing bowl combine flour, granulated sugar, baking powder and salt. Make a well in the centre of the dry mixture; set aside.
  • In an another medium mixing bowl combine eggs, milk, butter or oil, orange zest. Add egg mixture all at once to the dry mixture. Stir just until moistened (batter should be lunpy). Fold in buleberries.
  • Spoon batter into the prepared muffins cups, filling each almost full. If desired sprinkle tops with coarse sugar. Bake in 350 oven for about 35 minutes or until golden. Cool muffin cups; serve warm.

Suggested Accompaniments: Along with a cup of warm Tea or Coffee for a filling breakfast.

I am sending this as an entry to Mansi who is hosting the Monthly Mingle:Appetizers & Hors’Doeuvres as she requested me to,. So here it is Mansi, all the way to you!

Also, I had been awarded the Yummy Blog Award by Meeso recently and I am delighted to recieve it.

“Yummy Blog Award is the award given to a blog with the most yummy recipes/photos”

And now according to the rules of this Award, I have to quote here my favorite dessert which I have prepared/eaten. My favorite desserts would be:

  1. Qubani Ka Meetha with Vanilla Icre-Cream
  2. Black Forest Cake
  3. Caramel Custard Pudding
  4. Trifle Pudding with dry fruits
  5. Ande Ka Meetha
  6. Cheesecakes

I now pass on this award to:

Leisure Reding: An article on Hyderabadi cuisine by a Toronto newspaper 

Luv,
Mona

AddThis Social Bookmark Button

Idli anyone?

April 17th, 2008 Mona Posted in Baking powder, Basmati Rice/Chawal, Black Gram/Urad Dal, Canola Oil, Dals (Pulses & Legumes), Eid/Ramadhan/Iftaar, Food Additives, Hyderabadi special, Idli rawa, Salt/Namak, Simple Kitchen Tips, Spices & Seasonings/Masaale, Vegetables/Tarkariyaan 14 Comments »

Idli, also spelled as Idly or Iddly is a food native to Southern India. It is the most favorite South Indian breakfast next to Dosa, Wada and Samabar. Idlis have been compared to the moon and jasmine flowers in literature. They are steamed cakes of dehulled black gram dal and cream of rice or wheat. These soft and fluffy cakes are easy to digest and rich in proteins and carbohydrates. They are prepared in many hotels, homes and restaurants almost every day for the morning breakfasts especially in South India and elsewhere too. It is a healthy and nutritious probiotic pure South Indian breakfast.

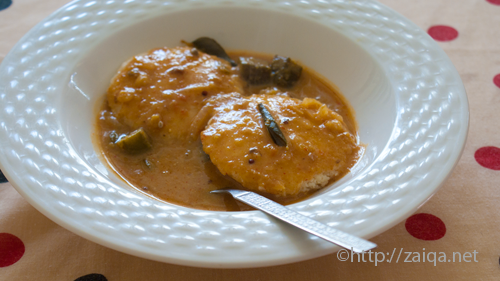
Idlis served along with Sambar generously poured over them

The ‘Idli Rawa‘, which is the cream of rice or wheat is available in any Indian stores. The Idli mould is also easily available in most of the Indian stores, and are sold in almost every stainless steel utensils shop in India. The Idli plates in a Idli mould have depressions  to pour the batter in those. These depressions vary in sizes in different stores. I have a medium size Idli mould which is perfect for my family.

To prepare Idli, I start its preperation from a day ahead. Like for example if I plan to prepare it on Sunday for breakfast or brunch, I start its preparation from Saturday morning. On the Saturday morning, I wash and soak the urad dal in plenty of water, and before I go to sleep in the night I drain away the water and grind the dal well, then mix it with the washed idli rawa in a bowl and keep the bowl in a warm and dark place to ferment night long. Then on Sunday morning the fermented batter is ready to prepare yummy Idlis. I use equal amounts of idli Rawa and dal for Idli preparation.

Idli – Steamed Rice-Lentil Cakes
Makes : approx 40 Idlis

Ingredients:

Urad Dal (or) Mask ki dal/Split husked Black gram – 1 1/2 cups
Cream of Rice (Idli Rawa) – 1 1/2 cups
Baking powder – 1/2 tsp
Salt –  1 tablespoon
Canola Oil – to grease the Idli Plates

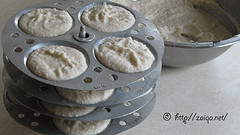
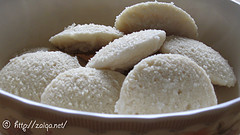
Idli batter in the Idli Mould & Cooked Served Idlis

Method:
(Note: Read the entire post before you proceed to prepare the Idli)

1. Wash the Urad dal in several changes of water and soak it in surplus water for about 6-8 hours. Later, drain the dal. In a wet grinder, or a food processor, blend the Urad dal adding just a little of water to aid in the blending to a very smooth and fluffy paste. Do not add to much water, it should be added just so that the mixer/grinder motor runs smoothly. The fluffier the batter, the better it is, so grind well for 10-15 minutes. Transfer the batter to a very large stainless steel mixing bowl (as the batter will ferment and rise and overflow if the container is small).
2. While the urad dal is grinding, wash the idli rava with water about 2-3 times and drain it completely. There is no need to soak the idli rava in water. Make sure no excess water remains after draining the water. Add this to the urad dal batter. Also add baking powder and mix it all completely using a spoon without any lumps. The batter should be as thick as possible. Cover and leave the batter undisturbed overnight so that it ferments and doubles in size. If you are not living in India or live in cold temperature places, you could use the oven to ferment the batter: Set the oven on to minimum (lowest setting/warm) for about 5-10 minutes, then turn it off. Cover and keep the mixing bowl with the batter in the warmed oven so that it ferments for about 8-15 hours or overnight.
3. The next morning the batter should have fermented well and the volume almost doubled. Once the batter has risen it can be used immediately to prepare idlis. If you are not going to make idlis immediately, store the batter in the refrigerator or else the idlis will be very sour. Add salt to the batter and mix it well. The consistency of the batter should be like condensed milk, not too thick nor too thin. You can add more water if needed to achieve that consistency.
4. Grease all the Idli plates with a few drops of oil and pour about 2-3 tablespoon of batter in each depression in the Idli plates.
5. Before filling the idli plates, add some water in a large pressure cooker and switch on the stove. So by the time you are done with the batter the water will start boiling and you can place the idli stand in the cooker and close the lid. Make sure the water does not touch the lowest idli plate in the stand. The water level in the pressure cooker should be well below it. Close the lid of the cooker and do not put the weight on it. In about 10 minutes you will see steam escaping from the vent of the cooker. Using an oven mitt remove the idli stand from the cooker and place it on the countertop. Scoop the Idlies out of the plates using a spoon in a big serving bowl. Cover the serving bowl with lid to keep the idlis warm. Repeat this process with the next batch adding water to the cooker as necessary until the batter is all used up.

Suggested Accompaniments: Serve them hot along with Sambar, Coconut chutney, Hara Dhaniya aur Pudina Ki Chutney at breakfast or as a brunch or a snack.

Tips:

  1. If you live in warmer places, you need not add baking soda to the batter.
  2. If you live in a cold place,  it happens that the batter has not fermented at all. If the batter has not fermented and doubled in size by next day, do not use it for Idli. Instead make Dosa out of it.
  3. If you do not find Cream of Rice, you can even use Cream of Wheat as the Idli Rawa.
  4. This is the basic recipe for the prepartion of Idli. You can alter it by adding a few chopped french beans, carrots, cilantro to the batter.
  5. Adding a dollop of butter to the steamed idlis while having them hot along with sambar makes it even more delectable.
  6. These Idli moulds are the traditional methods to prepare Idli at home. If you are somehow not able to find the Idli Mould, you can use little metal bowls which can be kept in a steamer or an egg poacher or tiny aluminium molds for cakes and muffins. I have however never used these. I only use the Idli Mould each time I prepare Idli.
  7. You don’t need a pressure cooker for steaming idlis. Simply use any vessel with a vent on the lid which is big enough to fit the idli plates stand you are using. Add some water to the vessel and heat it while you fill the batter. Place the stand inside the vessel and close it with a lid. If the lid does not have vent for the steam to escape, leave a small portion of the vessel open. Steam it for 10-15 minutes. Insert a toothpick or a knife in the center of the idli and if it comes out clean the idlis are ready. Switch off the stove and serve it after a couple of minutes.
  8. You can even freeze the leftover idlis to be used some other day. Simply place cooled idlis on a tray seperately and let them freeze for 3 hours. Once frozen, transfer them all to a zip lock freezer bag and store until needed. When you want to have them, simply place the frozen idlis in a plate and microwave for 2 minutes approx.

Luv,
Mona

AddThis Social Bookmark Button

Fettuccine in Creamy Coconut Milk

April 12th, 2008 Mona Posted in Blog Events/Entries/Polls, Canola Oil, Capsicum, Cereal Grains, Coconut milk, Cornmeal, Eid/Ramadhan/Iftaar, Fats and Oils/Tel, Garam masala powder, Light Cream, Milk and Milk Products, Mushroom, Onion/Pyaaz, Pasta & Noodles, Red Chilli powder, Salt/Namak, Spices & Seasonings/Masaale, Tomato/Tamatar (fresh), Vegetables/Tarkariyaan, Yellow Onion/Pyaaz 13 Comments »

Pasta is loved by everyone, and i believe it is one of those simplest one dish meals one can think of which is also everyone’s favorite for times when you have to serve the meal in less than 35 minutes. This is one such dish that i prepare using the usual ingredients and turns out to be a great hit with my loved ones.

This is my lovely Sisters recipe. She taught me this recipe and i prepare this along with any noodles that I have in my house. I also serve it along with Chicken Tikka, Salmon Tikka or Lamb Tikka. Children will especially devour upon it, and the elders too.  


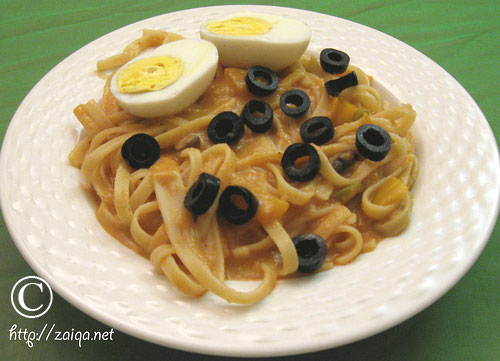
Fettucine in Creamy Coconut Milk 

Coconut Milk here makes a creamy sauce giving it a rich golden colour. Its healthy and nutritious.

Fettucine in Creamy Coconut Milk  

Ingredients:

To Prepare Sauce

  • Canola Oil – 4 tbsp 
  • Yellow Onions – 2, thinly sliced
  • Tomatoes – 1, large, finely diced
  • Red Chilli Powder – 2 tbsp
  • Salt – 2 tbsp
  • Garam Masala – 1 tbsp
  • Cornmeal – 2 tbsp
  • Coconut Milk – 3 tbsp
  • Light Cream – 1 tbsp
  • Water – 2 cups approx
  • Green Capsicum – 1, chopped
  • Red Capsicum – 1, chopped
  • Cremini Mushrooms – 100 gms, sliced

To Prepare Pasta 

  • Fettuccine Noodles – 500 gms
  • Water – 5.5 litres
  • Salt – 1 tbsp

Method:

  • In a heavy non-stick saucepan at medium high heat, pour in oil and as soon as it warms up, add the sliced onions and sauté them till they are light brown in colour. Add the chopped tomatoes, red chilli powder, salt and garam masala. Mix and let it cook on medium heat till the tomatoes are mushy.
  • Transfer the mixture to a blender container and add cornmeal to it. Blend till pasty.
  • Pour this paste back in the same pan and let it cook till oil seperates.
  • Add Coconut milk, cream and water to it. Let it cook for 3 minutes.Throw in the chopped red and green capsicums and mushrooms. Bring to a boil at medium high heat.
  • Meanwhile in a large saucepan , pour water and add the remaining salt to it. Bring it to a boil and add the pasta and stir until water again returns to a boil. Cook uncovered for 9 minutes stirring occassionally or until al dente. Drain.
  • Mix the drained pasta with the prepared Coconut milk sauce in the saupan and cook on low heat for 3 minutes.

Suggested Accompaniments: Serve it hot along with Boiled halved Eggs, and sliced Black Olives, Chicken Tikka or Lamb Tikka or Salmon Tikka, Chicken Croquettes, Pan Grilled Chicken Mustard, Grilled Sweet Chilli Chicken.

Luv,
Mona

AddThis Social Bookmark Button

Pakki Gosht Ki Biryani, and Dahi Ki Chutney

March 4th, 2008 Mona Posted in Almonds/Badaam, Basmati Rice/Chawal, Blog Events/Entries/Polls, Butter/Makhan, Canola Oil, Caraway seeds/Shahzeera, Cereal Grains, Chutneys and Pickles, Cilantro/Kothmir (fresh), Eid/Ramadhan/Iftaar, Fats and Oils/Tel, Fruits/Phal (fresh), Ghee, Ginger-Garlic paste, Green Chillies, Hyderabadi special, Lamb/Beef/Mutton/Veal/Sheep, Lemon/Nimbu, Milk and Milk Products, Mint/Pudina (fresh), Non-Vegetarian/Gosht, Onion/Pyaaz, Raisins/Kishmish, Red Chilli powder, Red Chilli/Lal mirch, Saffron/Zafraan, Salt/Namak, Spices & Seasonings/Masaale, Sunflower oil, Tomato/Tamatar (fresh), Vegetable Oil, Vegetables/Tarkariyaan, Yellow Onion/Pyaaz, Yogurt/Dahi 25 Comments »

Dear readers, today I present you with renowned Hyderabadi Lamb Biryani. Biryani is one of the most famous Hyderabadi one-dish meals craved and devoured by people from all over the world. The basic process of preparing Biryani involves the layering of raw marinated or cooked meat along with half cooked long grained aromatic Basmati rice, and a range of fresh spices and herbs for exceptional flavor and aroma.

Basically, there are two kinds of Biryani: Pakki Biryani, and Kachchi Biryani.

Pakki Biryani: where are half Basmati cooked rice is layered along with completely cooked chicken or lamb meat and then cooked till done on slow heat on dum.
1. Pakki Gosht ki Biryani
2. Pakki Murgh Biryani

Kachchi Biryaniwhich is the true Hyderabadi Biryani – where are half cooked Basmati rice is layered along with raw marinated meat and then finished on slow heat till done on dum.
1. Kachchey Gosht ki Biryani
2. Kachche Aqni ki Dum Murgh Biryani

Biryani always reminds me of my wedding, when I wore a very beautiful Khada Dupatta. It was on that day that I had best Biryani ever! This dish is so important in the Hyderabadi Muslim community that it is served along with Mirchi Ka Salan and Baghare Baingan and Dahi Ki Chutney, as the main dish at almost all gatherings, occasions, parties, all kinds of merry making get togethers. Essentially all weddings in Hyderabad are suposed to have Lamb Biryani and Mirchi Ka Salan in the menu.

My lovely sister had prepared this dish on the weekend. We were all in a mood to treat our family and ourselves with something special, and we immediately thought of this dish. What could be a more better meal to delight ourselves than this flavorsome fare.
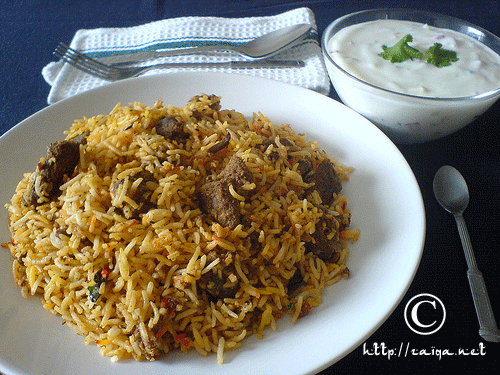
Gosht Ki Biryani, Dahi Ki Chutney

***

Dahi Ki Chutney – Yogurt Chutney
Makes:One small bowl

Ingredients:

Plain Yogurt (low-fat or full-fat)- 375 ml
Salt – 2/3 tsp or according to taste
Thai Red Chillies – 2, chopped (optional)
Green Chillies – 2, chopped
Yellow Onion – 1, medium, finely chopped
Mint leaves – 1/2 cup, finely chopped
Coriander leaves – 1/2 cup, finely chopped
Firm Red Tomato (fresh) – 1, small, deseeded and chopped finely (optional)

Method:

1. To the yogurt in a bowl, add salt and half a cup of water and whip it till smooth, and creamy for approx 2-3 minutes.
2. Add the remaining ingredients and fold them into the yogurt gently. Adjust salt according to your taste and cover the bowl with a plastic wrap.
3. Put it in the refrigerator to serve it later along with Biryani.

You can store Dahi Ki Chutney in the refrigerator in an air tight food storage box for only one more day in a refrigarator, it doesnt last long. It is always better if you have an idea how much your family memebers will have it and you prepare it in only the required amount.

***

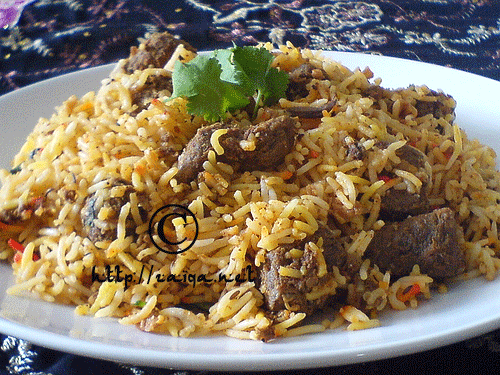
Hyderabadi Dum Pukth Pakki Gosht Ki Biryani – Fragrant Flavored Meat and Rice Casserole
Serves:5-8

Ingredients:

For the Marinade
Canola/Vegetable/Sunflower Oil (or) Butter/Makhan (or) Clarified Butter/Ghee – 90 ml/6 tbsp
Yellow Onion/Pyaz – 2, large, thinly sliced
Lean Lamb leg meat – 1 kg, washed and cubed into 3 cm pieces approx (with bones preferably if available, I have used only boneless here)
Plain Yogurt/Dahi – 500 ml, lightly whipped
Red Chilli Powder/Lal mirch powder – 1 1/2 tsp
Salt/Namak – 1 1/2 tsp
Lemon Juice/Nimbu Ras – 4 tbsp
Garam Masala – 1 tbsp
Turmeric/Haldi – 1/2 tsp
Ginger Garlic paste – 2 tbsp
Water/Meat Stock – 1/2 cup
For the Garnish
Green Chillies/Hari Mirch – 2, each slit into two
Thai Red chillies/Choti Lal Mirch – 2, each slit into two (optional)
Fried Onion reserved for garnish earlier
Mint Leaves/Pudina – 1/2 cup
Cilantro/Kothmir – 1/2 cup
Toasted sliced Almonds/Bareek Kata Badaam – 2 tbsp
Fried Red Raisins and Cashwnuts/Tala-huwa Kishmish – 3 tbsp
Pinch of Saffron threads/Zaafraan soaked in 1/2 cup warm Milk
A dollop of Butter/Makhan or Clarified Butter/Ghee (optional)
For the Rice
Long Grained Basmati Rice/Chawal (preferably ‘Lal Qilla’ Brand) – 4 cups
Salt/Namak – 4 tsp
Black Cumin seeds/Shah Zeera – 1 tsp
Method:

1. Wash and soak the rice in a big bowl for about 30 minutes.
2. In a pressure cooker at medium high heat, fry the onions in oil/butter until they are golden brown in colour. Remove with a slotted spoon on a kitchen towel and reserve half for garnish. Blend the other half in 2 tbsp water inoi a paste.
3. In the same pressure cooker, with oil/butter in it, add the washed cubed meat pieces, Stir fry till the meat has browned on all sides. Add the fried onions paste and the ginger garlic paste and turmeric. Saute them for 2 minutes. Throw in the red chilli powder, salt, garam masala, half cup water, and yogurt. Mix well and pressure cook for about 15-20 minutes until the meat is tender.
4. Meanwhile drain the soaking rice and keep aside. Bring 9 cups of water in a to boil in a large saucepan with Black cumin seeds and salt (do not forget to add salt to the rice!!) in it. As soon as its boiling, add the drained rice and let it cook till the rice grains are just done. Drain and keep aside.
5. Now, open the lid of the cooker and cook the meat mixture well without covering the lid on medium high heat until the meat mixture is done and most of the liquid has dried up. It should be a little bit dry mixture.
Add lemon juice to the meat and mix. Remove from heat.
6. Preheat the oven to 350°F.
7. In a large oven proof baking dish, add half of the rice in a layer at the bottom of the dish. Now add the whole meat mixture in one layer. Then cover it with the remaining rice completely and work gently, try not to break the rice kernels.
8. Garnish the layered rice with the reserved fried onions, mint and coriander leaves, slit red and green chillies, toasted and fried nuts, and sprinkle the milk with saffron threads in it. You can also add a dollop of butter if you wish.
9. Cover the dish with a tight lid or aluminium foil and keep it in the preheated oven for about 10-15 minutes, till a nice steam has formed inside.
10. Before serving, dig the spoon into the dish till the base and take the rice and meat in a bowl. mix it and serve it hot.

Tip: Adding salt to the water in which you cook rice is essential, or else the whole taste of Biryani turns upside down. One tip if you have forgotten to add salt to the water while boiling rice is – stir the required amount of salt in a little quantity of hot water, about half cup or a few tablespoons, and pour this on the biryani evenly. Warm the biryani in microwave and serve immediately.

Suggested Accompaniments: Mirchi Ka Salan or Baghare Baingan or Dahi Ki Chutney or Tomato Chutney.

This is my entry for Meeta’s Monthly Mingle-One Dish Dinners

Luv,
Mona

AddThis Social Bookmark Button

Khichdi aur Till ka Khatta

February 28th, 2008 Mona Posted in Basmati Rice/Chawal, Canola Oil, Cereal Grains, Dals (Pulses & Legumes), Eid/Ramadhan/Iftaar, Fats and Oils/Tel, Ginger-Garlic paste, Hyderabadi special, Onion/Pyaaz, Red Lentils/Masoor ki Dal, Roasted Sesame seed paste, Salt/Namak, Spices & Seasonings/Masaale, Turmeric/Haldi, Vegetables/Tarkariyaan, Yellow Onion/Pyaaz 12 Comments »

Khichdi always reminds me of my childhood when on every friday afternoon, by the time my father would come home for lunch from the masjid after the Jummah Salah, my beloved Ammi would prepare and serve Khichdi piping hot along with its accompaniments. The beautiful aroma of Khichdi used to fill the house provoking our taste buds. This dish is uniquely tasteful and very comforting, and we all used to enjoy the meal to the last morsel.. Sweet old memories!

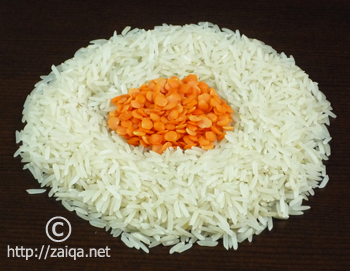
Split Red Lentils-Masoor dal and Basmati Rice

This dish is also sometimes prepared at breakfasts in Hyderabad, especially when someone is invited for a brunch or a breakfast. Khichdi is most usually enjoyed with accompaniments such as Khatta (see below for its recipe), Qimah, Mango Pickle/Keyri Ka Achar, Papad, Qageena and Cilantro and Mint Chutney/Hara Dhaniya aur Pudine ki Chutney or the Till ki Chutney. Everyone is allowed to help themselves with whatever he/she likes as an accompaniment with Khichdi. My grandmother/dadi used to loved it along with the chutney the most. It is also very delicious when had as it is with no accompaniments. The ginger garlic paste and onion are the main flavor ingredients and give the dish a sweet-pungent flavor.

Khichdi is best for upset stomachs and diarrhoeas. Add a little water to the prepared Khichdi and pressure cook it a little more so that the rice is very soft. Mash it lightly with the back of a wooden spoon. Have it along with yogurt. You will definitely feel good as it is easy to digest and very nutritous.

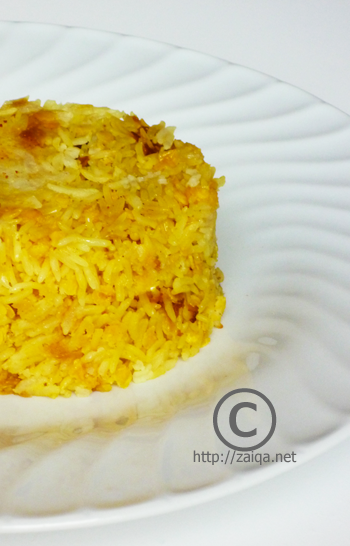
Khichdi – Red Lentil Rice

I like my Khichdi piping hot. As soon as it gets prepared I serve it along with its accompaniments. So I prepare the accompaniments well before the khichdi is to be prepared, so that everything can be served all at once. Warm Khichdi is so very comforting in these wintery days. It gives immense gratification to the soul.

Khichdi – Red Lentil Rice

Ingredients:

Basmati Rice – 2 cups
Masoor Dal/Red Split Lentils – 1/2 cup
Canola Oil/Ghee – 4 tbsp
Cinnamon stick – 1 inch stick
Cardamom – 2, whole
Green chillies – 3, each slit into two
Yellow Onions – 2, medium size, finely sliced
Ginger-Garlic Paste – 1 heaped tbsp
Salt – 2 tsp
Turmeric – 1/4 tsp
Water – 4 cups

Method:

1. In a big bowl, wash together the split red lentils and rice very well. Soak them in surplus fresh cool water for about 30 minutes.
2. In a heavy bottomed deep non stick saucepan at medium high heat, pour oil and let it warm up.
3. As soon as it gets warm, throw in the sliced onion and stir fry them till they are all light brown in colour.
4. Meanwhile drain the soaking dal+rice in a strainer and keep aside.
5. Now add cinnamon stick, cardamom, ginger-garlic paste, turmeric, green chillies, salt to the frying onions and reduce the heat to medium. Fry the spices along with the onions for a minute or two. Add the water retaining 2/3 cup water to add later. Increase the heat to high and let it come to a boil. Once boiling add the drained dal+rice to it and gently mix it all well and let it come to a boil once.  Once boiling, lower the heat to medium and cover with a lid, and let cook until the rice has absorbed all water, 2-4 minutes. Add the remaining water and mix gently. Cover with a lid and lower the heat to minimum and let cook until the water has almost all been absorbed and the rice is almost soft. Close the heat and leave to rest for about 10 minutes. During this time nice steam will be built up and the rice will all be cooked further to perfection. Serve hot along with above suggested accompaniments. Enjoy.

Suggested Accompaniments: It is had along with Khatta (see below for its recipe), Qimah, Mango Pickle/Keyri Ka Achar, Papad (I love Lijjat Papad), Qageena and Till ki Chutney or Hara Dhaniya aur Pudine ki Chutney

I am sending this as an entry to ‘Think Spice, Think Turmeric‘ event being hosted by Sudeshna.

Updated-Nov 07, 2008:

On the request of a few readers of my blog, I am updating this post with the recipe for ‘ ‘Till ka Khatta’. Roasted sesame seed paste is added to the thin tamarind water and then tempered along with aromatic spices. This thin soup is then used to wet the khichdi. Here’s the recipe:

Til ka Khatta – Sesame seed flavored Tamarind Water

Ingredients:

For the Tamarind water:

Tamarind paste – 4 tbsp
Water – 2 cups
Salt – to taste
Cilantro/Dhaniya – 1 tbsp, finely chopped
Mint leaves/Pudina – 1 tbsp, finely chopped
Yellow Onion – 1 tbsp, finely chopped
Ginger-Garlic paste – 1/3 tsp
Dry roasted Sesame seed paste (or blanched Almond paste) – 1 tsp

For Baghaar:

Canola oil – 2 tsp
Fresh Curry leaves – 4-6
Cumin seeds – 1 tsp
Small green chilli – 1, fresh, slit into two

Method:

1. In a bowl mix all the ingredients under the heading – ‘For Tamarind water’.
2. Heat the oil in a small saucepan, and add curry leaves, cumin seeds and chopped green chillies. Fry for a minute. Immediately add the above prepared tamarind water and let it come to a boil. Cover with a lid and remove from heat. Serve along with Khichdi.

And it is not the end, I have another pleasing information to share with you all, Priya of 365 Days of Pure Vegetarian and Lubna of A Hyderabadi Foodie’s Cookbook, have again presented me with the Nice Matters Award, Thanks Dear. I’m honored!

Luv,
Mona

AddThis Social Bookmark Button