Colourful Pasta

July 14th, 2007 Mona Posted in Black Beans, Canned Tomato paste, Canola Oil, Capsicum, Carrot/Gajar, Dals (Pulses & Legumes), Green Beans/Binees ki phalli, Lamb/Beef/Mutton/Veal/Sheep, Milk and Milk Products, Olive/Zetoon, Pasta & Noodles, Red Chilli powder, Salt/Namak, Tomato/Tamatar (fresh), Turmeric/Haldi, Yellow Onion/Pyaaz 4 Comments »

There’s one thing about pasta that I like a lot. It can be made in a thousand different ways changing the flavours with every ingredient you wish to add to it. While preparing pasta you can experiment a lot, with whatever you like, and it gets ready instantly for a delicious heartful meal.

This recipe which I make is loved by everyone in my home. You can substitute meat in this recipe with the same amount of chicken breast pieces, or omit both and make it a vegetarian pasta dish.

Serves : 4

Colourful Pasta

Ingredients:

Lamb/Veal meat – 110 gms, cubed into bite size pieces
Fusilli Pasta – 400 gms
Ripe Tomatoes – 2, large, chopped finely
Canned Tomato paste – 1 cup
Carrots – 2, washed peeled and sliced
Red capsicum – 1, large
Green beans/Binees – 1 cup, washed and chopped
Canned Black beans – 1 cup, drained and gently washed
Salt – to taste
Red chilli powder – 1 tsp
Turmeric – 1/4 tsp
Garam masala – 2 tsp
Yellow Onion – 1, small, sliced
Canola Oil – 4 1/2 tbsp
Parmesan Cheese – 1 cup, Grated (optional)
Black Olives – 1 cup, sliced and deseeded (optional)

Method:

  • Put a pressure cooker on heat and add half a tablespoon of oil to it. Add the washed and cubed lean meat pieces and stir until no longer red. Pour a little water and pressure cook till it becomes soft. You can even use some left over meat. Just shred it into bite size pieces. Remove the meat with all its juices to a bowl once done.
  • Take a pan and add two teaspoon oil to it. Fry the cut carrots, capsicum, french beans individually for 3-4 minutes each and remove in an another bowl.
  • In a sauce pan, add the remaining oil and put it on heat. Add the sliced onions to it and let them turn translucent. Add the finely chopped tomatoes and cover the lid for a few minutes till the tomatoes have become soft. Add the tomato paste and stir to mix. Add salt, chilli powder, garam masala and turmeric and stir again. Now add the meat pieces with all its juices to the tomato mixture and let it cook for 2-3 minutes.
  • Meanwhile cook Fusilli according to instructions and reserve half cup of the water in which the Fusilli was cooked. Drain and keep aside.
  • Add the drained pasta with its reserved water, the drained black bean and the sautéed vegetables to the tomato mixture. Reduce the heat to medium low and let it cook uncovered for 5 more minutes.
  • Serve immediately into individual plates sprinkled with grated parmesan cheese and sliced olives on top.

Luv,
Mona
AddThis Social Bookmark Button

Chatpata Tamatar Chawal

June 29th, 2007 Mona Posted in Basmati Rice/Chawal, Black Gram/Urad Dal, Chane ki Dal, Dals (Pulses & Legumes), Eid/Ramadhan/Iftaar, Fats and Oils/Tel, Ghee, Green Chillies, Onion/Pyaaz, Quick fix meals, Salt/Namak, Spices & Seasonings/Masaale, Tomato/Tamatar (fresh), Turmeric/Haldi, Vegetables/Tarkariyaan, Yellow Onion/Pyaaz 3 Comments »

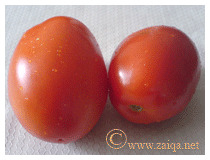
Tomatoes are rich in Lycopene. And a very important ingredient in an Indian kitchen.

Fresh Tomatoes

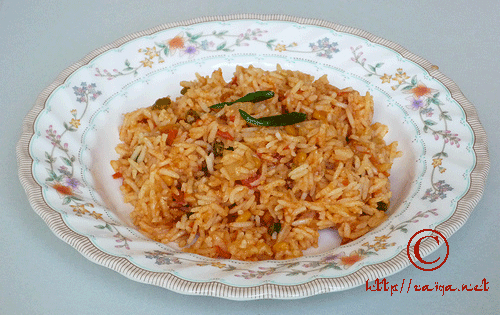
This One-Dish meal is healthy and nutritious, and a hit with kids. When you feel tired and do not feel like being in the kitchen for a long time, this recipe goes well, as it does not need any accompaniments, and you can prepare this in a jiffy. You will love it. Comfort food it is! Try it out, and enjoy.

Chatpata Tamatar Chawal – Spicy Tomato Rice
Serves: 5

Ingredients:

Rice – 4 cup
Tomato – 6 medium
Tomato paste – 2 tbsp
Ghee – 1 tbsp
Split Black gram/Urad Dal – 1 tbsp
Split Bengal gram/Chana Dal – 1 tbsp
Small Green chillies – 8, finely chopped
Red Chilli powder – 1/2 tsp
Yellow Onion – 4, medium
Turmeric – 1/4 tsp
Salt – To taste

Method:

1. If you have left over plain rice then you can use it or else cook the 4 cups rice with about 2 tsp salt and keep aside.
2. Slice green chilles, onions, and tomatoes finely.
3. Heat ghee in a pan and add split black gram and bengal gram along with onions, tomatoes, green chilles. Fry well stirring until the dal gets a reddish tinge. Add salt, tomato paste, red chilli powder and turmeric powder and stir well. Cook and let cook for a few minutes until the tomatoes are slightly mushy.
4. Remove in a large bowl and add cooked rice to it and mix it throughly and gently. Reheat it before you serve.

Luv,
Mona

AddThis Social Bookmark Button

Palak Poori

June 27th, 2007 Mona Posted in Canola Oil, Cereal Grains, Eid/Ramadhan/Iftaar, Fats and Oils/Tel, Flours/Aata, Green Chillies, Hyderabadi special, Milk and Milk Products, Onion/Pyaaz, Salt/Namak, Simple Kitchen Tips, Spices & Seasonings/Masaale, Spinach/Palak ki bhaji, Vegetables/Tarkariyaan, Whole Wheat Flour/Durum Atta, Yellow Onion/Pyaaz 5 Comments »

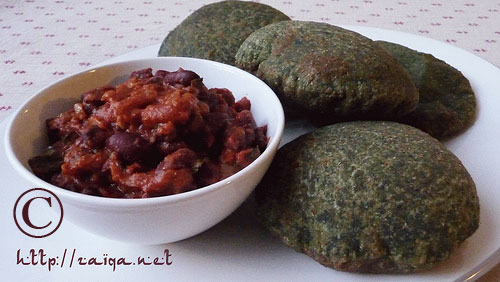
I had learned this recipe during my college days in Hyderabad. I had found it very unique and delicious. I treasure this recipe. Its easy, simple and gets ready quite quickly. Enjoy the poori’s with Rajma curry and you will never forget this dish for its good taste. Enjoy.

Palak Poori – Unleavened Fried Indian Puffed Spinach Bread

Makes approx 15 Pooris

Ingredients:

Wheat flour (Durum Atta) – around 2 cups (You can even use Refined flour/All-Purpose flour if you wish)
Spinach (fresh or frozen) – 300 gms
Yellow Onions – 1 small, chopped
Milk – as needed
Salt – to taste
Small Green chilli – 4, chopped
Canola Oil – to deep fry poori’s

Palak Poori served hot with warmed Rajmah (Red Kidney Bean) Curry

Method:

  • Heat oil in a pan and saute the onions till soft. Add spinach and green chillies, salt and cook well till dry (It is important that the it is pretty dry after you cook it as if left watery, you will not be able to make a proper dough later) Puree into a paste in a food processor of a blender and keep aside.
  • Put 1 cup flour in a bowl. Make a well in the middle and add spinach paste in the center. Use one hand to mix the flour with the added mixture in a rotating motion from the center of the bowl outward, until the dough is moist enough to be gathered into a rough mass. Keep adding extra flour as needed. Sprinkle milk if needed to the dough and continue to knead it. Wet hands and continue until the mixture cleans the sides of the bowl and has become a nonsticky, kneadable green coloured dough. When the dough is kneaded, it will be elastic and silky smooth. To test the dough, press it lightly with a fingertip. If it springs back, it is ready to be rested. Resting the dough is the last step and allows the dough to relax and absorb the water and kneading.

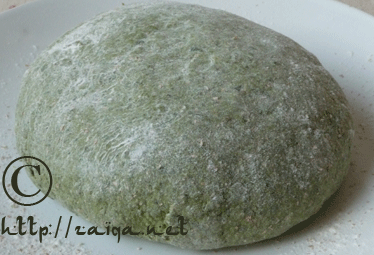
The Prepared Dough

  • Rest for 1/2 hour in warm climates and 1.5 hours in cold climates. Cover with a wet towel so the dough does not dry out. The rested dough is light and springy, less resistant to being rolled out into the thin rounds.
  • Knead dough a little again. Dough should be stiff enough to roll without extra flour.
  • Make small balls (approx 4 cm in diameter) of the dough and cover them with damp cloth.
  • Take one ball of dough and dip a corner of ball in melted ghee or oil and roll it out into 4 to 5 inches round.
  • Repeat the same process to roll out all puri’s.
  • Heat plenty of oil in a kadhai/wok until very hot.
  • Put in a poori and immediately start flickering hot oil over the top of it with a spatula so that it will swell up like a ball.
  • This should take only a few seconds. Flip the poori over and cook the other side until golden brown.
  • Remove with a slotted sppon and stack them vertically untill all are done in a bowl lined with paper towel to absorb the oil.

Suggested Accompaniments: Enjoy the puris along with Red kidney beans curry.

Tip: Store the left-over dough in a ziplock bag in the refrigerator for upto 1 week so that you prepare it again after some days.

Luv,
Mona

AddThis Social Bookmark Button

Chicken Croquettes

June 25th, 2007 Mona Posted in All-Purpose Flour/Maida, Bread Crumbs, Butter/Makhan, Cereal Grains, Egg/Anda, Eid/Ramadhan/Iftaar, Fats and Oils/Tel, Flours/Aata, Milk and Milk Products, Non-Vegetarian/Gosht, Poultry/Murgh 3 Comments »

A warm welcome to everyone on my blog!

This is my first post, and I start this blog attempting to make an insight into the method of home-style cooking in the Hyderabadi households for the whole world, and to make friends in the blogging world, which I loved since I had started to read recipe blogs of different people, who share interests like me, love to cook food and discover new ways of cooking food.

Chicken croquettes are loved by everyone, and is a hit with children and adults too. This recipe is an appetizer specifically, but you can have it anytime, as you want. Its an easy recipe that gets prepared in a jiffy and it tastes like melted cheese once you bite into it. Serve these hot as soon as you prepare them as they do not taste very good when cold. Enjoy them along with any of your favourite sauces. You will definitely love them.

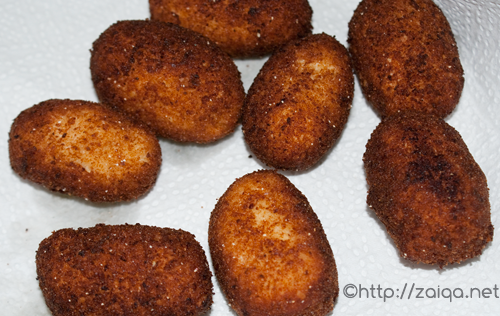
Chicken Croquettes

Chicken Croquettes

Ingregients:

Shredded cooked Chicken – 1 cup
All-Purpose flour/Maida – 4 tbsp
Butter – 1 tbsp
Milk – 1/2 cup
Egg – 1
Bread crumbs – 1/2 cup

Method:

1. If you have any left over chicken, shred it and you can use it, or u can take some boneless chicken and fry it in oil, salt, red chilli and little water to make it soft. Once the chicken is soft, shred it, not too finely.
2. Now take a non-stick pan, melt butter, add maida and brown it well enough, but not too much. Add milk to it, and stir it so tat it forms a good paste, add more milk if it requires, let it not form onto lumps. Let it cool down a little bit. Once it is cool, add the shredded chicken and mix well. Keep this mixture in the refridgerator for 15-30 minutes, so that it hardens a bit.
3. Later, remove it from the fridge and make balls (croquette shaped)
4. Beat an egg in a cup.
5. In an another plate keep the bread crumbs.
6. Dip the balls into egg first, then in the bread crumbs, till it is properly covered, pat and remove the crumbs from the balls if excessively covered.
7. Deep fry the balls till nicely golden brown in colour Serve hot.

Luv,
Mona

AddThis Social Bookmark Button