Talahuwa Qimah

July 6th, 2009 Mona Posted in Canola Oil, Cilantro/Kothmir (fresh), Curry leaves (fresh), Ginger-Garlic paste, Lamb/Beef/Mutton/Veal/Sheep, Lemon/Nimbu, MDH Chat Masala powder, Mint/Pudina (fresh) 9 Comments »


Tala huwa Qimah

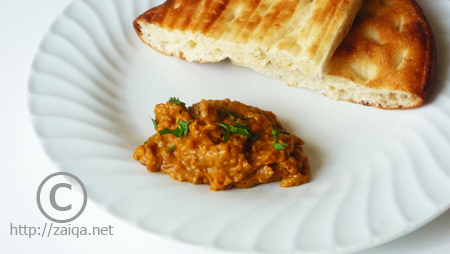
Sautéed minced meat/Talahuwa Qimah along with Kacchi Imli ki Khatti Dal and plain Basmati rice is ideal for a simple yet delicious meal. My Ammi always used to prepare Talahuwa Qimah as a change from the usual Qimah recipes and we all always relished it.

Tala Huwa Qimah – Sautéed Minced Meat

Ingredients:

Cumin seeds – 1 1/2 seeds
Ginger garlic paste – 1 heaped tbsp
Dried red chilli – 2, each split into two
Curry Leaves/Karyapaak – 10 fresh leaves
Minced Veal or Lamb or Sheep meat/Qimah – 800 gms
Red Chilli powder – 2 heaped tsp
Salt – to taste
Turmeric – 1/2 tsp
Coriander powder – 1 tsp
Juice of 1 Lime/Lemon
MDH Chat Masala powder – 1/2 tsp (optional)
Fresh Cilantro and Mint leaves – 1 tbsp, finely chopped
Canola oil

Method:

1. Wash Qimah and drain in a fine wire mesh strainer.
2. In a non-staick heavy bottmed Kadai/Wok, pour 2 tbsp oil and as soon as it warms up, add cumin seeds and ginger garlic paste and stir fry till it is lightly golden brown. Add the dried red chiili, karyapaak and quickly in a minute add the Qimah. Using a wooden spoon mix it all well and keep stirring it breaking the lumps of the Qimah for 3-5 minutes.
3. Let it cook uncovered at medium high heat until most of the moisture has been evaporated and the qimah is nicely cooked. Pour in about 3 tbsp oil and all the other ingredients and stir fry the qimah for 25-30 minutes more, stirring continously. Keep sprinkling a few drops of water if it tends to stick on the bottom of the Kadai. Fry the Qimah well and serve warm.

Suggested Accompaniments: Enjoy the Talahuwa Qimah along with Kacchi Imli ki Khatti Dal and Plain boiled rice for a delicious meal. 

Luv,
Mona

AddThis Social Bookmark Button

Kothmir-Cilantro

June 30th, 2009 Mona Posted in Cilantro/Kothmir, Cilantro/Kothmir (fresh) 13 Comments »

Cilantro (Coriander leaves), also called as Kothmir or Hara Dhaniya in Urdu language, is my favorite, most quintessential culinary herb with a wonderful aroma, which I love to add in most of my vegetable and meat preperations while I cook. The leaves are rich in vitamin C, vitamin A, the B vitamin riboflavin and dietary fiber.

Cilantro or Kothmir

To plant and harvest:
Growing this fragrant herb is easy. Every Indian kitchen is stocked up with coriander seeds. Just sow a few of them into soil, water a little daily to keep the soil moist. They sprout in about 10 days time. I sowed a handful seeds in railing planters, as well as in a few used yogurt boxes (which I washed throughly, and made two holes in the bottom, before adding soil and sowing) and they grew beautifully.

Cilantro growing in planter

Cilantro blooms are the most fragrant. If you pluck a few, the strong fragrance lasts in your fingers for a long time for everybody to notice.

Cilantro Blooms

Cilantro Blooms developing into Coriander seeds

I sow a few coriander seeds, once every two months (optional: and fertilize them with manure), so that I have cilantro at hand whenever I need it. Place the pots outdoors in summers, and sow them indoors in pots in front of bright windows in winters. Make sure to harvest the Cilantro before it goes into the blooming stage.

To store Cilantro – I usually follow the subsequent ways to store fresh cilantro:

1. Discard the tough stem ends and spread out the tender (unwashed) cilantro over a paper towel as shown in the picture below.

Gently roll the tender cilantro snugly in paper towel.

Transfer this roll to a zip-lock plastic bag, squeeze out air and store refrigerated. Before using, wash required amount thoroughly in water, pat dry and use as required. Use the roll within 2-3 weeks. Keep checking, if the paper towel has become damp or needs a change, replace it with a fresh paper towel for the cilantro to last longer.

2. Discard the tough stem ends and store the tender (unwashed) cilantro in a plastic box. Place two raw eggs in shell in the box and cover with a tight fitting lid.

The egg absorbs the excess moisture and keeps the cilantro fresh for almost 2 or 3 weeks. Discard the egg after 3 weeks of use, and replace with new if required. Before using cilantro, wash required amount thoroughly in water, pat dry and use as needed.

3. An another way to store fresh cilantro is to freeze it, just like I do with fresh mint leaves. This way you can store fresh cilantro indefinitely.

Discard the tough ends of cilantro. Wash the bunch in a sink of fresh cool water. Swish it vigorously. Plunge it in and out. Remove from water and shake off excess water. Spread on a kitchen towel and let dry for 30 minutes. Now chop them all up roughly. In an ice-cube tray, tightly pack roughly chopped cilantro along with its tender stems into each of the molds of the tray. Cover with water and freeze overnight. The next day, working quickly, unmold the frozen cilantro cubes from the ice-cube tray and transfer them to a zip-lock bag. Squeeze out air and freeze immediately. To use, add the frozen cubes to the curries during the last stages of cooking.

Luv,
Mona

AddThis Social Bookmark Button

Kaddu ka Dalcha

June 24th, 2009 Mona Posted in Bottle Gourd/Kaddu, Canola Oil, Chane ki Dal, Cilantro/Kothmir (fresh), Cumin seeds/Zeera, Curry leaves (fresh), Dried Red Chillies, Red Chilli powder, Salt/Namak, Tamarind/Imli, Tomato/Tamatar (fresh), Turmeric/Haldi, Yellow Lentil/Tuvar ki Dal/Toor dal 16 Comments »

I am so in love with the bottle gourds that I get here in the Asian stores in Toronto. Young and tender with bright spring-bud green color is how I describe the bottle gourds that I get here.

Kaddu, Split Chana Dal, Tomato

Kaddu, aka ‘Bottle gourd’ or ‘Opo squash’ in English

Dalcha refers to soupy dal preparation from Hyderabad. It can be prepared with only a vegetable, which I am writing about today, or along with meat with bone combination, also called as Daalcha Gosht. The dal with either of the combination is then simmered gently in a tomato with tempering/baghaar spices sauce that impart a beautiful aroma and flavor. Once the vegetable and meat is tender it is allowed to cook with the mashed dal. Today I prepared Dalcha with bottle gourd for my lunch along with Qimah Methi and Matar Chawal. Traditionally Dalcha is served along with Baghara Chawal and Phalli Gosht, or even along with Biryani on the side.

Kaddu, peeled and cut into Diamonds

Peel and cut bottle gourd kaddu diagonally into large diamond shapes. The kaddu that I have used today was very green and callow, so it didnt have any tough and aged seeds. If there is any fibrous central pith with mature hard seeds, I suggest you slice the central pith and discard it and use only the clean white flesh. But it not mandatory.

Kaddu Ka Dalcha

Kaddu Ka Dalcha – Bottle Gourd in Legume Soup

Ingredients:

Chana dal/Bengal gram (or) Yellow lentils/Tuvar ki dal – 1 1/2 cups
Salt
Canola oil/Ghee – 2 tbsp
Cumin seeds – 2 tsp
Garlic pods – 2-3, peeled and crushed
Dried red chillies – 2, each broken into two and stalks removed
Curry leaves – 10 fresh leaves
Tomato – 2, large, ripe and red, finely chopped
Chopped Cilantro – 1 tbsp
Red chilli powder – 2 tsp
Salt – to taste
Turmeric powder – 1/4 tsp
Bottle gourd/Opo Squash/Kaddu – 1, medium sized, around 750 gms
Raw tamarind juice/Kacchi Imli ka juice – 4 tbsp or to taste

Method:

1. Peel the bottle gourd. Slice off and discard the top and bottom of the gourd. Cut the bottle gourd into two halves lengthwise. If the central pith of the bottle gourd contains mature seeds, discard the central pith, or if the bottle gourd is young and tender, there is no need to discard the central pith. Now cut each half into 1 inch thick strips lengthwise. Cut each strip diagonally into 2-3 inch pieces.
2. Wash the dal in two or three water changes. Drain and keep aside. In a pressure cooker, add the drained dal and 4 cups water. Add 2 tsp salt and pressure cook the dal until it is soft and well cooked. You can puree the dal in a blender and pour it back back into the saucepan and keep aside. I just mash it using a dal ghotni or use an immersion blender sometimes.
3. In a large frying pan at medium heat, pour canola oil, and as soon as it warms up, add the cumin seeds and the crushed garlic pods. After 30 seconds, add the dried red chillies and curry leaves. Immediately add the chopped tomatoes, chopped cilantro, red chilli powder, salt, turmeric and mix well. Cover the lid for about a minute. Add the chopped bottle gourd and mix well. Pour in water to cover the bottle guard pieces and cover the lid. Let cook for about 10 minutes or until the bottle gourd is tender. To check, pierce a piece of bottle gourd with the tip of a sharp knife.
4. Once the bottle gourd is tender, add this to the saucepan with the pureed dal and pour in water to dilute and achieve a thin soupy consistency. Add the tamarind juice and mix well. Taste for seasonings. Let it boil once, then simmer and let it cook for 5 minutes. Serve warm.

This delicious dal is my entry to the event ‘Delicious Dals from India’ being hosted by Suma at her blog Veggie Platter.

Luv,
Mona

AddThis Social Bookmark Button

Baghari Turai aur Chane ki Dal ka Saalan

June 1st, 2009 Mona Posted in Canola Oil, Chane ki Dal, Cilantro/Kothmir (fresh), Green Chillies, Red Chilli powder, Ridged Gourd/Turai, Salt/Namak, Tomato/Tamatar (fresh), Turmeric/Haldi, Yellow Onion/Pyaaz 7 Comments »

Todays meal consists of a simple comforting Turai ka saalan along with warm Phulka’s

Main Ingredients ~ Turai, Tomatoeas, Yellow Onions, Split Chana Dal

The split bengal gram/chane ki dal in this curry is cooked until it is just tender, but still holds its shape, and later allowed to cook furthur in the tomato-onion sauce of ridged gourd.

Ridged gourd, mainly an Indian vegetable, also called as Turai in Urdu, is mainly composed of water. When it is cooked in a tomato-onion sauce, it develops a delicious mellow flavor. Peel and discard the tough outer skin of Turai.

In some places, ridged gourd is also referred to as ‘Ribbed Gourd’.

Chopped and Peeled Turai

Baghari Turai aur Chane ki Dal ka Saalan – Split Bengal gram and Ridged Gourd Curry
Serves: 8 to 10

Ingredients:

Split Bengal gram/Chane ki dal – 1 cup
Canola oil – 2 tsp
Yellow Onion – 2, large, finely sliced
Tomatoes – 2, large, finely chopped
Salt – 1 tbsp
Red Chilli powder – 1 tbsp
Turmeric – 1/4 tsp
Cilantro – 2 tbsp, finely chopped
Green chillies – 3, small sized, each slit into two
Ridged Gourd/Turai – 6, medium sized, as shown in the picture

Baghari Turai aur Chane ki Dal ka Saalan

Method:

1. Soak the Chana dal overnight at room temperature, covered in surplus cool water in a bowl. The next day, drain and rinse the dal. Add the drained dal along with 2 cups fresh cool water and 1 tsp salt to a saucepan. Boil until the dal is just soft, but not at all mushy. Once done, remove the saucepan from heat and keep aside.
2. Meanwhile, wash the ridged gourd under fresh cool tap water. Pat dry with towels. Peel and discard the skin. Chop and discard the two ends and cut into quarters as shown in the picture. Keep aside.
3. In a pressure cooker at medium high heat, pour oil and as soon as it warms up, add the sliced onion and stir fry for 5 minutes. Once the onion is soft, add the chopped tomatoes, red chilli powder, salt, turmeric, cilantro, green chillies and stir well to mix. Cover with lid and let cook for 3 minutes. Add the chopped turai, and half cup water and pressure cook for around 5 minutes.
4. Add the chana dal with its water to the pressure cooker and cover it ajar with a lid, and let cook at medium heat for 10 more minutes or until the turai is tender. Serve immediately.

Suggested Accompaniments: Enjoy this simple vegetable+dal salaan with warm rice or roti for a delicious meal.

Luv,
Mona

AddThis Social Bookmark Button

Besan Ka Salan

May 23rd, 2009 Mona Posted in Canola Oil, Cilantro/Kothmir (fresh), Gram Flour/Besan, Green Chillies, Red Chilli powder, Yellow Onion/Pyaaz 13 Comments »

My father is not a very good cook, but he prepares a few dishes perfectly well, like Pyaz ka Anda, Ande ka Meetha, Khichdi, Nimrish Anda, etc. Among these dishes, Besan ka Salan is his favorite, which he very lovingly used to prepare while my Ammi fixed a few Parathas to go along with it for us all as the Sunday breakfasts during my childhood. 

Besan Ka Salan – Gram Flour Curry

Today I present you all with one of my beloved father’s favorite curry, which I enjoyed along with store brought Afghani Roti as my weekend breakfast today. Hope you enjoy it as well. 

Besan Ka Salan – Gram Flour Curry

Ingredients:

Chickpea flour/Besan – 1 cup
Canola oil – 2 tsp
Sliced Onions – 1/2 cup
Red chilli powder – 1 tsp
Salt – to taste
Small green chillies – 4, finely chopped
Warm Water – 2 cups
Chopped Cilantro – for garnish

Method:
-In a non-stick frying pan at medium heat, pour in canola oil and as soon as it warms up add the onions and fry them until they are golden brown in color. Add the besan and mix throughly. Roast the flour along with the onions for a minute or two, stirring it continuously until you achieve a rich orange-yellow color, similar to the color of turmeric, and a beautiful aroma. Be careful so that you do not burn it into brown and also that the flour does not form into lumps.
-Pour in warm water, add red chilli powder, salt and chopped green chillies and stir it all well and breaking any lumps of flour if present into a smooth paste with the back of a wooden spoon. Let it cook for 2-5 minutes until you achieve the desired pasty consistency. Taste for salt and chilli, add more if you wish. Garnish with chopped cilantro. Serve warm immediately.

Note:
1. Serve Besan Ka Salan immediately as soon as it is prepared, or else it will absorb the liquid and form a cake. If due to any reasons it has dried up, simply pour in a little more water so that it forms a paste and reheat it stirring it well. Serve right away.
2. Enjoy this curry along with Roti/Paratha/Phulka. Rice is a not good accompaniment to it.

Suggested Accompaniments: Serve Besan Ka Salan warm along with warm Roti or Parathas for a delicious breakfast.

Luv,
Mona

AddThis Social Bookmark Button