Chana dal, or split bengal gram are an essential item among Pulses in Indian cooking. The other dals most commonly used by indians in their everyday cooking are Tuvar dal or yellow lentils, Masoor dal or Red lentils. These three pulses or dals are the basic source of protein intake in an Indian, chiefly vegetarian diet. Mostly savory dishes are prepared out of dals, but a few of the sweet dishes like the one I am writing today are my favorites.
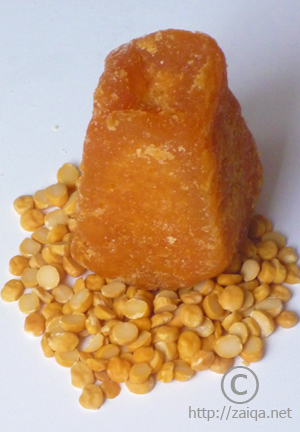
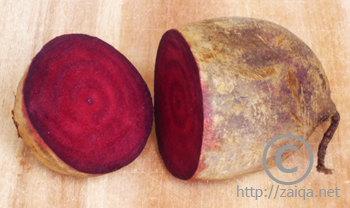
Chana dal and a block of Jaggery/Gud
My Ammi prepares the following halwa a lot. It brings back many sweet memories from my childhood. It is a simple meetha, which everyone will enjoy, and it is healthy too. It has got chana dal which are rich in proteins, ghee which has got many health benefits and lots of nuts to add flavor and richness.
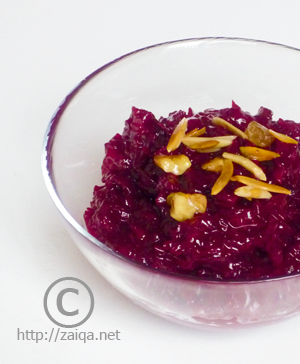
This meetha is quite subtly sweetish in taste. Once this meetha is done, it is spread out evenly on a flat greased dish and left to set until cool. It is then cut into diagonal pieces, hence called laoz. You can always add more sugar or khoa for flavor according to your preferences. The prepared chana dal or split bengal gram paste is called as ‘Puran’. It is also used as a stuffing for Parathas, just like Aloo Parathas, to prepare ‘Mitthi Roti’, and also as a filling in the ‘Halwa/Puran Puri’ which are the halwa stuffed deep fried pastries/puri which I will write about soon. Khoa and nuts are added to the Puran for that purpose.
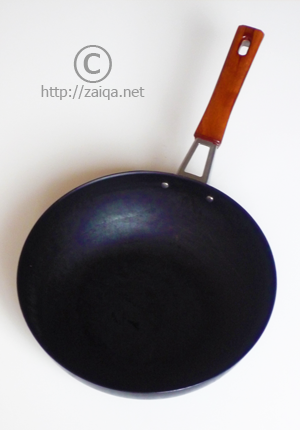
Kadai
It is better to prepare this meetha in a non-stick heavy bottomed kadai or saucepan, so that it wont stick to the bottom and burn. A kadai is a deep Indian kitchen utensil. It is wok shaped, has thick walls, usually used to for deep frying purpose. Mine is a new addition to my kitchen utensils, recently gifted to me by my MIL.
Puran ke Laoz – Bengal gram Halva
Ingredients:
Chana Dal – 1 cup
Sugar – 75 grams
Jaggery – 40 grams
Powdered cardamom pods – 1/4 tsp
Khoa – 3 tbsp
Ghee – 2 tbsp
Finely chopped nuts (walnuts, pistachio, almond, pine nut) – 1/8 cup
Slivered nuts – for garnish
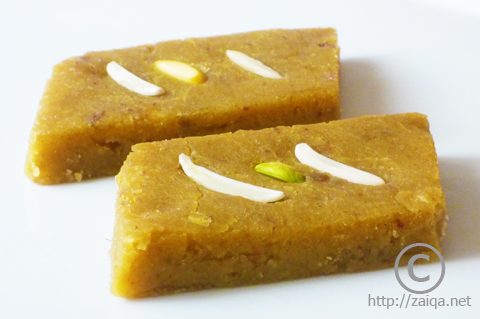
Puran ke Laoz – Bengal gram Halva
Method:
-Soak the dal for about 3-6 hours in surplus cool water. Later, drain and wash the dal. Pressure cook the dal in fresh cool water, until it is soft. Let cook until there is little or no water left. Once cool, puree it to a fine paste in a blender.
-Grease a stainless steel thali or any swiss roll tin with a little oil/ghee. Keep aside.
-Put the paste into a non-stick Kadai at medium heat. Add the powdered cardamom powder, ghee, jaggery, sugar and khoa. Mix well and keep stirring continously and let it cook until it thickens, no longer sticks and leaves sides of the pan. It will take around 20 minutes (time depends on the amount of water in the paste). Once done, stir in the chopped nuts. This is the Puran. Put the puran on the greased thali or swiss roll tin and spread it evenly to a thickness of 1 cm or half inch. Flatten the surface using a flat spatula. Once a little bit cool, put it in the refrigerator for an hour to serve later.
You can store these meetha stacked in an air tight food storage box for upto a month.
Luv,
Mona