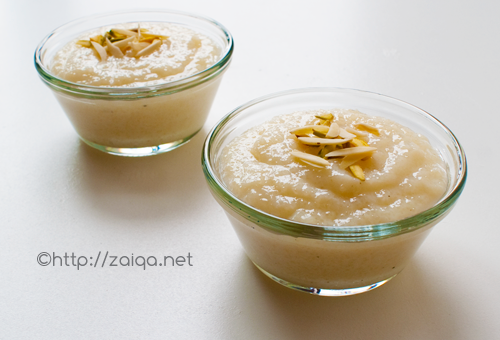
I was missing home, my Ammi’s hand made food, dearly.
Ammi makes the best Kheer-Poori in this whole world. When I was near her, with her, I never really realised the importance of her nearness, her closeness, her presence in my daily life. Now that I am so far away, I miss her and her embrace. Ammi, I miss you! But I am thankfull to my Allah (سبحانه وتعالى) that todays technology allows me to call and speak to her anytime I wish alhamdulillah. May Allah (سبحانه وتعالى) bless everybody’s parents with the best of health and give them the ajr, Ameen.
Kheer-Puri is a combinatin that most poeple from India and Pakistan must be familiar with. A combination that can make any person living away from his or her hometown nostalgic and bring back a rush of good old memories, just like it happened to me.
Today I am sharing with you all the recipe for Puran Poori and Chobay ke Poori, which are similar to the stuffed sweet pastries, empanadas.
Puran is a paste made of mashed Chana dal cooked in ghee, sugar and nuts. The same paste can also be used to prepare flat diamond shaped Laoz, and it is also used as a stuffing in flat bread to prepare Mitthi Roti. Today I am using Puran to prepare Puran Poori, which are stuffed pastries, similar to empanadas, but with a sweet stuffing.
Similarly, I stuff the pastries with an another sweet stuffing, called as Choba, or a mixture of shredded coconut, dry fruits and nuts and some sugar.
Chobay ke Puri – Sweet Empanadas stuffed with a Coconut and dry fruit and nut mixture
Ingredients:
For the filling:-
Ghee – 1 tbsp
Dry Desiccated Coconut – 3/4 cup
Finely sliced Pista – 1/4 cup
Finely sliced peeled almonds – 1/4 cup
Raisins/Kishmish – 1/4 cup
Sugar – 1/4 cup
For the Dough:-
Wheat Flour (Durum Atta) – 2 cups (usually maida/all-purpose flour is used)
Water – 1 cup
Salt – 1/4 tsp
Ghee – 1 tbsp
Method:
1. In a bowl, combine the sliced pistachios, almonds, dessicated coconut and the raisins.
2. Heat a heavy bottomed non-stick kadai at medium heat, pour ghee and as soon as it gets warm, add the above mixture. Stir continously and roast for a minute or two until you start getting an aroma and it is quite lightly toasted. Do not let the coconut turn into a dark brown color or get burnt, keep a close eye. Remove from heat and immediately add the sugar and mix well (you can also add a little bit of grated khoa at this stage for added richness). Keep aside to cool. This mixture is called as Choba.
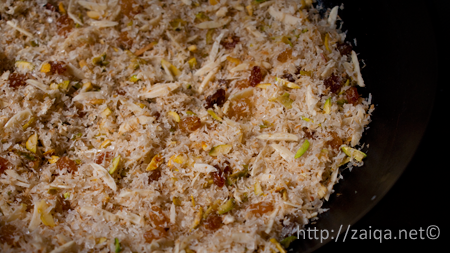
Choba ~ Coconut+Raisins+Pistachio+Almond+Sugar mixture
3. In a food processor, add the flour, ghee and salt. Process for a few seconds. Add the water and process to form a soft dough. You can also form the dough on a work surface using your hands. Remove the dough onto a platform and knead it add using some extra flour or water, whatever is needed, until a soft pliable dough is formed. Cover the dough with a damp cloth and keep aside for 30 minutes.
4. Pour cool water into a cup and keep ready.
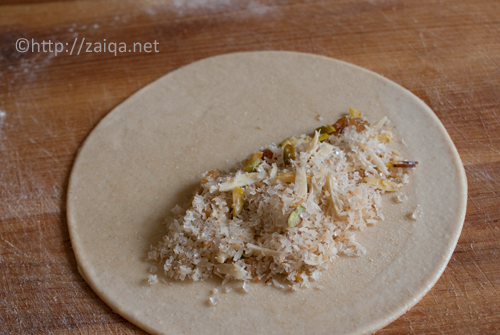
The filling~choba, on a side of the dough disc, notice the edges have been moistened for sealing
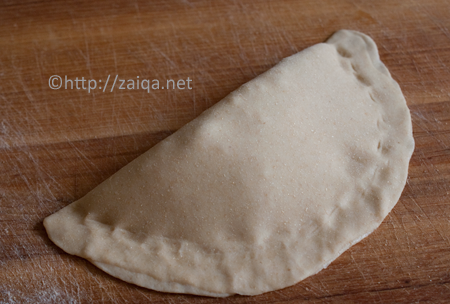
Stuffed Pastry
5. Lightly flour the work surface. Roll out the dough until about 1/8 inch thick. Cut into circles that ae about 12 cm in diameter, use a bowl as a guide if you wish. Collect the scraps, knead for a few seconds to form a ball and roll out again later, until then cover and keep aside. Dip your fingers into the cup with cool water, and wet the outer edge of the dough circles. Put about 2 tablespoons of the cooled toasted Choba mixture in a side, leaving room around the edges for sealing, and fold over the other half of dough over the filling to form a half circle. Do not over fill or else, the dough might tear. Use a pizza wheel to trim away the corners and make a nice half moon shape. Press the wet edges firmly to seal and crimp to form a pattern. Keep all the prepared stuffed pastries covered under a cloth on the work surface until all are done.
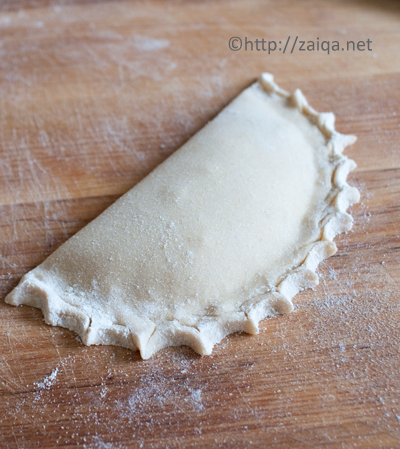
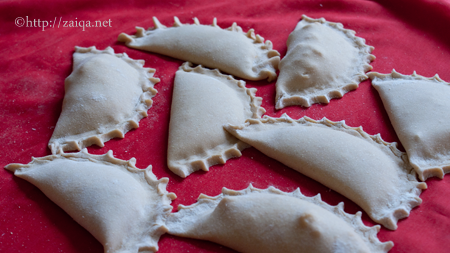
Stuffed Pastry with edges crimped
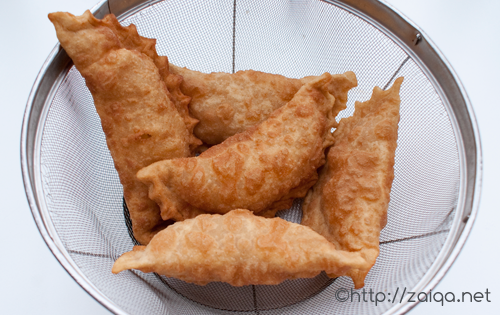
Puran Puri ~ Fried Stuffed Pastries
6. Once all the stuffed pastries are ready, heat oil in a kadai or wok to deep dry. Once the oil is hot, gently lower a few of them and deep fry both sides until lightly brown. Do not over crowd the kadai. Remove them using a slotted spoon. Do not pile them up onto a platter. Keep them uncovered in a single layer on a kitchen towel until all are done.
Puran Puri – Sweet Empanadas stuffed with Chickpea and nut mixture
Ingredients:
For the filling:-
Bengal gram/Chana Dal – 1/2 cup
Ghee – 1 tbsp
Sugar – 1/4 cup + 4 tbsp
Finely Powdered Green Cardamom seeds – 1/4 tsp
Finely sliced Pistachios/Pista – 1 tbsp
Finely sliced Almonds/Badaam – 1 tbsp
For the Dough:-
Wheat Flour (Durum flour) – 2 cups
Water – 1 cup
Salt – 1/4 tsp
Ghee – 1 tbsp
Method:
1. Wash and drain the dal. Pressure cook the dal in a little water until the dal is soft. Once done, cook the dal until there is very little water left. Remove it from heat. Once it is lukewarm, blend the dal in a blender until smoothly pureed keep aside.
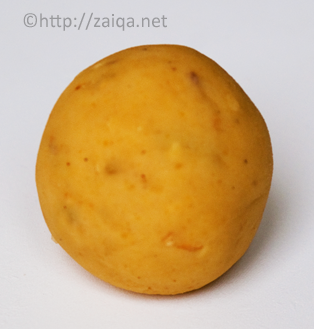
Puran ~ Sweet Chickpea mixture
2. Pour ghee in a saucepan at medium heat and as it melts, add the pureed dal and cook uncovered for 3 minutes. Add the sugar and cook for 5 minutes, stirring continously. Add the sliced pistachios and almonds, cardamom seed powder and mix well. Remove from heat when the mixture is fairly dry and starts leaving sides. Let it cool down. This mixture is called as the Puran.
3. In a food processor, add the flour, ghee and salt. Process for a few seconds. Add the water and form a soft dough. Remove the dough onto your platform and knead it add using some extra flour or water, whatever is needed, until a soft pliable dough is formed. Cover the dough with a damp cloth and keep aside for 30 minutes.
4. Pour cool water into a cup and keep ready.
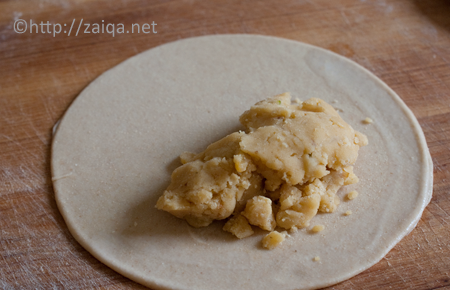
The filling~puran, on a side of the dough disc, notice the edges have been moistened for sealing
Pooriyaan – Stuffed Pastries
5. Lightly flour the work surface. Roll out the dough until about 1/8 inch thick. Cut into circles that ae about 12 cm in diameter, use a bowl as a guide if you wish. Collect the scraps, knead for a few seconds to form a ball and roll out again later, until then cover and keep aside. Dip your fingers into the cup with cool water, and wet the outer edge of the dough circles. Put about 2 tablespoons of the cooled Puran mixture in a side, leaving room around the edges for sealing, and fold over the other half of dough over the filling to form a half circle. Do not over fill or else, the dough might tear. Use a pizza wheel to trim away the corners and make a nice half moon shape. Press the wet edges firmly to seal and crimp to form a pattern. Keep all the prepared stuffed pastries covered under a cloth on the work surface until all are done.
Puran Puri ~ Fried Stuffed Pastries
6. Once all the stuffed pastries are ready, heat oil in a kadai or wok to deep dry. Once the oil is hot, gently lower a few of them and deep fry both sides until lightly brown. Do not over crowd the kadai. Remove them using a slotted spoon. Do not pile them up onto a platter. Keep them uncovered in a single layer on a kitchen towel until all are done.
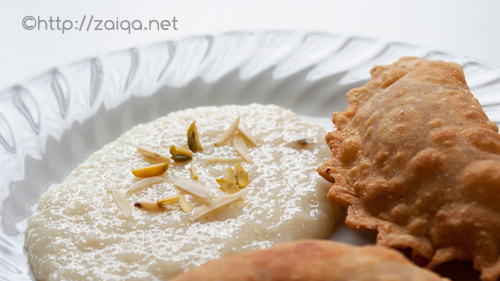
We enjoy both Chobay ki Poori and Puran Poori along with Chawal ki Kheer. Dip the deep-fried stuffed pastries in the rice pudding and enjoy.
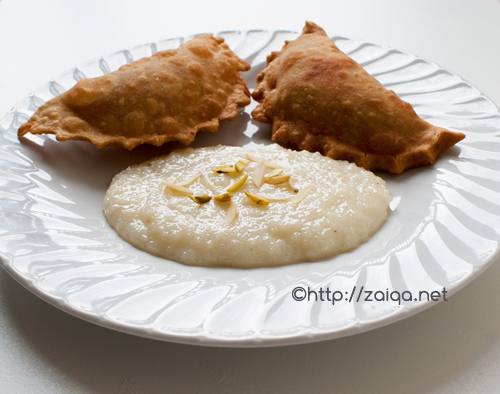
Kheer Puri – Rice Pudding and Stuffed Pastries
Reminder: Send me your Ramadan delicacies before the deadline. For more information refer to The Hyderabadi Ramadan Food Festival.
Luv,
Mona