Murgh Methi

September 1st, 2008 Mona Posted in Canned Tomato paste, Canola Oil, Coriander seeds, Cumin seeds/Zeera, Eid/Ramadhan/Iftaar, Fenugreek leaves/Methi, Ginger-Garlic paste, Hyderabadi special, Methi (fresh), Poultry/Murgh, Red Chilli powder, Salt/Namak, Simple Kitchen Tips, Turmeric/Haldi 29 Comments »

Inshallah the holy month of Ramadhan begins from tomorrow here, I wish all my readers Ramadhan Mubarak! May the choicest blessings of ALLAH (سبحانه وتعالى) shower upon us all, and grace our home with peace joy and happiness.

Ramadhan Mubarak to you all!

This month inshallah, like the last year, I will try to take some time out and post about the Ramadhan special dishes, some authentic, and some daily recipes, with tips to make life easier.

Tip: In my current daily schedule, I do not get time to sit at home and cook leisurely for Iftaar or the dinner afterwards, or for Seher for that matter. So what I do is, I stock up my refrigerator and freezer with cooked food that I prepare as and when I get time. Lots of curries in the freezer- both vegetarian, non-vegetarian and dals., Rice for the week in the refrigerator. When I have to serve food, I reheat them all for a few minutes in the microwave and serve it all piping hot on the Dastarkhaan. This way I stay peaceful and get ample time for my studies and prayers. This a great tip that I learnt from my MIL.

Mature/Full-grown Fenugreek leaves/Methi in pot

Mature Funugreek Leaf/Methi

To Grow Methi: This Summer, I had planted Fenugeek leaves/Methi along with the others. Methi is very easy to grow and the quickest to germinate. Just sprinkle a few fenugreek/methi seeds on wet soil and cover them up lightly using damp soil. Keep watering them everyday a little bit, you will soon see small seedlings in about a week time. Usually we Hyderabadis do not use the full grown mature Fenugreek leaves/Methi leaves in cooking. We pluck the leaves when they are at the two-leaves stage, tender, young and full of flavor. Click here to have a look at the tender baby methi available in Indian farmers markets. This time however I let it grow and used mature leaves to prepare Murgh Methi.

Murgh Methi is a delicious and well-known Hyderabadi chicken curry. I prepare it usually in the oven when I cannot devote my time to attend to the chicken cooking on stove top. But I have tried both the methods, the stove top method and the Oven method, and the curry was just as delicious both the ways.

Murgh Methi – Chicken with Fenugreek leaves

Ingredients:

Chicken with bone – 1.3 kgs, cut into medium size pieces
Onions
Canola Oil – 1 tbsp (optional)
Canned Tomato paste – 1/2 cup
Ginger -Garlic paste – 2tbsp
Red Chilli powder – 2 tsp
Turmeric – 1/4 tsp
Salt – 2 tsp
Dy roasted Cumin seed powder – 1 tsp
Dry roasted Coriander seed powder – 1 tsp
Fenugreek leaves – fresh, roughly chopped, 1 cup

Oven Method-The following is a quick method, where you do not have to stand in front of the stove attending to the chicken and tiring your legs. You have to simply marinate it and then let it slow cook in you oven, saving you lots of time:

1. Wash the chicken pieces, pull off the skin and excess fat and leave to drain in a colander.
2. In a large flat baking dish, add 100 gms of store brought fried onions. Add the chicken along with all the other ingredients except the fenugreek leaves and mix well so that all the chicken pieces are coated with the marinade. Cover the dish with aluminium foil and keep in the refrigerator for 30 minutes to 3 hrs.
3. Pre-heat the oven to 350° F.
4. Bring the marinated chicken to room temperature and keep the dish, covered, in the oven and let it cook for about 35 minutes. Later, carefully remove the aluminium foil (hot steam can burn your fingers) and throw in the fresh chopped fenugreek leaves. Gently stir to mix without breaking the chicken pieces. Cover once again with the aluminium foil and put it back into the oven and let it cook for a further 10 minutes. Serve warm.

Stove-Top Method-If you do not happen to have an Oven in your house, You can always prepare this curry on stove-top. The following is the procedure for it:

1. Wash the chicken pieces, pull off the skin and excess fat and leave to drain in a colander.
2. Pour oil into a large frying pan and fry two large finely sliced onions till golden brown. Add ginger garlic paste, and chicken pieces and stir fry them till they are lightly browned on all sides.
3. Add salt, red chilli powder, cumin seed powder, coriander seed powder, turmeric and canned tomato paste. Close the lid and let it cook for 15-20 minutes for until the chicken is tender and fully cooked and oil floats on surface. Add a little water if needed to cook.
4. Add the chopped fenugreek leaves and gently stir to mix well, taking care not to break the chicken pieces. Let it cook uncovered for 5 more minutes. Serve warm.

Suggested Accompaniments: Khatti Dal/Sojni Ki Phalli Ki Patli Dal, Khushka/Roti for a filling delicious meal.

Luv,
Mona

AddThis Social Bookmark Button

Kachchi Aqni ki Dum Murgh Biryani

August 23rd, 2008 Mona Posted in Almonds/Badaam, Basmati Rice/Chawal, Blog Events/Entries/Polls, Canola Oil, Caraway seeds/Shahzeera, Cardamom/Elaichi, Cashewnuts/Kaaju, Cilantro/Kothmir (fresh), Cinnamon/Dalchini, Clove/Laung, Coriander seeds, Cumin seeds/Zeera, Dry Bay Leaf/Tej Patta, Egg/Anda, Eid/Ramadhan/Iftaar, Garam masala powder, Ghee, Green Chillies, Hyderabadi special, Lemon/Nimbu, Milk and Milk Products, Mint/Pudina (fresh), Poultry/Murgh, RCI:Authentic Hyderabadi Cuisine, Red Chilli powder, Rose water/Gulab jal, Saffron/Zafraan, Salt/Namak, Tomato/Tamatar (fresh), Turmeric/Haldi, White Potato/Aloo, Yellow Onion/Pyaaz, Yogurt/Dahi 69 Comments »

Note – Read the whole post very carefully (also watch the video link I have posted at the end of the post) before you try preparing the Biryani, Please do not be overwhelmed by the length of the post. I have tried to explain each and every step briefly and as efficient as possible. Do write to me, if you have any queries. I will be glad to help you out.

Biryani is one of the most famous Hyderabadi one-dish meals craved and devoured by people from all over the world. The basic process of preparing Biryani involves the layering of raw marinated or cooked meat along with half cooked long grained aromatic Basmati rice, and a range of fresh spices and herbs for exceptional flavor and aroma.

Basically, there are two kinds of Biryani: Pakki Biryani, and Kachchi Biryani.

Pakki Biryani: where are half Basmati cooked rice is layered along with completely cooked chicken or lamb meat and then cooked till done on slow heat on dum.
1. Pakki Gosht ki Biryani
2. Pakki Murgh Biryani

Kachchi Biryaniwhich is the true Hyderabadi Biryani – where are half cooked Basmati rice is layered along with raw marinated meat and then finished on slow heat till done on dum.
1. Kachchey Gosht ki Biryani
2. Kachche Aqni ki Dum Murgh Biryani (which I am writing about today)

The preparation process of Kachchi Biryani is rather simple compared to the Pakki Biryani. In Kachchi biryani all you have to do is to marinate the chicken for overnight preferably and the next day layer it along with half cooked Basmati rice and leave it cook on slow heat/dum until completely done; whereas in Pakki Biryani you have to stand in front of your stove attending the chicken as it cooks completely, and then layer it with half cooked Basmati rice and finish it until done on slow heat/dum.

As you use the raw marinated chicken in this method, while you slow cook the Biryani on dum, the flavor of the chicken intensifies and infuses with the rice and other aromatic fresh herbs and spices giving you a heavenly aroma in the end which will fills your kitchen and your entire house.

*****

Here is the outline of the steps involved in the preparation, so that it is simpler for you all to understand the detailed method, follow these steps while you prepare the Biryani:

Outline of the steps:

Day 1:
Marinate Chicken.
Day 2:
1. Add Fried onions to the Marinated Chicken.
2. Give a smoked flavor to the Marinating Chicken with Fried Onions (
optional, but gives a very good flavor to the Biryani).
3. Prepare Basmati Rice, also called as Adhaan.
4. Arrange layers and garnish.

*****

The Detailed method:

Kachchi Aqni ki Dum Murgh Biryani
Serves – 8-10Day 1Marinate Chicken:

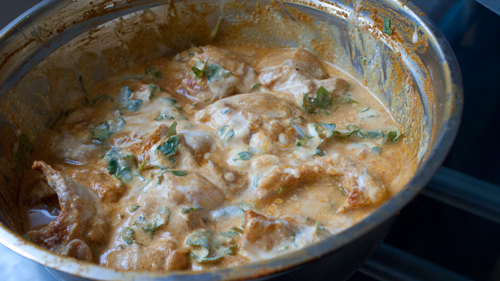
Chicken marinating in a bowl

Ingredients:

Chicken – 1.4 kg, with bone, cut into medium size pieces
Red chilli powder – 1/2 tsp
Green chilli paste – 1 1/2 tsp
Salt – 2 tsp
Turmeric/Haldi – 1/2 tsp
Tomato – 2, medium sized, pureed (optional)
Ginger-Garlic/Adrak-Lahsun paste – 2 tbsp
Yogurt – 2/3 cup, lightly whipped
Freshly squeezed Lemon Juice – 1/2 cup
Garam masala – 2 tbsp
Green Cardamom powder – 1 tsp
Dry roasted Cumin seed powder – 1 tsp
Dry roasted Coriander seed powder – 1 tsp
Fresh Cilantro and Mint – 2 tbsp, roughly chopped

Method:

In a large bowl marinate the chicken with all the ingredients. Make sure all the pieces of chicken are coated in the marinade. Cover and leave in the fridge overnight.

Day 2.

1) Adding Fried onions to the marinated chicken:

Ingredients:

Canola Oil – 3/4 cup
Finely sliced Yellow Onions – 800 gms
Salt – 1 tsp

Method:

1. Remove the marinating chicken from the fridge and let it come to room temperature.
2. Meanwhile, pour oil into a large non-stick frying pan at medium high heat. As soon as it gets warm, throw in the sliced onions and add salt. Stir fry until they are evenly golden brown in color. Make sure they do not burn them. Using a slotted spoon, remove the onions from the oil into a platter. Divide the fried onions into two equal parts and add one half of the fried onions to the marinating chicken and mix well. Spread the other half on a tissue lined platter to be used later for garnish, until cool. Once they are cool, they crisp up. Also divide the oil in which the onions were fried into two equal parts. Add one part of the oil into the marinating chicken and mix well. Reserve the other half to be added to the rice as the top layer along with garnish later on.

2) Give a smoked Flavor to the Marinating Chicken (optional step, but gives a really good flavor to the Biryani. I recommend you try this atleast once. Skip to the step 3 if you want to avoid)

Ingredients:

3 or 4 Burning Charcoal briquettes
Canola oil/Ghee – 1 tsp
Disposable aluminium foil tray/loaf pan

Method:

1. Make a well in the center of the marinating chicken in the bowl so that the mini aluminium loaf pans fits into it perfectly. My Ammi uses an onion skin for this purpose. With the help of tongs, carefully put the burning charcoal briquettes into the aluminium loaf pan.
2. Pour about a teaspoon of oil/ghee onto the charcoal. You will see that dense fumes start forming.
3. Immediately cover the bowl with a lid, so that the fumes do not escape. Keep it aside until you prepare the rice.

3) Preparing Basmati Rice/Adhaan:

Ingredients:

Long grained Basmati Rice (preferably ‘Lal Qilla’ Brand) – 4 cups, presoaked in water for 30 minutes
Salt – 3 tsp
Bay leaf/Tej Patta – 1
Cloves – 3
Green cardamom – 4
Cinnamon stick – 3/4 inch
Caraway seeds/Shah Zeera – 1 1/2 tsp
Water – 9 cups

Method:

1. Wash the rice and soak it in surplus water for about 30 minutes.
2. In a large cooking pot pour in water along with cloves, bay leaf, cardamom, cinnamon, caraway seeds and salt. Give it a stir, cover and let it come to a boil. (While the rice is boiling, follow the steps below under ‘Arranging layers and Garnish’ until step 4 and be ready)
3. Once boiling add the rice and mix gently, let the rice cook until it is half done, 2-3 minutes. Drain the rice and keep aside.

4) Arranging layers and Garnish: (Work fast while the rice is still hot! and try not to let the rice cool down)

Ingredients:

Marinating Chicken
Boiled, Quartered and shallow fried Potatoes – 2 cups (optional)
Mint leaves/Pudina – 1/2 cup, loosely packed, roughly chopped
Half cooked rice prepared earlier
Cilantro/Kothmir – 1 cup, loosely packed, roughly chopped
Ghee – 2 tsp (optional)
Reserved Fried Onions for garnish
1/4 Saffron strands, crushed and steeped in 1/4 cup warm milk
Rose water/Gulab Jal – 1 tsp (optional)
Green Cardamom seed powder – 1/2 tsp (optional)
Toasted Almonds and Cashewnuts – 1/2 cup total (optional)
Shelled Hard Boiled Eggs – 6-8 (optional)
Dough to seal the edges of the Casserole dish (optional)

(I use the ingredients stated as ‘optional’ only during parties when guests are invited)

Method:

1. Preheat the oven to 550°F (only if using an oven to prepare it on Dum, read below)
2. Carefully lift the loaf pan containing the charcoal briquettes from the marinating chicken, and discard it.
3. In a heavy bottomed casserole dish (which can be used in Oven-if using the Oven method (or) which can be used on stove-top-if using the Stovetop method – read below), arrange the marinating chicken along with all its juices in a single layer. Do not crowd it. (Use two casserole dishes if needed)
4. Spread the chopped mint leaves and the shallow fried potatoes (if using) over it.
5. Now add the drained warm half cooked rice prepared earlier and spread it nicely to cover the chicken all over. Reserve about 1 1/2 cups cooked rice for the top most layer.
6. Next, spread the chopped cilantro, toasted almonds and cashewnuts, hard boiled eggs (if using), reserved fried onions, cardamom seed powder and pour ghee (if using) and the saffron soaked in milk and rose water all over the rice. Add the 1 1/2 cup reserved rice and spread as the top most layer to cover evenly. Now pour the reserved oil in which the onions were fried evenly all over the rice.( I do not add fried onions over the top layer of rice to avoid getting the onions and herbs blackened or burned by steam).
7. Cover the dish with an aluminium foil or a tight lid (or) seal the edges with a dough and cover with the lid tightly, you can use some weight over the lid, so that no steam escapes.

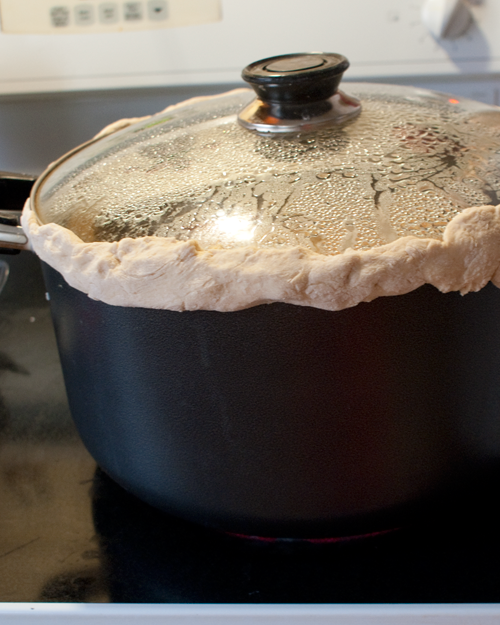
Lid sealed with dough and being cooked on stovetop

If using an oven to cook:
Put the sealed casserole in the preheated oven at 550°F for 20 minutes. Later, lower the heat to 300°F and leave the casserole dish in the oven for about 30 minutes. Remove from dish from oven once done.

If you are cooking on stove top:
1. Take a flat Dosa Tawa or a griddle pan and put it on the stove at high heat. As it gets warm, put the casserole dish on the tawa and let it cook for about 5 minutes on high heat.
2. Later, lower the heat to medium and let it cook for about another 15 minutes.
3. Now, reduce heat to very low and let cook for another 15-20 minutes and your Biryani will be done by now.

Once done, let the dish rest for 30 minutes. Later, open the lid and a heavenly aroma fills your house inviting all your house members. Carefully dig your spoon deep into the casserole dish until it touches the bottom, and gently mix the rice with the chicken until it is all completely mixed. Serve immediately.

Tip: Adding salt to the water in which you cook rice is essential, or else the whole taste of Biryani turns upside down. One tip if you have forgotten to add salt to the water while boiling rice is – stir the required amount of salt in a little quantity of hot water, about half cup or a few tablespoons, and pour this on the biryani evenly. Warm the biryani in microwave and serve immediately.

Suggested accompaniments: I enjoy my Biryani with Mirchi Ka Salan or Baghare baingan and Dahi ki Chutney as a side dish, and glass of chilled coke alongside. Yumm-O!

Note: You can also go through this video of ‘Khan Biryani’ showcased by VahChef, one of my favorite chefs, to get an idea on how to prepare Kachchi Murgh Biryani. His method for Khan Biryani is a bit different but quite interesting though.

I shared this recipe as part of the RCI:Authentic Cuisine of Hyderabad Event that I am hosting this month on my blog.

Be sure to read all the rules for the event and drop me your entries. The last date to send me your entries is September 15th’ 07.

Luv,
Mona

AddThis Social Bookmark Button

Sem Ki Phalli Ka Salan

July 18th, 2008 Mona Posted in Canola Oil, Coriander seeds, Fats and Oils/Tel, Garam masala powder, Indian broad Beans/Sem ki phalli, Onion/Pyaaz, Red Chilli powder, Salt/Namak, Tomato/Tamatar (fresh), Vegetables/Tarkariyaan, Yellow Onion/Pyaaz 15 Comments »

Indian broad beans (also sometimes referred to as Valor papdi or Hyacinth Beans ), or Sem Ki Phalli as they are called in Urdu language, (Chikkudu kaya in Telugu) are are a kind of green bean, very commonly sold in Indian markets and are available fresh daily at the ‘Rythu Bazar’ or the Farmers Market in India where you get to see an array of fresh fruits, spices, nuts, herbs and vegetables in huge piles being sold at reasonable prices. I do not usually get to see Indian vegetables and herbs at the Farmers market here, but when I do, I do not hesitate to get some, cook and enjoy eating them to the late morsel. Try searching for these beans at the Indian or Chinese grocery stores and food markets, you will find them definitely.

Indian broad beans – Sem ki phalli

The last week, I found some of these beans at the market and prepared this very comforting and simple stir fry which brings along many memories of my dear Ammi and my childhood. After washing and pat drying them, I always used to sit along with my mother to remove the hard fibrous srtings from the sides, split each bean into two, remove the seeds from inside into a small cup, and make a small pile of the prepared beans, chatting away endlessly. She used to then chop them up and when all were done, I was always so eager to taste this mouth wateringly delicious simple vegetable stir fry preperaed by her at the meal. Faint nostalgic memories like these tears my heart out with an intense desire to go back and live those moments again.

Sem Ki Phalli – Indian broad beans, with strings removed, split and chopped

These beans have hard fibrous strings which are preferably removed always while preparing them to be cooked. Some choose not to remove these strings as it provides fibre to the diet. The method to remove these strings is to simply tear the tip of the bean with hand and pull away the string from each side in one motion. These beans are delicious and nutritious. Do try them if you find these at the stores anytime.

Sem Ki Phalli Ka Salan – Sauteed Indian broad beans

Ingredients:

  • Indian broad beans/Sem Ki Phalli – 500 gms
  • Canola Oil – 2 tbsp
  • Yellow Onion – 2, large, sliced thin
  • Red Chilli powder – 2 tsp
  • Water – 1/2 cup
  • Salt – 2 tsp or to taste
  • Garam Masala – 1 tbsp
  • Dry Roasted Coriander seed powder/Dhaniya powder – 1 tsp
  • Tomato (fresh) – 1, medium, chopped fine

Sem Ki Phalli Ka Salan – Sauteed Indian broad beans

Method:

  • In a large frying pan at medium heat, pour oil and as soon as it gets warm add the sliced onion and salt and let it cook covered for 5-8 minutes, stirring it occasionally in between.
  • Add the beans, red chilli powder and water. Close the lid and let it cook for about 20 minutes, or until the beans are soft, stirring it occassionally. You can add more water if required.
  • Add garam masala, coriander seed powder and tomato. Close the lid and let it cook for 10 more minutes until the water is absorbed. Serve warm.

Suggested Accompaniments: Serve warm with Rotis.

Luv,
Mona

AddThis Social Bookmark Button

Hari Pyaaz aur Malai wale Jhinge

June 9th, 2008 Mona Posted in Canned Tomato paste, Canola Oil, Cardamom/Elaichi, Cinnamon/Dalchini, Clove/Laung, Coriander seeds, Cumin seeds/Zeera, Dry Desiccated Coconut, Fruits/Phal (fresh), Ginger/Adrak, Green Onion/Hari Pyaz, Lemon/Nimbu, Light Cream, Non-Vegetarian/Gosht, Prawns/Shrimp, Red Chilli flakes, Red Chilli powder, Salt/Namak, Sea-food, Sesame seeds/Til, Simple Kitchen Tips, Spices & Seasonings/Masaale, Turmeric/Haldi, Vegetables/Tarkariyaan 13 Comments »

This is one of the dishes that I prepare when I do not have much time to spend in my kitchen. These creamy prawns with scallions get prepared quite quickly and contain all the goodness.

Hari Pyaz aur Malai wale Jhinge – Shrimp with Scallions and Cream

Prawns are my favorite among the Seafood. These little crustaceans are devouring. In this dish I have used hari-pyaz/scallions and light cream along with some other ingredients as well, each one of them imparting their own special flavor to the dish, but keeping the flavor of the prawns the dominant.

I have also used the Salan Masala which I came across from the cookbook Regional Indian Cooking by Ajay Joshi and Alison Roberts. This masala has now become a very important ingredient in many of my daily recipes and I find it very flavorful. I’m sharing the recipe of the masala with you all which I found in the cookbook.

Salan Masala

Makes about 2/3 cup

Ingredients:

  • Dry Dessicated Coconut – 1/3 cup
  • Sesame seeds – 1 1/2 tbsp
  • Coriander seeds – 1 tbsp
  • Cinnamon stick – 1 insh piece
  • Whole cloves – 4
  • Green Cardamom pods – 6 green
  • Cumin seeds – 1 tsp
  • Red Chilli powder – 2 tsp
  • Turmeric – 1 tsp

Method:

  • Dry roast the coconut and sesame seeds at medium heat until golden forn 3-4 minutes. Set aside to cool, then in a spice grinder, grind it to a fine powder. Transfer to a bowl.
  • Add coriander, cinnamon, cloves, cardamom and cumin to the same pan. Dry roast at medium heat, stirring, until fragrant, 4-5 minutes. Set aside, cool and gring to a fine powder. Add to the coconut mixture along with chilli powder and turmeric. Stir well to combine.
  • Transfer to an airtight container. Store in refrigerator forupto 6 months. Use a clean dry spoon each time to us ethe masala to prevent mold from forming.

I usually get frozen prawns as they are easy to keep and are available for me to prepare and have them whenever I want. You can even use fresh prawns if available. I miss all the freshly available food in abumdance in India so much. Here, I do not get most of my Indian ingredients, and miss many of the Indian delicacies.

Hari Pyaz aur Malai wale Jhinge – Shrimp with Scallions and Cream

Ingredients:

  • Fresh or Frozen Prawns – 400 gms, deshelled; tails, legs and veins removed
  • Canola Oil – 2 tsp
  • Scallions – 3 cups, chopped with both the green and white parts
  • Tomato Paste – 2 tsp
  • Red Chilli Flakes – 1 tsp
  • Turmeric – 1/4 tsp
  • Salt – to taste
  • Light Cream – 2 tbsp
  • Lemon Juice – 2 tbsp
  • Grated Ginger – 1 tsp
  • Salan Masala – 2 tsp

Method:

  • Pour oil into a large frying pan with lid at medium heat and as soon as it warms up, add the scallions and saute them for 3-5 minutes. Add tomato paste, red chilli flakes, turmeric, salt and shrimp. Mix, cover with lid and let it cook for 3 minutes.
  • Later, add light cream, lemon juice, grated ginger and salan masala. Gently mix well and cover and let it cook for 5 more minutes. Serve warm.

Suggested Accompaniments: It tastes wonderful along with warm Rotis, or Basmati Chawal and any Vegetable side dish.

Luv,
Mona

AddThis Social Bookmark Button

Khatti Machli

March 1st, 2008 Mona Posted in Coriander seeds, Cumin seeds/Zeera, Curry leaves (fresh), Eid/Ramadhan/Iftaar, Fats and Oils/Tel, Mackerel, Mustard seeds/Rai, Olive Oil, Red Chilli powder, Salmon, Salt/Namak, Sea-food, Snapper, Spices & Seasonings/Masaale, Tamarind/Imli, Tomato/Tamatar (fresh), Turmeric/Haldi, Vegetables/Tarkariyaan 9 Comments »

Recently my hubby bought home fresh Mackerel fish as he knows I love Seafood. I thought of whipping up a curry using whatever I had in the refrigerator, and believe me, it was one yummy meal alhamdulillah.

Khatti Machli – Mackerel in a sour, Tomato-Tamarind Sauce

I had it along with Khichdi and my family members loved the combination. The sourness of the gravy with tomatoes and tamarind gave a very good flavour to the fish. You can even have it along with Basmati Chawal or Naan ki Roti.

Khatti Machli – Mackerel in a sour, Tomato-Tamarind Sauce

Serves : 3

Ingredients:

  • Fresh Mackerel – cut into big pieces (or) you can use any fish you like, like Salmon, or King fish, or Snapper
  • Olive Oil – 2 tbsp
  • Yellow Onion – 1, small, roughly chopped
  • Red Ripe Tomato – 1, cut into quarters
  • Tamarind concentrate – 2-3 tbsp
  • Red Chilli Powder – 1 1/3 tsp
  • Curry leaves/Karyapaar (fresh) – 8
  • Black Mustard seeds – 1 1/2 tsp
  • Salt – 1 tsp
  • Turmeric/Haldi – 1/3 tsp
  • Dry Roasted CorianderSeeds – 1 tsp
  • Dry Roasted Cumin seeds – 1 tsp

Method:

  • Pour 2 tsp oil into a non stick heavy bottomed pan at medium heat. When the oil is warm enough add chopped onion, and stir fry it till lightly browned.
  • In a blender container add the fried onion with oil, tomato and tamarind. Blend till its a smooth paste. You add little water to aid in blending.
  • Add the remaining oil to the pan and as soon as it gets warm, throw in some curry leaves and mustard seeds. As they start to splutter, add the mixture from the blender container and let it cook for 2-3 minutes on medium heat. Throw in the salt, red chilli powder, turmeric, coriander seeds, and cumin seeds. Also pour in half a cup of water and mix well.
  • Add the Mackerel pieces into the cooking gravy and close the lid. Let it cook for 3 minutes. Open the lib and gently turn the pieces. Again close the lib and let it cook for 3 more minutes. Serve warm.

Suggested Accompaniments: Basmati Chawal or Naan ki Roti.

Luv,
Mona

AddThis Social Bookmark Button