Tandoori Chicken is a classic Indian dish. The chicken is marinated in yogurt spiced with ginger garlic and other aromatic spices and some edible food colour. It is left to marinate for minimum 6-8 hours, or for best flavor~overnight, in the refrigerator. During Ramadhan, you can marinate the chicken pieces a day ahead, and just before the iftaar time, you will have to grill them up, and keep them warm in an oven.
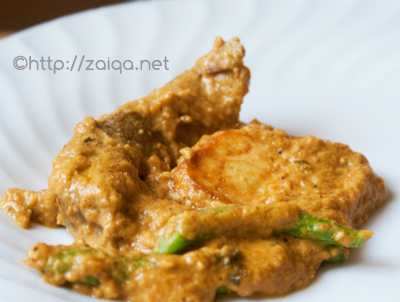
Tandoori Murgh – Chicken Marinated in a mixture of Yogurt seasoned with Spices
Traditionally the Tandoori chicken is made in a Tandoor(Indian clay oven) but today I prepared it in the oven. During summer I prepare it in a Charcoal BBQ Grill for a delicious smoky flavor.
Tandoori Murgh – Chicken Marinated in a mixture of Yogurt seasoned with Spices
Ingredients:
Chicken – 1, skin removed, cut into big 8 pieces (approx)
Lemon juice – 6 tbsp
Salt – 3 tsp
Yellow Onion – 1, large, roughly chopped
Ginger-garlic paste – 3 tsp
Saffron threads – 1 big pinch
Milk – 1 tbsp
Butter – 2 tbsp
Roasted Coriander seed powder – 2 tsp
Roasted Cumin seed powder – 2 tsp
Thick Yogurt – 1 cup
Red Chilli powder – 2 tsp
Kasuri Methi – 2 tbsp
Garam masala – 1 1/2 tsp
Turmeric Powder – 1 tsp
Butter – for basting the chicken
Method:
1. Wash and pat dry the chicken with paper towels, then make incisions on the chicken pieces at the thick parts. Soak Chicken in lemon juice and salt for 2 hours. This is the first marination.
2. Meanwhile prepare the second marination mixture. Grind the roughly chopped onion into a smooth paste and keep aside. Warm the milk slightly and add the saffron threads to it. Let them steep into the milk for again two hours, till the chicken has marinated in the first marination mixture. Now, in a bowl, mix the processed onion paste, thick yogurt, saffron threads with milk, and all the other ingredients except the last one, with the chicken marinating in salt and lemon juice. Rub the mixture well into the chicken. Cover and put the bowl in the refrigerator for 8 hours or preferably overnight, for a great taste.
3. Remove the chicken from the marinade. Preheat the charcoal BBQ and grill the chicken pieces, turning and basting them with butter as needed. Grill and cook chicken for 25 minutes till done and but still tender. Alternatively, you can grill/broil/bake it in the oven at low heat again turning and basting them with the butter as needed. Bake it in the oven for 25 – 30 minutes at 400°F turning them once after 15 minutes and basting them with butter. Pierce the chicken with fork to check if it is done. Garnish with onion rings, lemon wedges, sliced green chillies and serve.
Note: 1. The tempetarures and time used to cook chicken depends entirely on the size of the chicken pieces and the type of oven used. So, it varies. Keep a check on the chicken and make sure you not burn it or do not under cook it.
2. Usually for Tandoori chicken an edible red food color is used during marination for appeal, but I have avoided using it.
3. You can also use a whole skinned chicken to prepare a whole roasted tandoori chicken. For this purpose, make incisions on the chicken on the breast part, thighs and legs. Then let marinate covered in the refrigerator overnight. The next day, bake in a roasting pan with rack uncovered at 400°F for 30-45 minutes, turning the chicken once in the middle. Once done, carve and serve along with salad.
Luv,
Mona