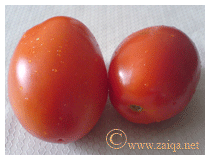
 Tamaton Ka Kut (Tamaton is the plural of Tamatar) (Tamatar(singular) is Urdu word for Tomato) is an another classic Hyderabadi dish. I love the rich red colour of this sauce. Who wouldnt like to have a yummy subtly spiced tomato sauce along with pulaos and biryanis.
Tomatoes, with their juicy subtle sweetness enhance the flavor of most of the dishes. I consider tomatoes as one of the most essential ingredients in Indian cooking, next to onions.
I like to have Tamaton Ka Kut a little bit thick in consistency, not too thick though. I do not add too many spices to this dish, and like to have it only along with cumin and coriander seed powders as the main added spices.
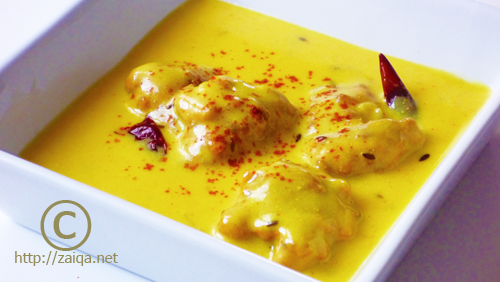
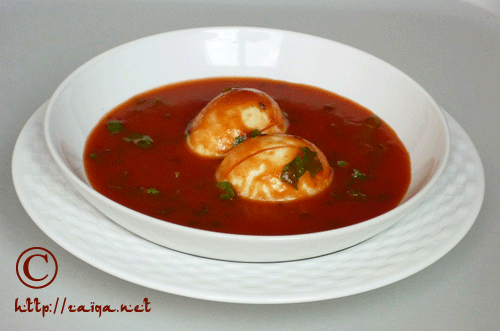
Tamaton Ka Kut – Rich Tomato Saucy Curry
Serves: 6-8
Ingredients:
Tomatoes – 10, large, red and ripe, washed and quartered (or) Canned ground/crushed tomatoes – 596 ml
Besan/Gram Flour – 1/3 cup
Salt – 1 1/2 tsp
Red Chilli Powder – 1 1/2 tsp
Dry Roasted Cumin Seed Powder – 1 tsp
Dry Roasted Coriander Seed Powder – 1 tsp
Oil – 2 tbsp
Cumin Seeds/Zeera – 1 tsp
Curry Leaves/Karyapaak – 8
Garlic pod/Lahsun – 2, whole, crushed
Dried Red Chillies – 2, each split into two
Fresh Cilantro/Kothmir – 1 cup, finely chopped
Fresh Mint/Pudina
Heavy Cream – a dollop(optional)
Hard boiled Eggs – 4
Tamaton Ka Kut – Rich Tomato Saucy Curry
Method:
- Put the quartered tomato pieces in a large non-stick sauce pan on medium low heat. Add a cup of water to it, mix, and cover with the lid. Let it cook till the tomatoes are mushy and soft. Keep giving it a stir every once in a while. Let it cool. Once cooled, pour into a blender container and add the gram flour. Blend till pureed. If you are using canned crushed tomato, add the gram flour to it and mix well.
- Strain this mixture through a wire mesh strainer back into the saucepan. Throw away the left over seeds and skin in the strainer. Add 2 cups water to it and let it cook on simmer.
- Pour oil into a small frying pan at medium heat and throw in the cumin seeds, whole red chillies, garlic pod and curry leaves when the oil heats up. As they start to splutter, remove from heat and add this to the tomato sauce being cooked in the saucepan.
- Add the cumin and coriander seed powder, red chilli powder and salt to the sauce and mix well. Bring it to a boil, and let it cook at medium low heat until the raw aroma of gram flour is gone. You can add a little water to it if required. Taste and adjust the salt and chilli powder according your likes.
- Take the eggs and make light slits on the egg on all 4 sides of it making sure the slits are not deep into the yolk, just on the surface. Add these to the simmering tomato sauce. Cook the tomato sauce until the raw smell of the gram flour is gone, about 30 minutes. Keep stirring it occasionally.
- Once it is cooked, just before you serve, stir in the chopped cilantro and mint. Pour it into a warm bowl. Drop in a dollop of heavy cream and serve it warm.
Note: For a good dark red colour, add a few tablespoons of canned Tomato paste.
Suggested Accompaniments: It is uaually devoured along with Chinese Fried Rice, Vegetable Biryani or Pulaos as a side dish. WE use this sauce to wet rice when we have it.
Luv,
Mona