Chicken with Lychees

August 16th, 2007 Mona Posted in Blog Events/Entries/Polls, Canned Tomato paste, Canola Oil, Capsicum, Ginger-Garlic paste, Gram Flour/Besan, Lychee, Poultry/Murgh, Red Chilli flakes, Red Chilli powder, Salt/Namak, Sugar/Shakkar, Yellow Onion/Pyaaz 1 Comment »

This recipe is my contribution to the event – A fruit a month’ AFAM, which the lovely Sig, of Live to Eat, has hosted for this month with Lychee as the fruit of the month. Many people do not know what Lychee are. Lychee is a fruit, mostly grown in China, and known for its sweet tart flavour. This fruit has a rose coloured skin when young, but as it matures, it develops a hard and leathery rind, which is inedible. It comes off easily leaving behind the jelly like, pearly white flesh with a single inedible seed inside. They are available fresh or canned in most asian stores. Anyways, here’s my entry for the event :

Ingredients:

Marination Ingredients-

  • Boneless Chicken Breast Pieces – 500 gms, cut into 2 cm cubes
  • Salt – 2 tsp
  • Black Pepper – 1 tsp
  • Canola Oil – 1 tsp
  • Sugar – 1/2 tsp

Gravy Ingredients-

  • Gram Flour – 5 tbsp
  • Canola Oil – 3 tbsp
  • Red Capsicum – 1/2 of a large capsicum, chopped
  • Green Capsicum – 1/2 of a large capsicum, chopped
  • Ginger Garlic paste – 2tsp
  • Yellow Onions – 1, finely chopped
  • Canned Lychee in Syrup – 1 can, 565 gms
  • Tomato paste – 3 tbsp
  • Water – 2 tbsp
  • Red Chilli flakes – 1 tsp
  • Red Chilli Powder – 2 tsp

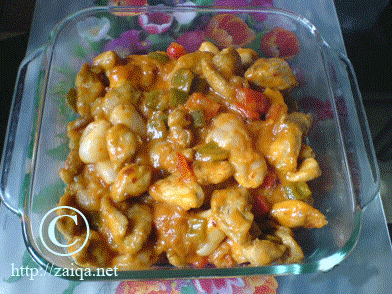
Chicken with Lychees

Method:

  • Drain and reserve all the lychees and a cup of syrup individually in two bowls.
  • Marinate the Chicken in the marination ingredients for preferably 30 minutes.
  • Roll the chicken breast pieces in 4 tbsp gram flour and fry till golden brown. Make sure you do not fry them for too long as breast pieces toughen up too quickly.
  • In a pan on medium heat, in a tbsp of oil, stir fry the red and green capsicum for about 7 minutes. Remove and keep aside.
  • In the same pan add the remaining oil and fry the onions till light brown.
  • Add the ginger garlic paste and fry it along.
  • Add the reserved cup of lychee syrup to it and simmer covered for 5 minutes.
  • Now add the tomato paste and the stir fried capsicum to it and mix well.
  • Dilute the remaining one tbsp gram flour in a 2 tbsp water and pour this into the pan. Let it cook till the mixture begins to thicken up.
  • Add the Chicken pieces and the drained lychees, chilli flakes and red chilli powder and give a good stir.
  • Let it cook on simmer uncovered for 5 minutes.
  • Once ready, Serve it hot.

Luv,
Mona

AddThis Social Bookmark Button

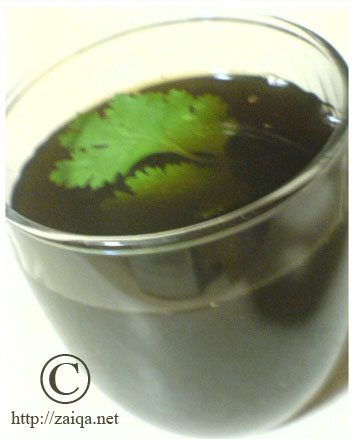
Jal Jeera

August 15th, 2007 Mona Posted in Black Salt/Kala Namak, Blog Events/Entries/Polls, Brown Sugar, Cilantro/Kothmir (fresh), Cumin seeds/Zeera, Drinks/Sharbat, Mint/Pudina (fresh), Red Chilli powder, Tamarind/Imli 3 Comments »

Cumin is a flowering plant that has been grown as a spice, it has digestive properties and a very distinctive aroma. Its a spice used very commonly in Indian cuisines. Its can be store in airtight containers for upto 6 months.

This post is my contribution to Sunita’s monthly event on Spices – Think Spice.. , and she has selected Cumin for this month.Thanks for hosting the event on such a wonderful spice Sunita. Here’s my entry:

Recipe Source: India’s Vegetarian Cooking, by Monisha Bharadwaj

Serves : 4

Ingredients:

  • Cumin Seeds – 2 tsp
  • Tamarind Concentrate – 1 tbsp
  • Hot water – 600 ml
  • Brown Sugar – 6 tbsp
  • Red Chilli powder – 1/2 tsp
  • Black Salt/Kala Namak – 1 tsp
  • Cilantro – few, finely chopped
  • Mint Leaves – few, finely chopped

Method:

  • Dry roast the cumin seeds in a small pan. When they turn dark, grind them into a fine powder and reserve.
  • Dilute the tamarind concentrate in water and add to it the rock/sea salt, sugar, chilli powder and reserved cumin powder and mix it well.
  • Let it cool and stir in the coriander leaves.
  • Pour this mixture into a small jug and let it chill in a refrigerato
  • Luv,
    Mona

    AddThis Social Bookmark Button

    Tuna Cutlets

    August 14th, 2007 Mona Posted in Black pepper powder, Bread Crumbs, Canola Oil, Egg/Anda, Eid/Ramadhan/Iftaar, Garam masala powder, Green Chillies, Quick fix meals, Red Chilli powder, Salt/Namak, Tuna, White Potato/Aloo, Yellow Onion/Pyaaz 5 Comments »

    Canned Tuna is a staple in my home. There are always a few tins stacked up in the pantry that come handy to me at times when I am in the mood of a quick fix.

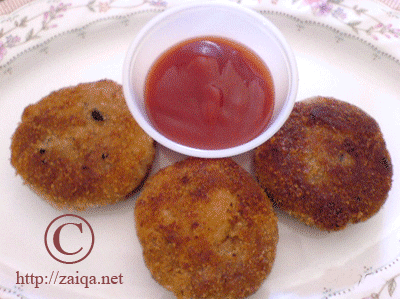
    Serve these cutlets as snacks with tomato ketchup, or as a side dish with Rice or Parathas.

    Tuna Cutlets
    Makes: 26 cutlets

    Ingredients:

    Canola Oil – 2 tbsp
    Yellow Onions – 2, large size, finely chopped
    Green chillies – 10-12, finely chopped
    Tuna Flakes – 2 tins
    Salt – 2 tsp
    Red Chilli powder – 2 tsp
    Garam Masala – 1/2 tsp
    Black Pepper powder – 1/2 tsp
    Potatoes – 3, boiled, peeled, and mashed
    Egg Whites – 3, whipped
    Bread Crumbs – 2 cups
    Canola Oil – as needed for shallow frying the patties

    Tuna Cutlets/Patties

    Method:

    • In a non stick heavy bottom pan on medium heat stir fry the onions and green chillies in oil till the raw flavour of onions is lost and they are translucent.
    • Add the drained tuna flakes to the pan. Mix and let it cook for almost 20 minutes till the tuna is light brown in colour. Keep strring it occasionally ensuring it doesnt get burned.
    • Add salt, red chilli powder, black pepper and garam masala.
    • Add the mashed potatoes to it mix well.
    • Keep stirring it continuously and let it cook for 7 minutes more.
    • Once ready, keep aside and let it cool.
    • Make small patties of the cooled mixture.
    • Pour the whipped egg white in a cup and bread crumbs in an another cup.
    • Dip the patties once in the egg white, then in the bread crumbs and store them in a plastic box if you want to store some, and arrange remaining on a tray to fry them.
    • Pour oil in a pan shallow fry them till brown on both sides.
    • Serve them hot.

    Luv,
    Mona

    AddThis Social Bookmark Button

    Paratha

    August 13th, 2007 Mona Posted in Butter/Makhan, Canola Oil, Eid/Ramadhan/Iftaar, Ghee, Hyderabadi special, Indian Cooking Utensil, Salt/Namak, Whole Wheat Flour/Durum Atta 5 Comments »

    Parathas are my favourite variety of Indian flat breads. They are deliciously flavoured with ghee/oil. I prefer oil mostly and restrict ghee only for special occasions.

    The combination of Parathas and Kawabs goes very well and is utmost delicious. We usually have Parathas and Rice with curries at meals. Its our staple diet.

    Getting the perfect round shape with the correct thickness of each paratha is a bit difficult, but it comes with practice and time. You can use a platter and cut the ends to attain a perfect circular shape for your parathas. But it is not very necessary to get the perfect circular shape always. They are easy to prepare once you get the hang of it.

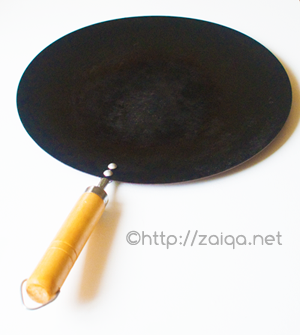
    Tawa ~ flat griddle
    Indian cooking utensil used for making flat breads

    Paratha – Flat bread

    Ingredients:
    Makes-7 Parathas

    Whole Wheat Flour/Durum Atta – 2 1/2 cups
    Salt – 1 1/2 tsp
    Water – 2/3 cups
    Ghee/Oil – 6-8 tbsp
    Extra ghee/Butter/Oil for cooking

    Paratha – Indian Flat Bread,
    kept warm stacked in a Milton hot-pot/casserole

    Method:

    1. Sieve the wheat flour, salt into a mixing bowl or a food processor bowl pour rub in one table spoon ghee. Add water all at once, and knead dough if you are preparing it with your hands for atleast 10 minutes (the more it is kneaded, the lighter the bread will be), or if you are using a processor, use the dough blade and pulse till the dough forms into a ball. Form dough into a ball and cover with clean plastic wrap and set aside for 1 hour.
    2. Later divide the dough into 7-8 equal portions and roll each ball one by one on a lightly floured board into a very thin circular shape (approx 10 cm in diameter) with a rolling pin on a flat surface like the thoroughly clean platform of your kitchen. Pour 1 tsp melted ghee/oil into the centre of each and spread lightly with your fingers on the rolled out discs. With a knife, make a cut from the centre of each circle to the outer edge. Starting the at the cut edge, roll the dough closely into a cone shape. Pick it up and press the apex of the cone and base towards each other and flatten slightly. You will now have a small roughly circular piece of dough again.
    3. Lightly flour the rolling board(girda)/platform again and roll over the dough with the rolling pin(belan) very gently, taking care not to press too hard and make them too thin. Sprinkle extra flour if needed while rolling. Cover the rolled out discs with a kitchen towels to prevent them from drying out.

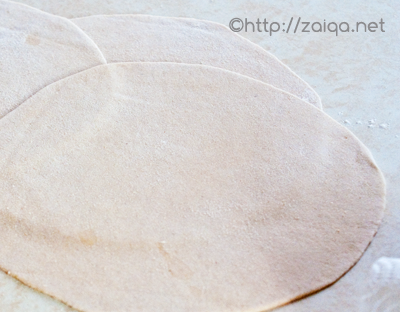
    rolled out Paratha’s, ready to be cooked

    4. Heat a flat griddle/tawa on medium high heat. Once it is hot, put the rolled out disc on the heated griddle. Let it cook for 1 minute. You will notice small bubbles on the disc. Flip it with a rubber spatula or a flat spoon which you have and again cook it on the other side for a further 1/2 minute.
    5. Now quickly brush it liberally with 1 tsp oil/ghee using a silicone basting brush or a teaspoon all over, and flip it over again and cook for a few seconds. Again, working quickly, spead the ghee/oil over the other side too and flip it to cook that side and remove into a plate lined with a paper towel. Keep stacking them over one another and cover the dish with a towel to keep them warm. I have a Milton hotpot/casserole which I had bought from India, and I use it to keep the Parathas warm until I finish cooking all.

    Luv,
    Mona

    AddThis Social Bookmark Button

    Kaddu ka Meetha

    August 13th, 2007 Mona Posted in Almonds/Badaam, Bottle Gourd/Kaddu, Butter/Makhan, Cardamom/Elaichi, Confectionary, Eid/Ramadhan/Iftaar, Hyderabadi special, Khoa, Milk and Milk Products, Sugar/Shakkar 4 Comments »

    I am not much of a ‘Mithai’ person, I do not like sweets/mithai’s a lot. Just yesterday I had to attend a party at my aunt’s place and she gifted us some Boondi Laddu’s and the one to have them are everyone besides me in this house. I usually prefer sweets/desserts that are light, with not too much sugar, infact only a hint of sugar in it.

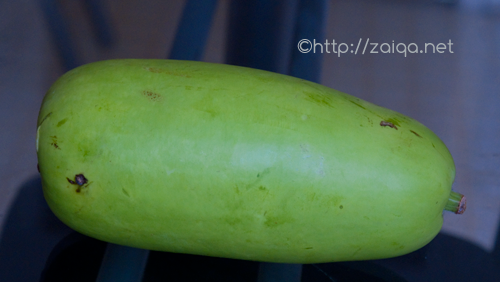
    Kaddu/Bottle Gourd/Opo Squash

    One such meetha that is light on stomach and calories, quick to get prepared, nonetheless satisfies my sweet cravings is Kaddu ka Meetha. For all those of you who haven’t tried this delicious meetha yet, I recommend you prepare it and try it atleast once.

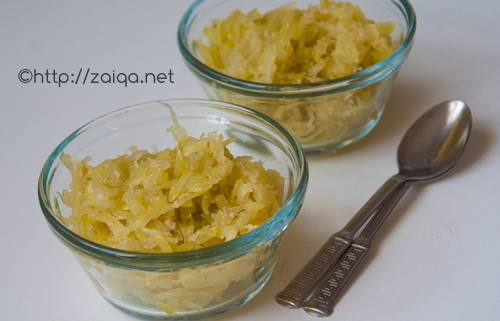
    Kaddu Ka Meetha/Halwa – Bottle Gourd Sweet
    Serves: 4

    Ingredients:

    Bottle gourd/Opo Squash/Kaddu – 1, medium sized, around 1 kg in weight
    Ghee – 1 tbsp
    Milk – 1/2 cup
    Green Cardamom – 3, skin discarded and black seeds finely powdered
    Sugar – 1/2 cup
    Chopped/Sliced Almonds or Chopped/Sliced Pistachios or Raisins or Chopped Cashewnuts – shallow fried in little oil/ghee, for garnish

    Method:

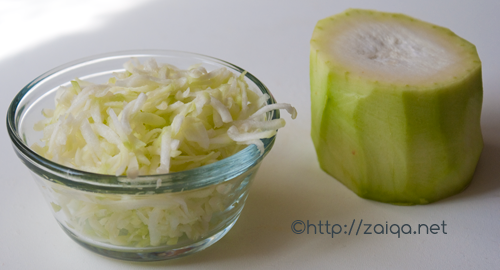
    1.Wash, pat dry and peel the bottle gourd. Discard the peels or use them to prepare this curry. Then slice off the central pith containing the seeds and discard it. Use only the clear white flesh devoid any seeds present between the central pith and the peel. Grate this flesh using a grater or in a food processor. Mine came to around 4-5 cups of grated bottle gourd.

    Grated Bottle gourd (left); Cut and Peeled bottle gourd (right)

    2. In a heavy bottom sauce pan on medium heat, add the grated bottle gourd and cook it stirring continuously, but very gently, make sure you do not mush it up while stirring; until mostly dry. At this point add ghee and let it cook for a minute while stirring it gently. Pour in milk and let it cook again until it absorbs most of the milk. Add cardamom powder, sugar and keep stirring it. You can add more or less sugar according to your taste. Let it cook again until the sugar dissolves for about 5-10 mins more. Add fried nuts or raisins and mix. Remove from heat and let cool. Once cool, refrigerate for a few hours and serve chilled.

    Kaddu Ka Meetha/Halwa – Bottle Gourd Sweet

    Suggested Serving: To impress your guests, serve the chilled meetha in mini pastry cases that are easily available in stores. You can name it ‘Kaddu ka Meetha Tarts’.

    Luv,
    Mona

    AddThis Social Bookmark Button