Shalgam ka Salan and a Giveaway

December 7th, 2010 Mona Posted in Canola Oil, Cilantro/Kothmir (fresh), Ginger-Garlic paste, Product review/Giveaways, Red Chilli powder, Salt/Namak, Turmeric/Haldi, Turnip/Shalgam 18 Comments »

Other than just eating raw in salads, there are so many different ways to enjoy this humble winter root vegetable. Grown mostly in temperate climates, turnips are creamy white in color with a reddish purple upper crown where they have been exposed to sunlight. They have a pungent flavour similar to raw cabbage or radishes and becomes mild after cooking.

Turnips – Shalgam

About 100 gm of turnip root contains just 30 calories and contains Vitamin C. This underappreciated root vegetable packs a nutritional wallop that includes impressive stores of lutein, beta carotenes, riboflavin, magnesium, carotene, manganese, folate, calcium and iron. So for all these good reasons remember to buy them every once in a while during your grocery shopping and include them in your diets. Here’s a simple curry for you all to try this vegetable out.

Shalgam ka Salan – Turnip Curry

Ingredients:

Turnips/Shalgam – 5, peeled and chopped into pieces
Canola oil – 3 tbsp
Onions – 2, medium sized, finely sliced
Ginger garlic paste – 1 tsp
Red chilli powder – 1 1/2 tsp
Salt – 2 tsp
Turmeric powder – 1/4 tsp
Green chillies – 2, small, finely chopped
Cilantro – 3 tbsp, finely chopped

Shalgam ka Salan – Turnip Curry

Method:

In a saucepan, add oil and as soon as it warms up, add the sliced onions and fry until they are light brown in color. Add ginger garlic paste and fry along for a minute. Add red chilli powder, green chillies, chopped cilantro, salt and turmeric powder and about 2 tbsp water. Mix and cook for a minute. Add the chopped turnip and pour in about 1/2 cup water. Mix well and cover with a lid. Let it cook until the turnips are soft. Serve warm along with parathas.

The Giveaway:

A few days the Tetley Canada tea team had contacted me if I would be interested in giving away a basket full of their teas. To which I gladly accepted and here is a chance for you to win this gift basket with a range of aromatic herbal teas to extinguish all your winter blues and warm up your body.

Tetley Tea is on a mission to help Canadians get more “colourful” with their new line of herbal teas. As you know, colour influences our lives every day. In the home, a bedroom that’s painted paled blue an have a calming affect. Wearing red can illicit a sense of energy and excitement. Our colour choices can have dramatic effects on our mood and well being. Now you can match or even influence your mood using colour with this new line of herbal teas for a little Tetley Colour Therapy.

Discover which tea will suit your mood by visiting TetleyColourTherapy.com

This giveaway is limited to within Canada only (excluding Quebec, due to shipping, sorry!). Leaving a comment on my blog enters you a chance to win. One randomly-picked winner will be chosen. Contest closes on midnight December 15th 2010. Good Luck!

Luv,
Mona

AddThis Social Bookmark Button

Lamb Roast

December 3rd, 2010 Mona Posted in Black pepper powder, Ginger-Garlic paste, Hyderabadi special, Lamb/Beef/Mutton/Veal/Sheep, Lemon/Nimbu, Red Chilli powder, Salt/Namak 9 Comments »

It had been quite hectic since Bakr-Eid with get-togethers and celebrations going on quite often in our circle of friends. Had a very good time along with loved ones, but it all left me tired and didn’t give me any time to sit back and unwind, forget about blogging. Nevertheless I am happy now to get back to my usual routine and enjoy the daily grind. Perhaps I am one of those people who prefer a familiar routine rather than the unusal and atypical cycles.

Lamb Roast

The last Eid I had prepared Dum ki Raan, where a whole leg of lamb is marinated overnight and then slow roasted in the oven until so tender that the meat literally falls off the bone. This year I tried my hands on Lamb roast, my mother in law’s recipe, and it was absolutely delicious. The method is as simple as it can get with the use of only the basic seasonings and ginger garlic paste as the meat tenderizer. To prepare, all excess fat from the lamb leg is removed and discarded, deboned and then the meat is cut into chunks. The meat is then allowed to marinate overnight and then roasted on stove top until perfection. The trick is to ask the butcher to give you the best quality lean meat and then to marinate it overnight. There is no need for commercial meat tenderizers at all.

Lamb Roast

Ingredients:

1 Leg of Lamb- deboned, fat removed, meat cut into big chunks, washed and pat dried
Ginger garlic paste – 2 tbsp
Red chilli powder – 1 tsp
Salt – to taste
Black pepper powder – 1 tsp
Lemon juice – to taste

Method:

1. In a mixing bowl, add ginger garlic paste, salt, red chilli powder, black pepper powder and lemon juice. Marinate the meat chunks in the above mixture overnight covered in the refrigerator.
2. In a large, wide and thick bottomed preferably non-stick frying pan, add the chunks of meat along with all the marinade and arrange in a single layer. Let the meat cook on high heat and keep turning after a few minutes, not too often, until you see all the pieces have nicely browned on all sides. You will see a lot of moisture that will be released during this process. Once the meat has properly browned on all sides, add about 3/4 cup of water and cover with a tight lid. Lower the heat to medium and let cook until the meat has become tender. This might take 30 minutes to 1 hour. Once done, serve immediately on a platter garnished with shredded lettuce, sliced tomatoes and onion rings.

This is my first contribution to the Hyderabadi Bakr Eid Food Festival that I am hosting this month on my blog. Click on the link or the logo for more details. The logo for the event is:

Remember that the event is on and you can all send in your entries to me before December 31, 2010.

Luv,
Mona

AddThis Social Bookmark Button

Tarkari ki Biryani

November 9th, 2010 Mona Posted in Almonds/Badaam, Broccoli, Canola Oil, Carrot/Gajar, Cashewnuts/Kaaju, Cilantro/Kothmir (fresh), Cinnamon/Dalchini, Clove/Laung, Cumin seeds/Zeera, Eid/Ramadhan/Iftaar, Ghee, Ginger-Garlic paste, Green Chillies, Green Onion/Hari Pyaz, Hyderabadi special, Mint/Pudina (fresh), Peas/Matar, Red Chilli powder, Saffron/Zafraan, Salt/Namak, Tomato/Tamatar (fresh), Turmeric/Haldi, White Potato/Aloo, Yellow Onion/Pyaaz, Yogurt/Dahi 22 Comments »

I was immensely thrilled to learn just a few months back during this last Ramadan that Haleem is the first Hyderabadi delicacy to be granted the Geographical Indication Certificate (GI status) along the lines of the famous Tirupati laddu, Darjeeling tea, Goan feni and Banarasi silk. So it will only be referred to as ‘Hyderabadi Haleem’ from now on. How cool is that. I wish that Biryani and many other such iconic dishes of the city too get the recognition as soon as possible.

Biryani is a dish of royalty, of the nizams of the Hyderabad and the Moghuls, known for its cooking method, delicate flavor, heavenly aroma and the use of many spices in the right proportion. In Persian “Birian” means ‘fried before cooking’. There exist two kinds of Biryani, the non-vegetarian and the vegetarian versions. I have already blogged about both the kachchi (raw) and pakki (cooked) method of the Chicken and Mutton Biryani. You can find the recipes here. Apart from the Hyderabadi Biryani, many other versions also do exist, like the Iranian Biryani, the Khaibari Biryani (from Afghanistan) and Pakistani Biryani, all with a few regional variations that change with religion, geography and culture, but all under the same name Biryani. Today Hyderabadi Biryani caters to palates all over the world.

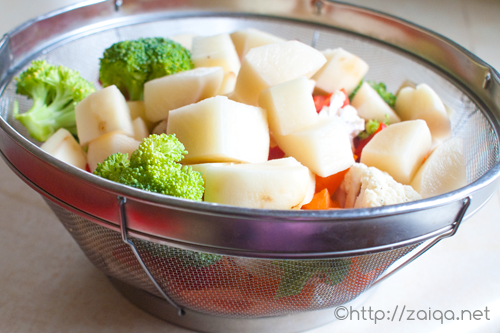
Chopped Mixed Vegetables

Like I had mentioned in my last post, I love to prepare traditional dishes like Nihari, Biryani and Haleem during the cold season. So the last weekend, I prepared Hyderabadi Vegetable Biryani along with Tomato Chutney as the main course for a dinner party.

Tarkari in Urdu language means vegetables. Just like the non-vegetarian version, the vegetarian version is just as ambrosial and a delightful crowd pleaser. All my guests loved it. I do not know how I missed writing about this Biryani all this while. So without further ado, for all those who were waiting for the Hyderabadi version of the Vegetable Biryani, here goes. Following is my Ammi’s recipe.

Hyderabadi Tarkari ki Biryani – Vegetable Biryani
Serves: 6- 7

Ingredients:

Fragrant long grained Basmatic Rice – 3 cups
Warm milk – 3/4 cup
Saffron strands – two pinches
Canola oil – 5 tbsp (or Ghee)
Yellow Onions – 2, large, finely sliced
Ginger garlic paste – 1 tbsp
Long Green chillies – 2, each slit lengthwise and chopped into half
Mixed Vegetables – large cauliflower florets, large broccoli florets, carrots cut into 2″ long thick sticks, capsicum (any color) cut into long and thin strips, green beans cut into 2″ long pieces, boiled/frozen green peas, quartered potatoes, quartered firm red tomatoes – 5 cups
Cumin seeds – 2 tsp
Red Chilli powder – 2 tsp
Salt – 4 1/2 tsp
Turmeric powder – 1/4 tsp
Cilantro – 1/2 cup, loosely packed, roughly chopped
Yogurt – 250 ml, 1 cup
Caraway seeds/Shahzeera – 1 tsp
Dried Bay leaf – 2
Cloves – 4
Green cardamoms – 5
Mint leaves – 1 cup, loosely packed, roughly chopped

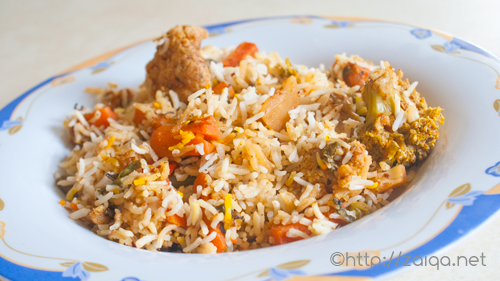
Tarkari Biryani – Vegetable Biryani

Method:

1. Wash the rice in several changes of water and let soak in cool surplus water in a vessel.
2. In a small cup, pour in warm milk and saffron strands. Keep aside.
3. In a large and wide saucepan, add oil and as soon as it warms up add the sliced onions and fry them while stirring frequently until evenly golden brown in color. Remove the pan from heat and using a slotted spoon transfer half of the fried onion into a platter and reserve for garnish.
4. In the same saucepan, add the cumin seeds, ginger-garlic paste and green chillies, stir fry for a minute. Immediately add all the mixed vegetables. Also add red chilli powder, 1 1/2 tsp of salt and turmeric powder and chopped cilantro. Mix well very gently. Increase the heat to high and let the vegetables sear. Give the vegetables a stir every two minutes, until they get seared on all sides. Now add the yogurt and mix. Lower the heat to medium high and let cook covered for 3-5 minutes. Once the vegetables are cooked, (but not mushy) (do not overcook the vegetables) (pierce a knife into a potato and check if it is done) uncover and cook on high while stirring whenever required until the vegetables are almost dry. Keep aside.
5. In a large heavy bottomed vessel pour in surplus water and add shahzeera, dried bay leaf, cloves, green cardamoms and cover with a lid. Let it come a rolling boil. Once boiling, drain the soaking rice and add to the boiling water. Let it cook until the rice if half done. Once done, drain the rice and keep ready. Now starts the layering process of the Biryani. Working quickly, in the same vessel, add half of the drained rice. Now add the cooked mixed vegetables. Spread over the rice evenly. Now spread the reserved fried onions meant for garnish, and the chopped mint leaves evenly over the vegetables. Next, arrange the left over rice evenly covering the vegetables. Lastly, pour evenly the saffron milk. Cover the vessel properly with aluminium foil or a tight lid (with vents closed with dough if any) so that no steam can escape. You can also apply dough to seal the lid which is the traditional method.
6. Cook the Biryani on high for 2 minutes. You will notice that a good amount of steam has built up, which is called as the pehli bhaap, meaning first steam. Then take a flat dosa tawa and keep it below the vessel (so that the bottom does not burn and it slow cooks evenly) and lower the heat to simmer and let it slow cook for 30 minutes, until done. Remove from heat. Let the Biryani sit for 15 minutes before serving. Dig a spoon into the vessel and gently mix the Biryani. Serve on a platter. For a special touch, garnish with more fried onions, finely chopped cilantro and mint leaves, toasted/fried almonds or cashewnuts or pinenuts or raisins.

Serve this Biryani along with Mirchi Ka Salan or Baghare baingan or Tamatar ki Chutney or plain and simple Dahi ki Chutney for a sumptuous Hyderabadi meal.

Note:
1. You can also add chopped paneer cubes, sliced mushrooms, and soy nuggets along with the vegetables.
2. Brocolli is not usually added to the Biryani, I added it because I love it.

Luv,
Mona

AddThis Social Bookmark Button

Qimah Aloo Methi

October 20th, 2010 Mona Posted in Canola Oil, Cardamom/Elaichi, Clove/Laung, Eid/Ramadhan/Iftaar, Ginger-Garlic paste, Green Chillies, Hyderabadi special, Kasuri methi, Lamb/Beef/Mutton/Veal/Sheep, Methi (fresh), Onion/Pyaaz, Red Chilli powder, Red Potatoes, Salt/Namak, Tomato/Tamatar (fresh), Turmeric/Haldi, White Potato/Aloo 22 Comments »

“..the only one way to learn to cook is through the senses and heart. It turns out it is the only real way to live and to love, as well.” ~ Nani Power

Toronto has four very distinct and picturesque seasons. Among them all, I absolutely love fall. The amazing colors that the trees take on sets my heart to praise its beauty beyond words. The misty mornings, spectacular drives, earthen colors, cozy sweaters, cool winds, falling leaves. Yep, I am in love with the most colorful season of Toronto -Autumn/Fall.

Fall is my favorite season for cooking. This season for me calls for very rustic and traditional recipes like Biryani along with Mirchi ka Salan, or masaaledaar (spicy) curries that I can enjoy along with warm parathas, HaleemNihari and the usual simple soups to warm up the body. Today I prepared Qimah Aloo Methi along with piping hot Khichdi, perfect for the fall season, warm and comforting.

baby fenugreek leaves – choti methi ki bhaji

Qimah Aloo Methi is a usual at most Hyderabadi households. Baby fenugreek leaves, aka choti methi ki bhaji as they are called in Urdu language, is the key to a great tasting Qimah Aloo Methi. You can either grow fenugreek leaves in your own backyards, or buy it from the markets. If baby methi is not available, you can make do with the usual matured fenugreek leaves that are available at grocery stores which is called as badi methi ki bhaji, or use dried methi leaves which is the Kasuri methi, like I did.

We used to enjoy this curry along with warm parathas at breakfast or along with Khichdi, Khatta and Chutney at lunch. Nothing can go wrong with this simple yet nourishing recipe. You are bound to fall in love with it.

Qimah Aloo Methi – Minced meat along with Potatoes and Fenugreek leaves

Ingredients:

Onions – 2, medium sized, finely sliced
Minced Lamb/Veal meat/Qimah – 1 lb
Canola oil – 2 tbsp
Cloves – 4
Green Cardamoms – 2
Ginger garlic paste – 1 tbsp
Turmeric powder – 1/2 tsp
Tomato – 1, large, finely diced
Red chilli powder – 2 tsp
Salt – to taste
Green chillies – 3, each slit in half lengthwise
Fresh baby methi leaves or matured leaves – 3 bunches, root part chopped and discarded, tender stams and leaves finely chopped, washed and drained (or) Kasoori Methi – 2 tbsp
Red/White potatoes – 3, large, quartered

Qimah Aloo Methi – Minced meat along with Potatoes and Fenugreek leaves

Method:

1. Wash the minced meat well in a fine strainer so that the blood drains off. What my Ammi always does while washing minced meat is that she mixes the raw minced meat with sliced onions, and she then puts it in a fine meshed strainer meant specifically for washing minced meat and she then lets fresh tap water run over it while working the minced meat with her fingers until the water runs clear. She says that mixing sliced onions with the meat will help wash the minced meat well and also helps get rid of the smell. Once washed, let the washed minced meat and onion sit in the strainer over a large bowl for a hour or so to let the excess water drain away.
2. In a large frying pan at medium high heat, pour in oil and as soon as it warms up, add the cloves and cardamoms. Now add the ginger garlic paste, red chilli powder, salt and turmeric powder. Stir fry for a few seconds. Immediately add the diced tomatoes and green chillies. Mix well. Add the drained minced meat and onions. Using a spoon break the minced meat while mixing it up thoroughly with the masala and cover the lid. Keep mixing it and the covering it until you see the color of the minced meat has changed from red to brown. Now add the fresh methi or kasoori methi, quartered potatoes and water to cover and let it cook covered at simmer. Keep stirring it frequently. Once the water has all dried up and the potatoes are done, remove from heat and serve immediately along with warm parathas.

***

On a different note, I have been thinking of announcing an event especially dedicated to the iconic Kacchi Biryani of Hyderabad. It would be wonderful to go through everyone’s recipes for the Kacchi Biryani. What do you think. Will you all participate and join in the fun. Please let me know.

Luv,
Mona

AddThis Social Bookmark Button

Lagan Ka Murgh

October 15th, 2010 Mona Posted in Canola Oil, Cardamom/Elaichi, Cashewnuts/Kaaju, Cilantro/Kothmir (fresh), Clove/Laung, Dry Bay Leaf/Tej Patta, Eid/Ramadhan/Iftaar, Garam masala powder, Ginger-Garlic paste, Hyderabadi special, Indian Cooking Utensil, Onion/Pyaaz, Poppy seeds/Khus-Khus, Poultry/Murgh, Red Chilli powder, Salt/Namak, Tomato/Tamatar (fresh), Turmeric/Haldi, Yogurt/Dahi 26 Comments »

During my recent trip to Hyderabad, I got to do a lot of things that I had been wanting to do since long. I attended many weddings and enjoyed the traditional food serving there, brought along Lamsa tea mix which is something solely available in Hyderabad city, spices, and a few of the Indian utensils that were missing in my kitchen here depending on the weight limitations. I wish there was a little more allowance so that I could have got more.

Lagan – Indian utensil

Lagan is an Indian utensil that is wide, thick walled with a slightly curved thick bottom. I do not know if this is available and used in other parts of India as well. I brought along a medium sized lagan to use in my daily cooking. Mostly, this utensil is used to prepare dough in it, but it is also used to cook other dishes as well.

Since I had landed here in Toronto, I wanted to treat hubby dear with some special dishes, so I thought to prepare this simple yet exotic chicken curry. I cannot vouch for the authenticity of this recipe, but it turned out superb. My hubby was a happy man, he enjoyed several servings of this curry along with rice and licked the plate clean.

Marinating the chicken and then slow cooking it in the masala does the trick. If you do not have a lagan to cook this dish in, you can simply use any heavy bottomed pan instead.

Lagan Ka Murgh ~ Slow-cooked Creamy Chicken curry in Aromatic Spices

White Poppy Seeds/Khus Khus – 1 tbsp
Cashew nuts – 1/8 cup
Warm milk – 3/4 cup
Chicken – 8 chicken leg pieces (or 650 gms with bone or boneless chicken cut into bite size pieces)
Thick Yogurt – 1/2 cup
Ginger garlic paste – 1 tbsp
Red chilli powder – 2 tsp
Salt – 1 1/2 tsp
Turmeric powder – 1/2 tsp
Canola oil – 4 tbsp
Onions – 3, medium sized, finely sliced
Cloves – 4
Green cardamoms – 4
Dried Bay leaf/Tej patta – 1
Tomato – 1, large, pureed
Garam masala powder – 3/4 tsp
Cilantro/Kothmir – 2 tbsp, finely chopped

Lagan Ka Murgh ~ Slow-cooked Creamy Chicken curry in Aromatic Spices

Method:

1. In a small cup, add khus khus and cashewnuts. Pour in warm milk and let soak for 20-25 minutes. Later puree it into a smooth paste.
2. Marinate the chicken with yogurt, ginger garlic paste, turmeric powder, salt and red chilli powder. Mix well and keep aside for 30-40 minutes.
3. In a lagan or any thick bottomed vessel at medium high heat, pour oil and as soon as it is hot, add the sliced onions, two pinches of salt and fry while stirring constantly until they are golden brown in color. Add cloves, cardamoms and bay leaf. Add the marinated chicken along with the marinade and mix well. Add the prepared cashewnuts+khus khus+milk puree, and the tomato puree and mix well. Simmer, cover and let it cook slowly for 30-40 minutes. Keep stirring it every once in a while. You will see the oil will start to leave and the gravy will get thicker. Once done, sprinkle garam masala powder and chopped cilantro. Mix well and serve immediately.

Serve this creamy chicken curry warm along with hot Tandoori Naan, or Parathas or Khushka.

Luv,
Mona

AddThis Social Bookmark Button