During my childhood, this spongy vegetable ranked among the toppers in my list of disliked vegetables . The only way I would eat them was when these eggplant discs were deep fried till crisp on the edges with a soft flesh in the center, and lightly seasoned with red chilli powder and salt while still warm. But today, eggplants seem to have become one of my favorite vegetables over time and I somehow end up getting a few eggplants home most usually. There are so many delicious preparations that can be made out of this simple vegetable, for ideas I recommend going through this cookbook – Eggplant – More than 75 delicious recipes, it will make you fall in love with eggplants.
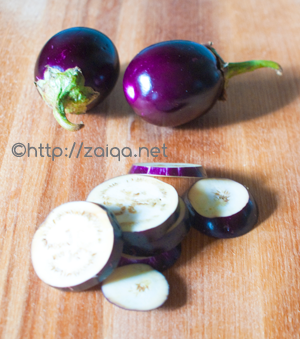
Indian eggplants ~ cut into chips
I am sure even you all will enjoy these eggplant chips, my childhood favorite, as an accompaniment to your meals.
Taleh Baingan – Deep fried Eggplant discs
Ingredients:
Baingan/Aubergine/Eggplants – 4 (I used baby eggplants as shown in the picture, you can even use Japanese eggplants)
Red chili powder – 3/4 tsp or to taste
Salt – to taste
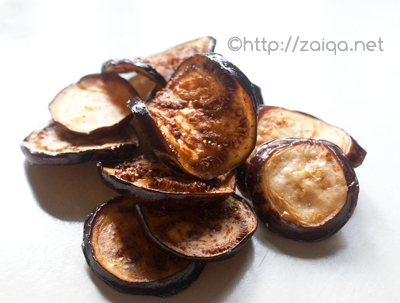
Taleh Baingan – Deep fried Eggplant discs
Method:
1. Cut the eggplant into half inch thick slices and soak them in surplus salted water in a mixing bowl.
2. Heat oil to deep fry in a kadai or wok at medium heat and as soon as it is warm enough. Drain the eggplant discs and gently slide them in the hot oil, and deep fry in batches on both sides until the color is changed to a golden brown color and the outer edges are wrinkled.
3. Remove using a slotted spoon into a wire mesh strainer for the excess oil to drain away. Immediately sprinkle the fried discs while warm with the red chilli powder and salt on both sides. Serve immediately and enjoy while still warm.
Luv,
Mona