Tamatar ka Achaar

April 29th, 2010 Mona Posted in Canola Oil, Cumin seeds/Zeera, Curry leaves (fresh), Fenugreek/Methi seeds, Ginger-Garlic paste, Mustard seeds/Rai, Red Chilli powder, Salt/Namak, Tamarind/Imli, Tomato/Tamatar (fresh), Turmeric/Haldi 30 Comments »

Every Andhra kitchen in India is well stocked with a range of spicy pickles. Even I love to prepare and store a few pickles to compliment and add a zing to my meals. Right now, I have jars of tomato pickle, lemon pickle and mutton pickle sitting in the refrigerator.
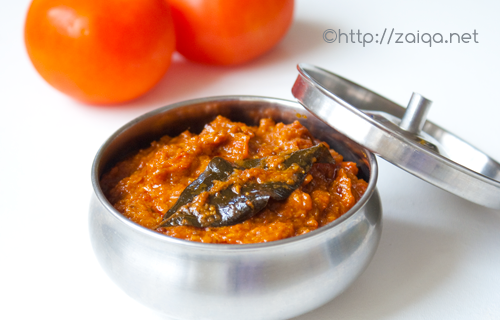
Tomato Pickle – Tamatar ka Achaar

Tangy, sour, salty and bold on taste buds ~ Tomato pickle is one such specialty from the state of Andhra Pradesh. This pickle is not labor intensive, but it does require a little attention and time. I prepare only small batches that last for a month or so, and again keep preparing this pickle whenever I see good quality tomatoes on sale.

Tomato Pickle – Tamatar ka Achaar

Ingredients:

Tomatoes – 800 gms, red & ripe, firm, juicy and blemish free
Thick tamarind pulp – 3 ½ tbsp
Red chilli powder – 1 tbsp
Salt – 1 tbsp
Haldi – ½ tsp
Cumin seeds/Zeera – 1 ½ tbsp
Fenugreek seeds/Methi dana – 1 tsp
For Tempering/Baghaar:
Canola oil – 6 tbsp
Mustard seeds/Rai – ½ tbsp
Cumin seeds/Zeera – ½ tbsp
Ginger-garlic paste – 3 tbsp
Curry leaves – 2 sprigs

Method:

1. Wash the tomatoes, pat dry thoroughly, and cut them into quarters.
2. In a spice grinder, add the cumin seeds and fenugreek seeds and grind them individually into a fine powder.
3. In a blender container, add the quartered tomatoes, cumin seed powder and fenugreek seed powder, tamarind pulp, red chilli powder, salt and turmeric powder. Blend until smooth. Pour into a saucepan at medium hight heat and bring it to a boil. Keep stirring it frequently.
4. Meanwhile, prepare baghaar: In a small frying pan at medium high heat, pour oil and as soon as it warms up, add the mustard seeds and cumin seeds. As they start spluttering, add the ginger-garlic paste and stir fry for a minute. Add curry leaves and mix well. Immediately pour this baghaar hot and hissing into the cooking tomato mixture and mix well.
5. Once the tomato mixture is boiling reduce heat to medium and keep cooking uncovered while stirring frequently until most of the moisture has been evaporated and the tomato mixture has been reduced to a thick paste and the oil starts leaving, this might take around 1 ½ hour time of slow simmering. Remove from heat and let cool. Once completely cool, spoon the pickle into sterilized glass jars with tight lids. Store in the refrigerator and enjoy the pickle along with your meals. Stays well for around a month or two.

Luv,
Mona
AddThis Social Bookmark Button

Steamed Asparagus

April 26th, 2010 Mona Posted in Asparagus, Black pepper powder, Salt/Namak 8 Comments »

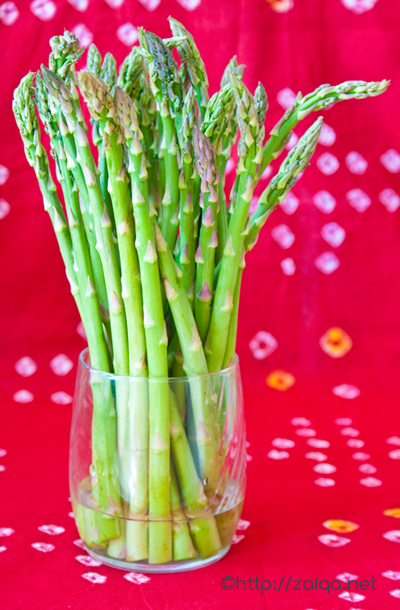
A member of the lily family~asparagus, was one such vegetable that had me intrigued with its strange beauty. I had seen and tasted this speary spring time delicacy for the first time in my life only in Toronto. Sweet, grassy and earthy in taste with a fragrance of spring, it soon began one of my favorites. Asparagus comes in two colors~green and white. While buying, look for tightly closed tips and long stems that are signs for good asparagus, and enjoy it fresh as soon as you bring it home. However, if you want to store for later use, trim the base of the stalks, and stand them upright in a jar filled with an inch of cool water, cover loosely with a plastic bag and refrigerate for 3-4 days.

Asparagus

What do I usually do with asparagus you ask? Mostly I steam cook them as soon as I get them home to enjoy as a quick side-dish to my meals. Sometimes I also simply roast/grill them, or prepare some asparagus and dill cream soup, and occasionally add asparagus to dal, etc. There are so many other ways to enjoy this beautiful vegetable full of health benefits.

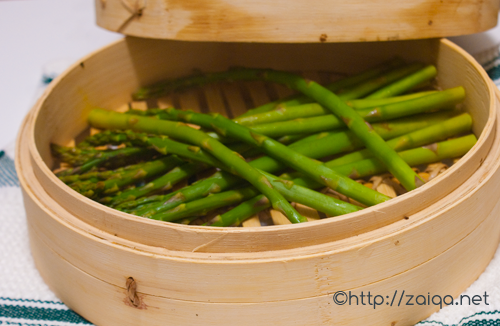
steam cooked fresh Asparagus

Steamed Asparagus

Rinse asparagus in cold water and drain. Cut and discard the woody ends of the asparagus. Bring surplus water to rapid boil in a large saucepan. Add asparagus in a bamboo steamer and place over saucepan. Let steam cook for approximately 12 minutes or until tender-crisp. Once done, transfer the asparagus onto a platter and season liberally with salt and pepper and enjoy.

Luv,
Mona

AddThis Social Bookmark Button

Daalcha Gosht

April 23rd, 2010 Mona Posted in Bottle Gourd/Kaddu, Canola Oil, Chane ki Dal, Cilantro/Kothmir (fresh), Cumin seeds/Zeera, Curry leaves (fresh), Dried Red Chillies, Ginger-Garlic paste, Green Chillies, Hyderabadi special, Lamb/Beef/Mutton/Veal/Sheep, Red Chilli powder, Salt/Namak, Tamarind/Imli, Tomato/Tamatar (fresh), Turmeric/Haldi, Yellow Onion/Pyaaz 20 Comments »

Hyderabadi cuisine is unique, a perfect marriage between the fiery South-Indian and rich North-Indian cuisines of India. Yet, sadly there are such few records in the form of cookbooks, TV shows, magazines, newspapers, blogs or even local restaurants/eateries in the city itself that dedicate to chronicle/serve the true Nizami cuisine of Hyderabad. Only those few lucky members of the Nizam Club of Hyderabad, or people who have connections with the fellow local Hyderabadi families get to enjoy the traditional lovingly home cooked Hyderabadi meals.

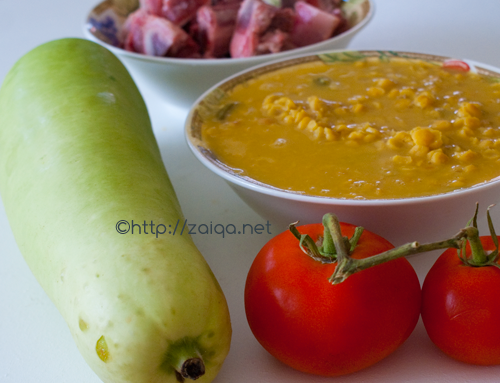
clockwise from bottom right~tomatoes, opo squash, meat bones, cooked dal

Daalcha is one such true Hyderabadi preparation. The Nizami cuisine of Hyderabad is not just about Biryani and Mirchi ka Salan, or an assortment of meat concoctions unlike considered. It has to its repertoire many vegetarian and especially dal (lentil) preparations that are deeply related to the inimitable flavors of Nizami cuisine. Basically, there are two variations to daalcha, one is the vegetarian version – which can be prepared with either opo squash, eggplants or drumsticks, and the other non-vegetarian version – made by adding meat bones to the tangy tempered dal. To impress your guests, serve daalcha gosht along with baghara khana and phalli gosht, the way it is served traditionally at Hyderabadi households.

I have added a few bottlegourd pieces to Daalcha Gosht, you can skip adding them if you want only meat in the dal.

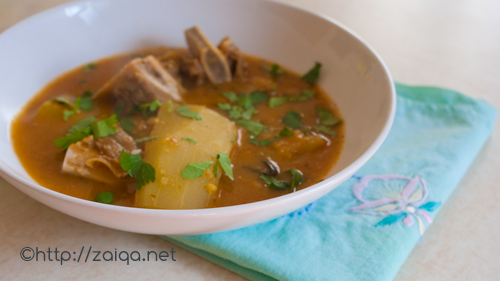
Daalcha Gosht – Lentil and Meat stew

Chanay ki Dal/Chana dal – 1 cup
Green chillies – 3, chopped
Tomatoes – 2, large, chopped
Salt – to taste
Canola Oil – 2 tbsp
Cumin seeds – 2 tsp
Curry leaves – 2 sprigs
Onion – 1/4 cup, finely sliced
Ginger-garlic paste – 1 tsp
Dry red chillies – 2, each broken into two
Lamb meat with bones/Lamb shanks – 500 gms
Red chilli powder – 1 tbsp
Salt – to taste
Turmeric powder – 1/4 tsp
BottleGourd/Opo squash/Kaddu – 1, medium sized, peeled and cut into diamond shape (optional)
Tamarind extract – 1 cup
Cilantro – 3 tbsp, finely chopped

Daalcha Gosht

Method:

1. Soak the dal for 1-2 hours in fresh cool water. Later drain the dal and rinse it in a wire mesh under running water. Add this soaked dal to a pressure cooker, pour in about 3 cups of fresh cool water, chopped green chillies, tomatoes and salt. Close the lid and pressure cook until the dal is mushy. Puree it in a blender until smooth and keep aside.
2. In a separate pressure cooker at medium high heat pour in oil and as soon as it is warm, add the cumin seeds, curry leaves, sliced onion and stir fry until the onion is lightly golden brown in color. Add ginger-garlic paste and stir fry along for a minute. Add dried red chillies, lamb bones/shanks, red chilli powder, turmeric powder and salt. Mix well. Pour in fresh cool water to cover the meat and pressure cook until the meat is tender.
3. Add bottlegourd pieces and mix well. Add little more water to cover them and again pressure cook for 1 whistle. (Skip this step if you are not adding bottlegourd)
4. Add the pureed dal mixture and mix well. Add about 2-3 cups of fresh cool water and tamarind extract to get a pouring consistency (not too thick, nor too thin) and let it come to a boil. Once boiling, simmer and let cook for 10-15 minutes. Add cilantro and stir to mix. Serve warm.

Luv,
Mona

AddThis Social Bookmark Button

Dry Fruits and Nuts Biscuits

April 19th, 2010 Mona Posted in All-Purpose Flour/Maida, Brown Sugar, Butter/Makhan, Canola Oil, Cashewnuts/Kaaju, Clove/Laung, Dry Fruits/Qushk Mewah, Egg/Anda, Fig/Anjeer (dried), Honey/Shahed, Hyderabadi special, Lemon/Nimbu, Nuts/Maghziyaat, Orange/Santra, Raisins/Kishmish, Salt/Namak, Sugar/Shakkar, Walnuts/Aqrot 25 Comments »

Just like Sharmila, and I believe many other Indians, I tend to get confused between cookies and biscuits. Back home in India, only those that are studded with chocolate chips were called as cookies, whereas all others are referred to as biscuits. So you are free to call them whatever you wish, fruit biscuits, or fruit cookies, these melt in mouth morsels studded with dry fruits and nuts are a treat.

dry fruits and nuts biscuits

The famous Karachi Bakery in Hyderabad city is popular for fruit biscuits, among many other baked food products that they are known for. I had always loved these when I was a little kid. These were perhaps one my most early loves. So you can imagine my joy when I discovered a recipe for fruit biscuits at one of my favorite TV chefs website, Ina Garten. I have tried and took delight in many of her recipes, her homely style of cooking is something that I can identify with.

Simple to prepare and delightful to taste, these biscuits have become a regular in my house. Ofcourse I miss those that were available at Karachi Bakery, but these have been successful enough to win my heart and rock my tastebuds. I have made a few changes to the original recipe so that it suites me. For an eggless version, try Priya’s version.

Dry Fruits & Nuts Biscuits/ Cookies
Adapted from this original recipe

Ingredients:

Dried fruits – 1 cup [I used a mixture of tutti frutti and raisins. You can use whatever dry fruits you fancy, like dried berries, candied cherries (or any fruits) etc]
Dried nuts – 3/4 cup [I used a mixture of cashewnuts and walnuts]
Honey – 1 tbsp
Fresh orange juice – 2 tbsp
Fresh lemon juice – 1 tbsp
Unsalted butter – 1/2 cup (at room temperature)
Canola oil – 1/2 cup
Powdered cloves – 1/4 tsp
Light brown sugar – 1/3 cup
Granulated sugar – 1/2 cup
Eggs – 2, large
All purpose flour – 2 2/3 cups
Salt

Method:

1. Chop the dried nuts and fruits roughly. Place them in a mixing bowl, add orange juice, lemon juice, honey and a pinch of salt. Mix well. Cover with a plastic wrap and let sit at room temperature overnight.
2. In a mixing bowl add butter and oil, powdered cloves, granulated sugar and brown sugar. Using a whisk or an electric hand mixer, beat for 3-4 minutes. Add eggs and beat for a minute or two until mixed. Add the the dried fruits and nuts, including any liquid in the bowl. Now add the flour and 1/4 teaspoon salt just until combined. Don’t over-mix! Divide the dough in half. Place the half on a wax paper and using the long edge of the paper as a guide, shape them into logs. Cover the logs with plastic wrap entirely if you plan to freeze them now to use later. Or else, refrigerate the logs wrapped in wax paper for 1-2 hours or until firm (you can even freeze them for just 15-20 minutes) so that you can easily cut them into slices.

biscuit dough logs

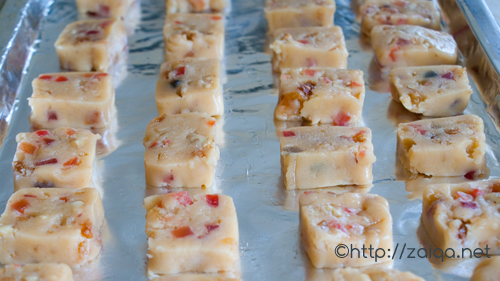
biscuits, cut and ready to be baked

3. Preheat the oven to 350°F. With a small, sharp knife, cut the logs into 1/2-inch-thick slices. Place the slices 1/2-inch apart on aluminium foil lined cookie sheets and bake for 14 to 20 minutes, until lightly golden on the edges. Mine were done in just 14 minutes. Once done, transfer the biscuits immediately on a rack and let cool. Once cool, store in air tight food storage containers.

Luv,
Mona

AddThis Social Bookmark Button

Penne in Roasted Red Pepper Sauce with Minced Meat

April 16th, 2010 Mona Posted in Beef Stock, Cheddar Cheese, Cilantro/Kothmir (fresh), Ginger-Garlic paste, Lamb/Beef/Mutton/Veal/Sheep, Long Sweet Peppers, Pasta & Noodles, Red Chilli powder, Salt/Namak, Turmeric/Haldi 7 Comments »

After having enjoyed aplenty of locally grown sweet red peppers in various forms, I had made a batch of roasted red pepper sauce and froze it to use later early this year. Yesterday, I had the urge to make pasta for dinner for everyone. So I combined the sauce with minced meat, few herbs and spices and some penne pasta, and the meal was so yummy.

Vibrant red color from the silky roasted red pepper sauce along with the delicious meaty flavor, this pasta meal was satisfying and loved by everyone. I will definitely be making this again and again.

Penne in Roasted Red Pepper Sauce with Minced Meat and Cilantro

Ingredients:

Penne pasta – 750 gms
Roasted Red Pepper sauce (see below for instructions on how to prepare) – 350 ml
Minced Lamb/Veal meat – 650 gms
Ginger-garlic paste – 1 tbsp
Red chilli powder – 1 tbsp
Salt – to taste
Turmeric powder – 1/2 tsp
Beef stock – 3 cups
Chopped cilantro – 4 tbsp
Grated cheddar cheese (optional)

Method:

1. Prepare Roasted red pepper sauce, see below for instructions.
2. In a saucepan, heat oil and as soon as it warms up, add ginger garlic paste and fry until it is lightly brown. Add the minced meat, red chilli powder, salt and turmeric powder and stir well to mix. Cook stirring frequently and breaking lumps until there is little or no moisture left and the meat is well cooked. Add the roasted red pepper sauce, beef broth and bring to a boil. Lower heat to medium and cook for 5 minutes.
3. Meanwhile bring a large pot of salted water to boil. Add the penne and cook according to instructions. Drian and add the cooked penne to the cooking sauce of red pepper and minced meat. Add chopped cilantro, mix well and cook until there is just little sauce left. Remove from heat and let rest for 5 minutes for the pasta to absorb flavors. Serve immediately garnished with grated cheddar cheese.

For Roasted Red Pepper Sauce:
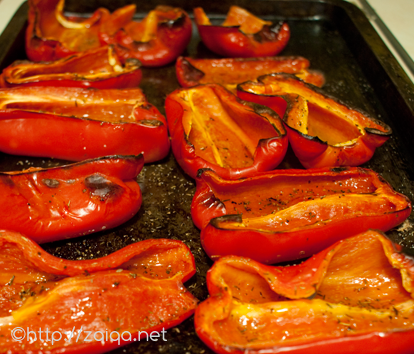
On a rimmed baking tray, arrange 6 halved and cleaned red bell peppers (or) long sweet peppers(red shepherd peppers). Brush them lightly with oil. Sprinkle salt, black pepper powder and dried herbs of your choice.

Roasted Red Peppers

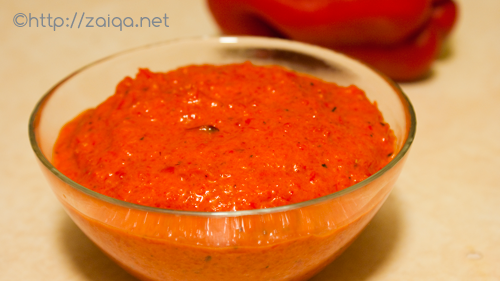
Roasted Red Pepper Sauce

Grill/broil them for a few minutes until the skins brown and blister, approx 15-20 minutes. Turn the peppers once in between. Keep a close eye. Remove, let cool and puree them all until smooth. Store in the refrigerator and use in a week, or freeze to use later.
Note:
1. You can use an assortment of colored peppers, or just use red peppers. I didnt peel the peppers after I grilled/broiled them, you can if you want to.
2. You can also use roma tomatoes that are red but not over-ripe instead or peppers. Halve each tomato, season the halves and grill/broil them similarly for a few minutes, then puree into sauce and use instead of pepper sauce in the pasta for a different but equally delicious taste.

Luv,
Mona

AddThis Social Bookmark Button