Pleasing Paneer

November 26th, 2009 Mona Posted in Black Peppercorns, Canned crushed tomatoes, Canola Oil, Cardamom/Elaichi, Cashewnuts/Kaaju, Cinnamon/Dalchini, Clove/Laung, Coriander seeds, Ginger-Garlic paste, Kasuri methi, Milk and Milk Products, Paneer, Red Chilli powder, Salt/Namak, Turmeric/Haldi, Yellow Onion/Pyaaz, Yogurt/Dahi 16 Comments »

During days when I do not feel like having any non-vegetarian meal, I treat myself with some Paneer in a creamy gravy curry. The non-melting attribute and meat like texture of Paneer is favored by vegetarians and is a very good substitute for meat.

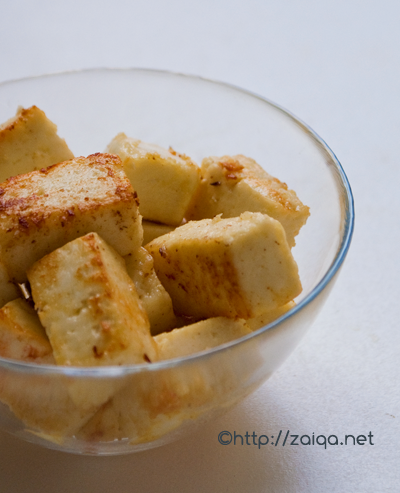
Shallow fried Paneer cubes

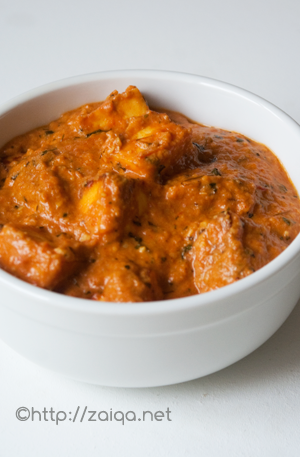
To add a shahi touch/richness and thickness to the gravy, paneer is simmered in a cashewnut+milk puree along with yogurt and tomatoes. I have used milk instead of using cream, you can go ahead and use cream for the gravy if you want. You will definitely fall in love with this delightful paneer curry which is one my favorites.

You can use home-made Paneer,or store-bought~ easily available at Indian stores in the cold sections. Store brought ones has additives and lacks freshness, but saves time.

Shahi Paneer Masala – A Royal Cottage Cheese Curry

Ingredients:

Yellow Onions – 2, large, roughly chopped
Canola oil – 5 tbsp
Home-made Paneer – 400 gms, cut into cubes (if using store bought, I recommend Mother-dairy brand)
Cinnamon stick – one 2″ stick
Cardamom – 2
Cloves – 2
Black peppercorns – 5
Ginger-Garlic Paste – 1 tbsp
Cashewnuts – 1/4 cup, soaked in 3 tbsp warm milk for 30 minutes and pureed to a smooth paste
Yogurt 2% – 1/2 cup
Canned Crushed tomatoes – 185 ml (or you can also use 5 medium sized pureed tomatoes)
Salt – 1 1/2 tsp
Red chilli powder – 2 tsp
Turmeric – 1/4 tsp
Dry roasted Coriander powder – 1 tsp
Karuri Methi – 1/4 cup
Milk 2% – 1 1/2 cup

Shahi Paneer masala

Method:

1. Grind the roughly chopped onions in a blender and make a fine paste. Transfer to a bowl and keep aside. In a separate bowl, whisk the canned crushed/pureed tomatoes and yogurt and keep aside.
2. Heat oil in a kadhai. Cut paneer into small cubes. Shallow fry over medium heat until light brown on all sides. Using a slotted spoon transfer the fried paneer pieces aside to a bowl.
3. In the same oil, add the cinnamon stick, peppercorns, cardamom and cloves. Fry them for a minute and add the onion paste and fry for a few minutes until the raw smell wards off and oil starts separating. Add ginger-garlic paste and fry it along for a minute. Add the cashewnut+milk paste, tomatoes+yogurt mixture, salt, red chilli powder, turmeric powder and coriander powder. Saute for 1-2 minutes. Add kasuri methi to the gravy and mix well. Add the fried paneer pieces and mix gently. Pour in milk and mix well, bring the gravy to boil. Reduce the heat and cook until the gravy becomes thick and oil separates. Serve.

This goes to JFI-Paneer being hosted by Trupti at her blog ‘The Spice Who Loved Me‘.

Luv
Mona

AddThis Social Bookmark Button

Tala huwa Gosht~I

November 16th, 2009 Mona Posted in Black pepper powder, Canola Oil, Cilantro/Kothmir (fresh), Cubeb/Kawabchini, Cumin seeds/Zeera, Curry leaves (fresh), Ginger-Garlic paste, Green Chillies, Hyderabadi special, Lamb/Beef/Mutton/Veal/Sheep, Lemon/Nimbu, Mint/Pudina (fresh), Quick fix meals, Red Chilli powder, Salt/Namak, Turmeric/Haldi, Yellow Onion/Pyaaz 19 Comments »

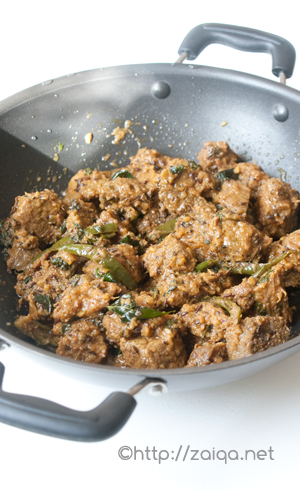
Perhaps one of the most simplest yet ambrosial meat preparations, made very often in Hyderabadi households, that I love to prepare for my family is Tala huwa Gosht, which means Sautéed meat. Simple seasonings, an aromatic baghaar, and lemon juice are the main flavoring ingredients.

Tala huwa Gosht – Sautéed meat in aromatic spices and herbs

Enjoy this delicious Hyderabadi meat preperation along with Tamatar ki dal, or Khatti dal and Baghara Chawal or plain Khushka.

Tala huwa Gosht – Sautéed meat in aromatic spices and herbs

Ingredients:

Boneless Veal/Mutton meat – 650 gms, washed and drained, cut into small bite size pieces
Sliced yellow onions – 100 gms
Water – 1/2 cup
Red chilli powder – 1 tsp
Salt – 2 tsp
Turmeric powder – 1/4 tsp
Ginger-garlic paste – 2 tbsp
For Baghaar:

Canola oil – 2 tbsp
Cumin seeds – 1 tbsp
Curry leaves – 1 sprig
Cilantro – 1/4 cup, finely chopped, loosely packed
Mint leaves – 1/4 cup, finely chopped, loosely packed
Green chillies – 4, each cit into two, then slit into halves in the middle

Black papper powder – 1/2 tsp
Kawabchini – 1/2 tsp, dry roasted in a stovetop frying pan and cooled; once cooled, finely powdered
Lemon juice – 2 tbsp

Method:

1. In a pressure cooker, add the meat, onion, water, red chilli powder, salt, turmeric and ginger-garlic paste. Mix well. Cover and pressure cook for a few minutes until the meat is soft and tender. Make sure it not tough at all.
2. Meanwhile, in a kadai or wok at medium high heat, prepare Baghaar. Pour in oil and as soon as it warms up add the cumin seeds. As the seeds splutter, add the curry leaves, finely chopped cilantro and mint, slit green chillies and fry for just a few seconds and remove from heat. Keep aside.
3. Once the meat is done, let it cook uncovered until all of the liquid has been evaporated. Once almost dry, add it all to the baghaar in the kadai and mix well. Add black pepper power, kawabchini powder and lemon juice. Cook it for 5-10 minutes in the kadai at medium heat and serve immediately.

This recipe is also being featured in the HomeAway.co.uk Travel Cookbook.

Luv,
Mona

AddThis Social Bookmark Button

Murghi ka Salan

November 7th, 2009 Mona Posted in Canola Oil, Cilantro/Kothmir (fresh), Coriander seeds, Ginger-Garlic paste, Hyderabadi special, Lemon/Nimbu, Poultry/Murgh, Quick fix meals, Red Chilli powder, Salt/Namak, Tomato/Tamatar (fresh), Turmeric/Haldi, Yellow Onion/Pyaaz, Yogurt/Dahi 16 Comments »

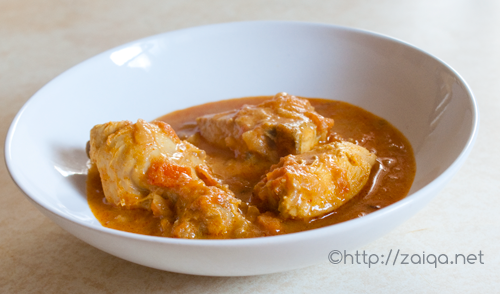
Out of all the curries that I prepare using chicken, this is perhaps the one I prepare most usually at home for meals. Home made ginger-garlic paste and yogurt, fresh lemon juice helps tenderize the chicken, and both the yogurt and tomatoes render a subtle sour flavor which balances out the sweetness of the shallow fried onions in the curry. Fresh roasted coriander seed powder and fresh cilantro add a wonderful aroma.

Murghi ka Salan – Chicken Curry

Murghi ka Salan – Chicken Curry

Ingredients:

Chicken, with bone – 800 gm, skinned and cut into 10-12 pieces
Home made Yogurt – 1/2 cup
Home made Ginger garlic paste – 2 tbsp
Fresh Lemon juice – 3 tbsp
Red chilli powder – 1 1/2 tsp
Salt – 1 1/2 tsp
Turmeric powder – 1/4 tsp
Canola oil – 3 tbsp
Yellow Onion – 2, large, peeled and finely chopped
Green cardamom – 4
Black peppercorns – 8
Cloves – 3
Cinnamon stick – one 2″ stick
Dry-roasted Coriander seed powder – 2 tsp
Tomatoes – 4, large, ripe and red, finely chopped
Cilantro/Kothmir – finely chopped, 1/2 cup, loosely packed

Method:

1. In a large mixing bowl, add yogurt, ginger garlic paste, lemon juice, red chilli powder, salt and turmeric. Using a spoon or a whisk, mix well. Add the chicken pieces and mix well to coat all the pieces with the marinade. Marinate for 1 hour, covered, in the refrigerator
2. Later, before you start cooking, remove the chicken from the refrigerator and leave on the countertop to bring it back to room temperature. Continue cooking.
3. In a large heavy bottomed non-stick casserole dish at medium high heat, pour in oil, and as soon as it warms up add the chopped onion and stir fry until it is nice and evenly golden brown in color. Add the cloves, cinnamon stick, cardamom, black peppercorns, coriander seed powder and mix well. A wonderful aroma emanates. Fry them for a minute along with onions, later add the chopped tomatoes and mix well. Cover with a lid and let cook for 4-5 minutes. Add a few splashes of water and let cook until tomatoes are all mushy, add the marinated chicken with all the juices and mix well. Let cook uncovered for 5-10 minutes. Later, lower the heat to medium, pour in 2 to 3 cups warm water and mix gently. Cover with the lid and let cook for 30-40 minutes or until the chicken is tender and well-cooked. Remove from heat and add the chopped cilantro and gently mix well. Serve.

Suggested Accompaniments: Serve the curry along with Khushka and Tamatar dal, or along with Parathas, and a vegetarian side-dish of your choice for a delicious meal.

Luv,
Mona

AddThis Social Bookmark Button

Simple Pleasures

October 2nd, 2009 Mona Posted in Basmati Rice/Chawal, Canola Oil, Caraway seeds/Shahzeera, Cardamom/Elaichi, Cilantro/Kothmir (fresh), Cinnamon/Dalchini, Cumin seeds/Zeera, Curry leaves (fresh), Dried Red Chillies, Dry Bay Leaf/Tej Patta, Ghee, Ginger-Garlic paste, Mint/Pudina (fresh), Peas/Matar, Red Chilli powder, Salt/Namak, Tomato, Tomato/Tamatar (fresh), Turmeric/Haldi, White Cauliflower/Phool Gobi, White Potato/Aloo, Yellow Onion/Pyaaz 15 Comments »

Baghara Khana (or Baghara Chawal), is an another simple and nourishing dish that reminds me of that happier era, when I was a kid. Food that reminds me of my childhood and my hometown definitely makes me immensely nostalgic every time.
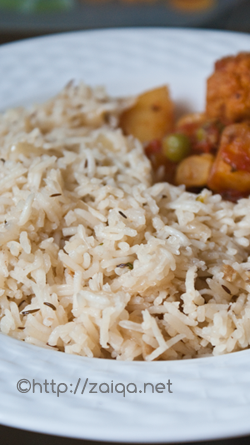
Baghara Khana along with Aloo Gobi Matar ~ was my yesterday’s lunch

Fragrant long grained basmati rice is cooked along with caramelized onion and exotic whole spices that give a delicate flavor and a wonderful aroma that will fill your house, and welcome your loved ones with open arms and a sense of home where warmth and comfort abounds. Always serve Baghara khana warm, along with the accompaniments of your choice.

To prepare Baghara Khana, use rice and water in the ratio of 1:2, i.e., for 1 cup rice, use two cups of water. Save a little amount of the water to add later on after the rice is about 3/4th cooked as described below.

Baghara Chawal/Khana
Serves: 2

Ingredients:

Long grained White Basmati Rice – 1 cup (I prefer the brands ‘Daawat’ or ‘India Gate’ or ‘Lal Qila’)
Canola Oil – 1 tsp
Ghee – 2 tsp
Onion – 1, small, finely sliced
Ginger-garlic paste – 1 tsp
Fresh Cilantro/Kothmir – 1 tbsp, finely chopped
Fresh Mint/Pudina – 1 tbsp, finely chopped
Green cardamom/Elaichi – 2
Cinnamon/Dalchini – 2 inch stick
Dry bay leaf – 1, medium sized
Caraway seeds/Shahzeera – 1/2 tsp
Water – 2 cups
Salt – 1 tsp

Method:

1. Wash the rice in two changes of water and soak it in surplus cool water for 30 minutes.
2. In a saucepan at medium high heat, pour oil and ghee and as soon as it warms up, add the sliced onion and stir fry until the onion is nicely browned up. Add the ginger-garlic paste and fry it along for a minute. Add the chopped herbs, green cardamom, bay leaf, cinnamon stick and caraway seeds. Fry them for a minute more. Add 1 2/3 cup of water and salt. Cover with a lid and increase the heat to high. Let it come to a boil.
3. Meanwhile drain the soaked rice and keep ready.
4. Add the drained rice to the boiling water in saucepan and mix well. Let it come to a boil once. Lower the heat to simmer and cover with a lid. After 3 minutes using a spoon, mix the rice well, lower the heat to minimum and and cover it back again and let cook for a furthur 3 minutes. Open the lid, pour in the remaining 1/3 cup water and gently mix well. Cover and let cook until the rice is tender. Close the heat and leave the saucepan on the hot stove for about 15 more minutes to finish cooking on Dum. Serve warm.

My house smells like a potpourri every time after I prepare Baghare Chawal due to all those aromatic spices.

Note: You can also add chopped green chillies and a few whole cloves along with the other spices while frying the onions. I do not prefer to add them. Also for a special touch, garnish the cooked rice while serving with a few toasted whole cashew nuts.

Suggested Accompaniments: Baghara khana is enjoyed along with Dalcha or Baghare baingan or Mirchi ka Salan or Sem ki phalli gosht or Qimah or Qorma for a delicious Hyderabadi meal.

***

This Summer, I had planted a few tomato seeds (first time with tomatoes) and voila, I had plenty of fresh tomatoes from my lil tomato garden in the backyard. Here are a few snaps:

Tomato Variety: Moneymaker
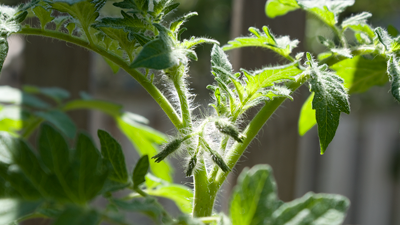
tomato budss under the warm early spring sunshine
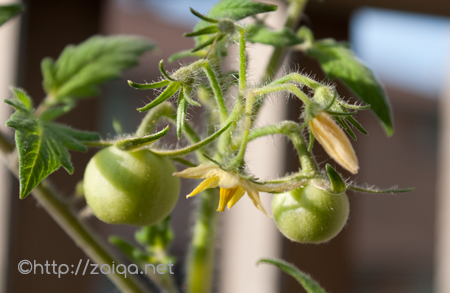
tiny tomatoes and blooms in early summer
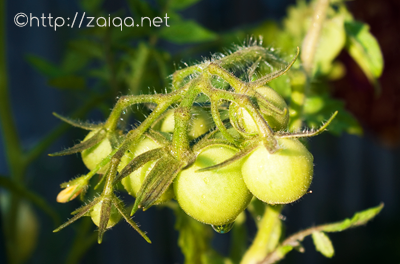
after a shower
I love the fuzzy stems and the unique strong scent of tomato foliage
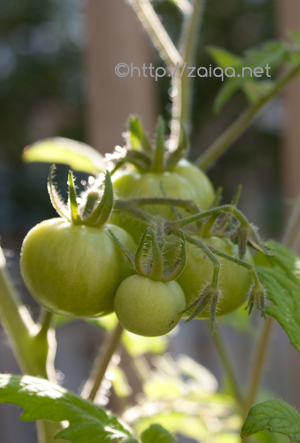
on a warm sunny evening
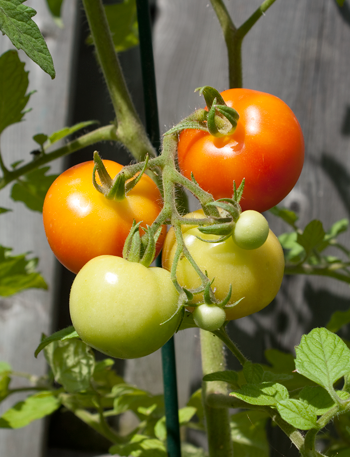
ripening on the vine

For the curry below I had used the garden ripe tomatoes from my plants. With the commenced autumn chill in the air, I do not think the plants will live much longer. To freeze tomatoes, just cut out the tough part of the core, put the whole tomatoes on a baking sheet and into the freezer. After they’ve frozen, transfer them to a plastic zipper bag and put them back into the freezer. When you want to use them, you can easily peel them if you allow them to thaw until they’re just barely soft on the outside. Then just rub off the skins. Or you can run warm tap water over them and peel them immediately. Use them in recipes for any cooked dish. Inshallah the next season, I plan/wish to grow the heirloom ribbed or beefsteak tomatoes and even more veggies. Have a look at the beautiful heirloom tomatoes here, I am sure even you all will be smitten by their beauty. Need to stock up the seeds soon for the gardening season.
For those of you interested, this book has loads of information on heirloom tomatoes and how to plant them.

Aloo Gobi Matar – Potato Cauliflower and Peas in one pot

Ingredients:

Canola Oil – 1 1/2 tbsp
Onion – 1, large, finely sliced
Cumin seeds – 1 tsp
Fresh Curry leaves – 6
Dry red chillies – 3, each broken into two
Salt – 2 tsp
Turmeric powder – 1/4 tsp
Cauliflower – 1 medium head, cut into florets, washed and drained
White Potatoes – 3, peeled and cut into quarters
Tomatoes – 2, medium sized, chopped
Red chilli powder – 2 tsp
Frozen organic peas/Matar – 3/4 cup
Fresh Cilantro – 2 tbsp, finely chopped
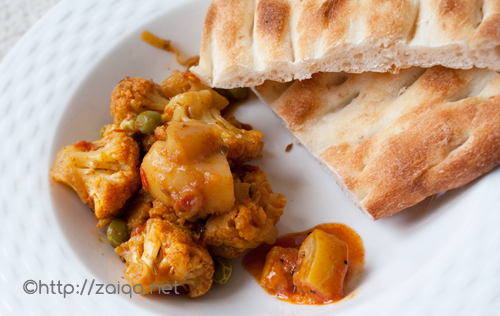
Aloo Gobi Matar along with toasted Afghani Roti, and home-made Lemon pickle ~ todays lunch

Method:

Heat oil in a wide saucepan at medium high heat and as soon as it is warm, pour in oil. Add the sliced onion and stir fry until the onion are just lightly browned. Add the baghaar ingredients~cumin seeds, curry leaves and dry red chillies. Also add salt and turmeric powder. Mix well. Add the cauliflower florets and potato quarters and mix well. Spread the vegetables so that they are in a single layer in the pan. Sear the vegetables for about two minutes. Keep stirring them occasionally. Add the chopped tomatoes, half cup of warm water and red chilli powder. Mix well and cover the lid. Let cook until the vegetables are tender and have absorbed most of the liquid. Keep stirring occasionally. Add the frozen peas and cover the lid for 2 minutes. Garnish with chopped cilantro and serve warm.

‘Aloo Gobi Matar – Potato, Cauliflower and Peas’ in one pot goes to Andera’s Grow Your Own event.

Luv,
Mona
AddThis Social Bookmark Button

Nimbu ka Achaar

September 24th, 2009 Mona Posted in Canola Oil, Coriander seeds, Cumin seeds/Zeera, Dried Red Chillies, Garlic/Lahsun, Green Chillies, Kabuli Chana, Lemon/Nimbu, Mustard seeds/Rai, Nigella seeds/Kalonji, Red Chilli powder, Salt/Namak, Turmeric/Haldi 21 Comments »

Pickles are Indian specialities, enjoyed at breakfasts, at meals, or as an accompaniment to a snack . Each household has their own twist on the pickles that they prepare yearly using freshly available seasonal fruits and vegetables. Among those pickles, mango pickle and lemon or green lime pickle are the two classic indian pickles prepared most commonly in every household, and also easily available at the stores in various varieties.

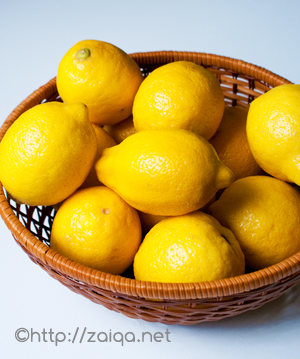
Fresh Lemons

In todays express lifestyle, the art of making pickles at home is slowly sinking into the mists of time. It only takes a little time, effort and love to prepare these indulgences at home, with your own control on the amount of spices as well as the quality of the product. The following is my mothers recipe for Lemon or Lime pickle.

Note: Pickling is a bacteriostatic method of food preservation, in which the micro-organisms are unable to grow in food. Salt is the main ingredient used as the preservative. Throughout the preperation, take precautions and use only dry spoons for mixing and transfering purpose. Make sure the utensils you are using for making the pickle are absolutely moisture free. Otherwise the pickle will spoil and there are chances of fungus/mould formation. Pickles should never be sored in glazed jars.

Enjoy about a teaspoon of this pickle along with your meals, as an accompaniment to your breakfast or a snack.

Nimbu ka Achaar – Lemon/Lime Pickle
Makes: about 2.5 lb

The procedure includes the following steps which are later described in detail below:

1. Wash and wipe lemons or limes. Chop the 10 lemons or limes, add juice of 2 lemons or limes, mix salt and turmeric and keep aside for 3 days covered in a glass jar with tight lid at room temperature. Shake the bottle gently twice everday so that all the pieces are soaked in the juices.
2. After 3 days, add the powdered pickle spices and the tempering/baghaar to the pickle. Mix well.  Transfer to air tight pickle jars and store in the refrigerator for 1 or 2 weeks for the lemon or lime pieces to ferment. The pickle is ready to be used once the skin of the lemons or limes is soft.

Detailed Procedure:

Lemon or Lime – 10, blemish free, ripe and juicy
Juice of fresh lemons or limes
Iodine free Salt – 2 tbsp
Turmeric powder – 1/3 tsp

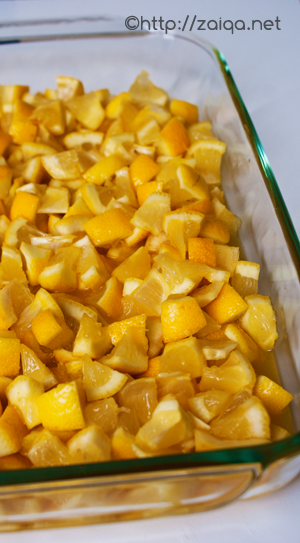
Cut lemons mixed with turmeric powder, lemon juice and salt in a large glass dish

Choose blemish free, good quality, preferably organic lemons or limes. I am never able to find thin-skinned lemons where I live, so I prepare pickle using thick skinned lemons or green limes, and have kind of got used to them. Infact the thick pickled lemon skin tastes delicious! Wash them and pat them completely dry using a dry cloth. You can also spread them out on a tray and place it under the sun to complately air dry for 1 or 2 hours. If the skin of the lemons you are using is thick (like mine, see the pictures), discard the thick top stalk part and bottom of the lemons and chop up 10 lemons into small quarters and put into a sterilized glass jar with a tight non-metallic lid. This need not be done for limes as they have a thinner skin. Cutting off the top and bottom is also not required if the skin of the lemons you are using is thin. The skin of Indian lemons is usually thin, whereas the lemons that are available elsewhere are quite thick. Discard the seeds. Add salt, turmeric powder and lemon/lime juice to the jar so that all the pieces are covered in the juice and mix well. Keep the jar in a dark place at room temperature for 3 days. Gently shake the jar twice every day.

Red chilli powder – 2 tbsp
Dry Roasted Cumin seed powder – 2 tbsp
Dry Roasted Coriander seed powder -1 tbsp
Dry Roasted Black Mustard seed powder – 1 tsp
Dried Chickpeas/Kabuli Chana – washed and pat dried completely (optional)
Garlic pods – 3
Small green chillies – 4, washed, and completely pat dried, roughly chopped

After 3 days, the lemon/lime pieces will have released a lot of juices. Add and mix all the above ingredients into the chopped lemon/lime quarters with its juices in the glass jar using a dry spoon and keep aside. Now prepare the baghaar or the tempering. (the dried chickpeas and garlic pods turn soft, suitable for eating, upon fermentation and acquire a tangy taste in the pickle).

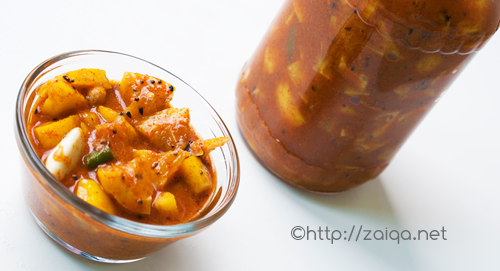
Freshly prepared Lemon pickle ready to be set aside in the refrigerator to mature

Baghaar or the Tempering:

Canola oil – 1/2 cup
Nigella seeds/Kalonji – 1 tsp
Black mustard seeds – 1 tsp
Cumin seeds – 1 tsp
Dried red chilli – 2

In a pan, heat oil at medium high heat and as soon as it warms up add the remaining ingredients and mix well. In a few seconds they start to splutter. Remove from heat and keep aside. Take care not to burn the spices. Let it cool down and come to room temperature. This is the baghaar or tempering. Once the baghaar is cooled, carefully pour it into the lemon/lime pickle jar.

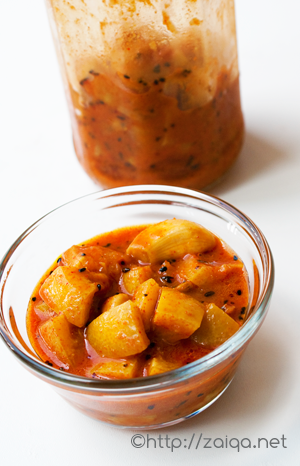
Lemon pickle ready to be eaten with its skin all nicely softened after 2 months

Store this freshly prepared lemon/lime pickle in the refrigerator to slowly ferment for about a week or two. Fermentation process renders fruits soft and and the fruits take on an additional aroma and flavor of spices. Mould growth is prevented by the use of a tight lid, by which air is prevented from coming in contact. Make sure that you use a completely dry spoon to use the pickle when you feel like eating it, and cover it and store in the refrigerator as soon as possible for a long life. Keep rotating and turning the jar frequently in the refrigerator. Check if the skin of the lemon/lime is soft enough. If you have used thick lemons, you might have to wait a little longer. I kept the pickle jar unopened for 3 months in the refrigerator, before I used it.

Luv,
Mona

AddThis Social Bookmark Button