Pumpkin ka Meetha

October 19th, 2009 Mona Posted in Almonds/Badaam, Cardamom/Elaichi, Ghee, Khoa, Milk and Milk Products, Pistachios/Pista, Pumpkin, Sugar/Shakkar 23 Comments »

Pumpkins, during this season are spotted galore at every food market and I had brought a beautiful Pumpkin home a few days back. After enjoying a warming Pumpkin soup, I prepared a simple Pumpkin ka Meetha, just similar to Gajar ka Meetha and Kaddu ka Meetha, and الحمد لله it was delicious.

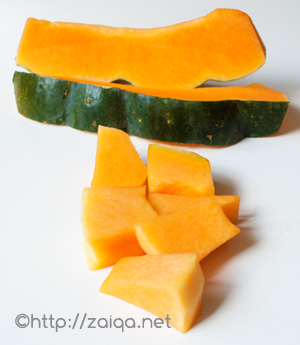
Pumpkin slices, peeled and cubed

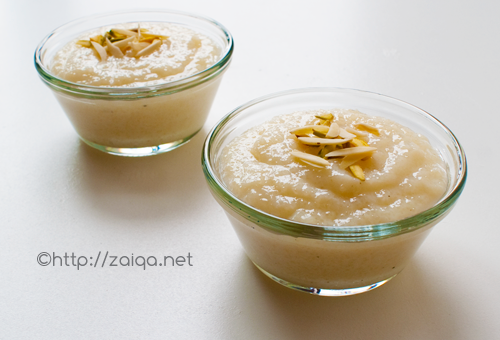
I prepared a very small quantity with left over pumpkin, and it was enough for me and my hubby. If you are thinking of preparing it for a bigger crowd, do increase the quantities accordingly.

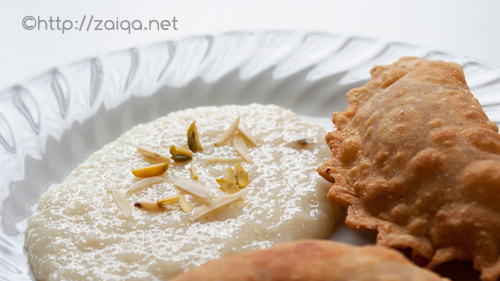
Pumpkin ka Meetha/Halwa
Makes- 2 small bowls as in the picture

Ingredients:

Pumpkin – 350 gms, peeled and grated (I used Chinese/Japanese variety Pumpkin, however you can try using any Winter squash or Pumpkin variety instead)
Ghee – 2 tbsp
White Sugar – 1/3 cup
Milk – 1/3 cup
Khoa – 2 tbsp, finely grated
Cardamom seed powder – a pinch
Finely Slivered toasted Pistachio+Almond – 1 tbsp
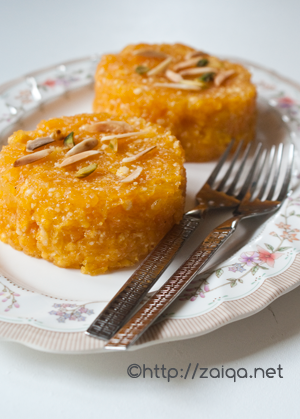
Pumpkin ka Meetha

Method:

1. Cut pumpkin in slices. Peel and cut into cubes. Grate the cubed pumpkin. My food processor does the job in a jiffy.

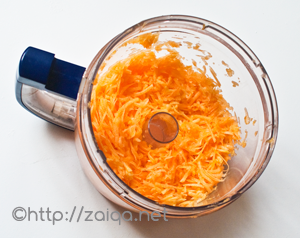
grated pumpkin in the food processor bowl

2. In a stainless steel saucepan at medium high heat and add the grated pumpkin and dry roast it stirring it frequently until most of the moisture is evaporated and it is mostly dry. You will also observe a slight change in color and a nice aroma.
3. Pour in ghee and keep stirring it for 3 minutes. Add milk, khoa, sugar and cardamom powder. Let cook stirring frequently until all the milk has been absorbed, about 10 minutes. Once the halwa is dry, remove from heat and let cool. Once cool, refrigerate and serve garnished with toasted slivered nuts.

Suggested Serving: To impress your guests, serve the chilled meetha in mini pastry cases that are easily available in stores. You can name it as ‘Pumpkin Meetha Tarts’.

Luv,
Mona

AddThis Social Bookmark Button

Basic Chocolate Cake

September 11th, 2009 Mona Posted in All-Purpose Flour/Maida, Baking powder, Baking soda, Blog Events/Entries/Polls, Butter/Makhan, Canola Oil, Chocolate and Cocoa, Egg/Anda, Milk and Milk Products, Salt/Namak, Sugar/Shakkar 24 Comments »

A week back, I had lost all hope of blogging again on Zaiqa and the world seemed profoundly altered to me. Someone had probably hacked my blog and installed a new wordpress on it. Thankfully, I was able to retrieve it all, and I thank my god immenesely for that. I wish that no blogger has to go through such agony ever.

Chocolate Cake

I decided to bake a rich chocolate cake to celebrate the the recovery of my blog with you all. I always bake this lovely dense chocolate cake for parties and other occasions and it is always loved by everyone. Who doesn’t love a delicious chocolate cake?

Bittersweet Chocolate

Basic Chocolate Cake
Recipe adapted from: Cakes – 1,001 recipes from around the world

Ingredients:

Bittersweet Chocolate – 9 oz
All-Purpose flour – 2 cups
Unsweetened Cocoa powder – 1/3 cup
Baking powder – 2 tsp
Baking soda – 1/2 tsp
Salt – 1/4 tsp
Butter – 1 cup, softened
Granulated Sugar – 2 1/2 cups
Eggs – 4, large
Milk – 1/2 cup
Canola oil – 2 tbsp

Chocolate cake Batter ~ yummy

Method:

1. Preheat the oven to 350 C
2. Butter and flour a 9-inch springform pan.
3. Melt the chocolate in a double boiler over barely simmering water. Set aside to cool.
4. Sift the flour, baking powder, baking soda, cocoa and salt into a large bowl.
5. Beat the butter and sugar into a large bowl with a electric mixer at medium speed until creamy. Add the eggs, one at a time, until just blended after each addition.
6. With mixer at mow speen, gradually beat in the dry ingredients, alternating with chocolate, milk and oil.
7. Spoon the batter into the prepared pan. Bake for 50-60 minutes, or until a toothpick inserted into the center comes out clean.
8. Cool the cake in the pan on a rack for 15 minutes. Loosen the sides and let cool completely. You can store the cake for 3-4 days.

This goes to CFK: Chocolate event being hosted by Hema at her blog.

Luv,
Mona

AddThis Social Bookmark Button

Pineapple Papaya Jam

August 7th, 2009 Mona Posted in Papaya/Papita, Sugar/Shakkar 10 Comments »

I had prepared this jam a while back using fresh season’s produce from the market.

Sugar, chopped pineapple chunks, chopped papaya chunk

This jam is easy to prepare, has a subtle sweet flavor thats delicious. The sugar that I have used to prepare this jam is white crystal Indian sugar that I bought from an Indian store here, which is different from granulated sugar available in the market usually. If you are using granulated sugar, you might need it in a lesser quantity.

Pineapple Papaya Jam
Makes approx 675 ml jam

Ingredients:

Chopped Pineapple (skinned, core removed) – 400 gms
Chopped Papaya (peeled and seeds removed) – 400 gms
Sugar – 600 gms
Lemon juice – 2 tsp

1 (24-ounce/3 cup/700 ml capacity) glass canning jar

Papaya Pineapple Jam

Method:

1. In a large saucepan bring surplus water to boil. Meanwhile, wash the glass canning jar in which you want to store the jam with warm soapy water. Rinse thoroughly. Plunge the glass canning jar in the boiling water for 2 minutes and remove using tongs. Let the jar air dry completely on racks while you prepare the jam. Similarly sterilize the lid of the jar.
2. Puree pineapple and papaya individually in a food processor and keep aside.
3. In a stainless steel saucepan, add the pureed papaya and pineapple. Also add sugar and lemon juice and mix well. Let it come to a boil once then let cook at medium high heat for about 45 minutes. Keep stirring every few seconds being careful not to scorch the mixture, and cover with a splatter screen (as it later on spits intensely) during the last stages.
4. To test for doneness, remove the jam from heat and place half a teaspoon of the jam on a cold saucer. If the consistency of the jam resembles a firm jelly, remove from heat. If the consistency is thin and runny it needs to be cooked for a few more minutes.
5. When the jam is ready, pour it into the dry jar leaving 1/4 inch space from the top, and cover with the lid. Let the jar come to room temperature, then refrigerate to store.

Note: This is a preservelike spread and not a true preserve and must be refrigerated to avoid spoilage, because it contains a higher proportion of fruit to sugar and retain more fresh fruit flavor.

Luv,
Mona

AddThis Social Bookmark Button

Cherry Clafoutis

July 24th, 2009 Mona Posted in All-Purpose Flour/Maida, Almond extract, Almonds/Badaam, Cherries, Egg/Anda, Milk and Milk Products, Sugar/Shakkar, Vanilla powder 14 Comments »

With the ongoing garbage strikes and the temperatures soaring humid and an intensely cloudy gloomy  weather with no glimpse of sunshine from the past few days added the forecast doesn’t seem to give any good news for the coming days either, there aren’t many things going right for Torontonians. So, to cheer myself and my family, I decided to bake a dessert. The warm fruity aroma that fills the house surely comforts every solace seeking soul.

Cherries

June and July being the cherry season in Toronto, cherries are seen in every store and market, being sold in huge quantities at reasonable rates, which I didnt mind to think a lot about before I picked up a kilo during the last week.

Halved Cherry

This easy french dessert/pudding is what I did with the remaining cherries after gorging upon them in various ways.

Cherry Clafoutis
8 servings

Ingredients:

Ripe red cherries – 1 pound, pitted and halved
All-Purpose flour/Maida – 125 grams
Eggs – 4, large, at room temperature
Vanilla powder – 2 tsp
Almond extract – 1/2 tsp
Finely powdered raw Almonds – 1/2 cup
Milk – 1 1/2 cup
Sugar – 1 cup

Cherry Clafoutis

Method:

1. Preheat the oven to 400 F.
2. Grease a baking dish with about 2 litre capacity generously with ghee or melted butter. Mix the cherries with 2 tbsp sugar and spread in a layer in the dish.
3. In a blender, mix all the remaining ingredients and blend for a minute, until smooth. Pour this mixture into the dish with cherries and bake for 35-40 minutes or until the edges are golden brown and a toothpick inserted into the middle comes out clean.
4. Let cool for 15-20 minutes and serve warm.

Tip: To pit the cherries, you can buy yourselves a good quality cherry pitter from the market, you improvise using a chopstick. Just push the pit out of the cherry with a chopstick.

Luv,
Mona

AddThis Social Bookmark Button

Chawal ki Kheer

July 21st, 2009 Mona Posted in Almonds/Badaam, Basmati Rice/Chawal, Cardamom/Elaichi, Milk and Milk Products, Pistachios/Pista, Sugar/Shakkar 13 Comments »

Simple, healthy, cooling, smooth and a delicious indulgence, Chawal ki Kheer or Phirni , similar to rice pudding ~ the dessert which every Hyderabadi immensely enjoys. Today I share with you my family’s recipe for it.

Chawal ki Kheer served along with Poori

Rice is first soaked for a little while in cool water, and then powdered to a semolina texture. This powdered rice is used to prepare the Kheer. Be careful when you add the rice powder to the milk. Always soak it in water and add it to the cooking milk to avoid any lumps. Do not substitute the powdered rice with the rice flour that is available in the market. Chawal ki Kheer is enjoyed cold, on its own. It is also served along with Pooris.

Chawal Ki Kheer – Rice Pudding
Makes – 4 or 5 servings

Ingredients:

Basmati rice – 1/3 cup
Milk – 3/4 litre
Sugar – 1 cup
Finely powdered cardamom seeds – 1/4 tsp
Finely sliced Pistachios – for garnish
Finely Sliced Almonds – for garnish

Chawal ki Kheer served in individual cups

Method:

1. Wash and soak the rice in cool surplus water for about 2 hours. Later, drain the water and spread the rice overnight on a cloth so that the rice air-dries.
2. The next day, add the dry rice grains in a grinder and powder it, not too coarse, not too fine, the texture of the rice should be similar to that of semolina/rawa.
3. Pour milk into a saucepan at medium high heat and let it come to a boil. Lower the heat to medium and cook the milk for 3 minutes.
4. In a small bowl, add the powdered rice, and about 3/4 cup of cool water. Mix well and slowly add this to the boiling milk while stirring continously but gently. Stirring the milk continously while adding the coarse rice powder soaked in water is vital, or else you will end up with lumps of rice powder in the milk. Keep stirring and simmer for about 5 minutes. Add sugar and let it cook for about 10 minutes more. During this time you will observe that the pudding has started to thicken up and the rice powder is thoroughly cooked. Do not cook for too long, as the pudding will thicken more once it is cold. Remove from heat, when the consistency is just slightly thick.
5. In the last few seconds, add the cardamom seeds powder and mix well. Remove from heat and keep side to cool. Once cool, refrigerate the pudding until cold. Serve in individual cups garnished with the sliced nuts.

Note: For best flavor, serve this dessert in small unglazed terracotta pots(called as ‘katori’ in Hyderabad). The earthern pots absorb all the moisture and impart a delicate flavor to the dessert which is out of the world.

Luv,
Mona

AddThis Social Bookmark Button