Baghare Baingan

September 19th, 2008 Mona Posted in Blog Events/Entries/Polls, Canola Oil, Cilantro/Kothmir (fresh), Coriander seeds, Cumin seeds/Zeera, Curry leaves (fresh), Dry Desiccated Coconut, Eggplant/Baingan, Eid/Ramadhan/Iftaar, Ginger-Garlic paste, Groundnut/Moomphalli, Hyderabadi special, Poppy seeds/Khus-Khus, Red Chilli powder, Salt/Namak, Tamarind/Imli, Turmeric/Haldi, Vegetables/Tarkariyaan, Yellow Onion/Pyaaz 38 Comments »

‘Baghare Baingan’ (in Urdu) when translated into english language means ‘Tempered Eggplants’. Baghaar or tempering is an Indian process of flavoring the oil with spices which is used in the preperation of a curry to impart added taste and aroma.

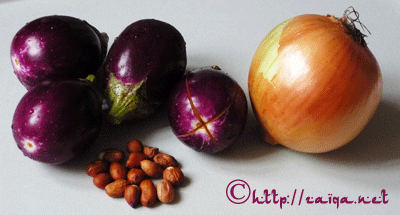
Aubergines, Peanuts and a large sized Onion (One of the Aubergines has an ‘X’ shaped incision at its base)

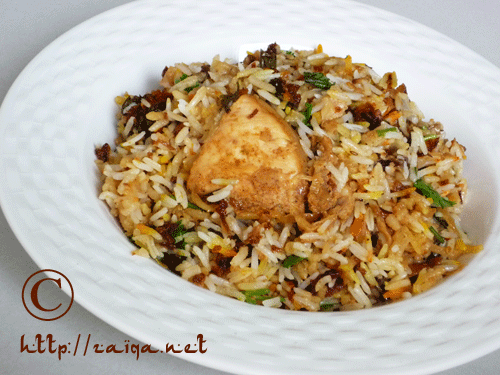
This is a lovely and delicious brinjal side dish, a hallmark and peculiar to the state of Hyderabad, usually seen being served at Daawat – weddings, parties and large gatherings. It is generally had as a side dish along with Biryanis or some people even enjoy it along with a Roti/Paratha.

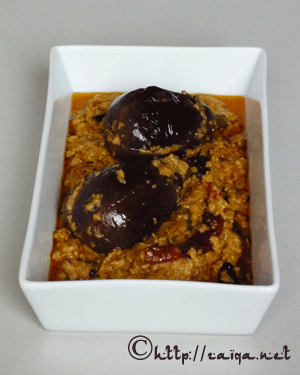
Baghare Baingan – Tempered Aubergines in a rich Sauce

The eggplants are cooked twice, once they are shallow fried and then later simmered in a fragrant sweet and spicy sauce of sauteed onions and roasted spices. The tamarind imparts a tangy kick to the sauce consisting of roasted nutty and buttery peanuts, poppy seeds and coconut, a range of aromatic spices and caramelized onions.

Only Indian eggplants that are small, shiny deep purple and fresh are used for this curry. These are easily available at many Indian stores. Brinjal/Eggplant/Aubergines or Baingan are not a favorite of many people, but I suggest you all try this dish once and you will definitely love it. It is one of the best aubergine dishes I have ever had.

The procedure to prepare Mirchi Ka Salan or Tamatar ka Salan is also almost the same as this curry. Also, you can also add any firm fish fillets (Red snapper, Haddock, Cod, etc) to the gravy instead of brinjal to make it a fish curry/Machli ka Salan; or halved tomatoes to the gravy to make it Tamatar ka Salan. There is no difference, except for the fact that in Mirchi ka Salan, green chillies are used; in tomato curry, tomatoes are used; in fish curry, fish fillets are used; and in this curry, the brinjals are used.

Baghare Baingan – Tempered Aubergines in a Spicy Nutty Tangy Sauce
Cooking time: around 45 minutes; Serves: 6

Ingredients:

Eggplants/Baingan – 6-8, indian variety~small sized, fresh, and deep purple in colour
For dry masala paste:
Khus Khus/White Poppy seeds – 1 tbsp
Till/Sesame Seeds – 1/2 cup/50 gms
Peanuts/Groundnuts/MoomPhalli – 1/2 cup/50 gms
Dry Desiccated Coconut – 3/4 cup/50 gms
Coriander seeds/Dhania – 1 tsp
Cumin seeds/ Zeera – 1 1/2 tsp
For baghaar/tempering:
Cumin seeds/ Zeera – 1 tsp
Curry leaves/ Kariyapaak – 2 sprigs
Mustard seeds/ Rai – 1/2 tsp
Nigella seeds/ Kalaunji – 1/3 tsp
Fenugreek seeds/ Methi dana – 1/8 tsp
For gravy:
Canola oil
Yellow Onions – 4, large, sliced slightly thick into semi circular rings
Ginger garlic paste – 2 tsp
Salt – 1 tbsp
Red Chilli Powder – 2 tsp
Turmeric/ Haldi – 1/4 tsp
Cilantro/ Kothmir – 2 tbsp, finely chopped
Thick tamarind pulp – 4 tbsp

Method:

1. Wash the eggplants and make four incisions, perpendicular cuts (an X) from the base of each eggplant, taking care the stem end is intact. Soak them in a bowl of cold water with 1tbsp salt to prevent discoloration. Keep aside. In a kadai pour oil to deep fry. When the oil is hot, drain the brinjals. Deep fry the brinjals for about 10-15 minutes until they are tender and well cooked. Gently remove them in a platter and keep aside.
2. Heat a small non-stick frying pan or a cast iron skillet at medium high heat and once it is hot, dry roast the desiccated coconut, sesame seeds, khus khus, peanuts, coriander seeds and cumin seeds, all one by one separately for just 2-3 minutes until they are a few shades darker and remove them into separate bowls. Do not burn the spices. Once cool, rub off the skins of the peanuts. Grind them all separately in a spice grinder to a fine powder or a smooth paste without adding any water and keep aside.
3. Heat a large non-stick frying pan or a cast iron skillet at medium high heat, and as soon as it warms up add the sliced onions. Let the onions sweat and keep stirring them until they are just starting to brown up. Once the onions are soft and lightly browned in color, remove them to a platter and keep aside. Once the dry roasted onions are cool, puree them in a grinder until smooth. Keep aside.
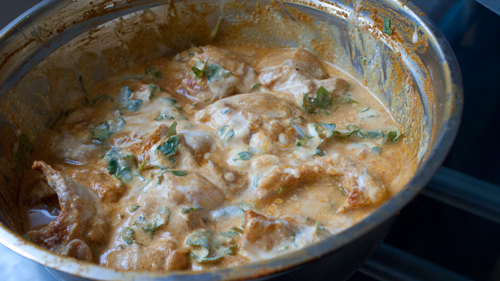
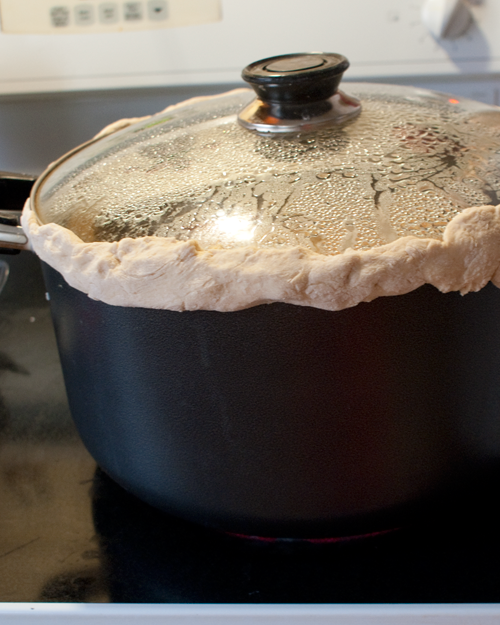
4. Heat 1/4 cup oil in a heavy non-stick pan at medium heat and as soon as it is warm, add the ingredients under the heading ‘for baghaar’ – cumin seeds, mustard seeds, curry leaves, nigella seeds and fenugreek seeds. Let the spices splutter for a minute. Then add the pureed roasted onion paste and immediately cover the pan with a lid for a minute. Lower the heat to medium low and shake the pan to thoroughly mix. This is done for the mixture to absorb all the flavour from the baghaar(tempering). Uncover, lower the heat and add ginger garlic paste and fry for 3-4 minutes. Add the desiccated coconut paste, sesame seed paste, khus-khus paste and peanut paste and stir fry it for 2-5 minutes or until you see that the mixture comes together and starts leaving oil. Add the red chilli powder, salt and turmeric. Mix well and keep stir frying it for a further 2 minutes on medium low heat. Once the raw odor of the peanuts, ginger-garlic paste and coconut is no longer coming, add the dry roasted coriander and cumin seed powder and chopped cilantro and mix well. Pour in 3 1/2 cups warm water and the tamarind pulp. Mix well. Add the fried brinjals and stir. Cover the lid and let cook on simmer for 20-25 minutes while stirring frequently, until the oil has all separated and the brinjals are soft and completely done in the masala gravy. Remove from heat and serve the curry along with Pulao or Biryani or Naan.

Suggested Accompaniments: Biryani, Roti, Paratha

Varieties of Eggplant

This goes to the Monthy Mingle event currently being hosted by Ruth. The theme this time is Sensational Sides, and Baghare Baingan fits perfectly for the title of the event.

Inshallah my next post is going to be the round up for RCI:Authentic Hyderabadi Cuisine which I will publish in just a few days from now. So keep checking on it. Take care of yourselves everyone and Have a good weekend!

Luv,
Mona

AddThis Social Bookmark Button

Kachchi Aqni ki Dum Murgh Biryani

August 23rd, 2008 Mona Posted in Almonds/Badaam, Basmati Rice/Chawal, Blog Events/Entries/Polls, Canola Oil, Caraway seeds/Shahzeera, Cardamom/Elaichi, Cashewnuts/Kaaju, Cilantro/Kothmir (fresh), Cinnamon/Dalchini, Clove/Laung, Coriander seeds, Cumin seeds/Zeera, Dry Bay Leaf/Tej Patta, Egg/Anda, Eid/Ramadhan/Iftaar, Garam masala powder, Ghee, Green Chillies, Hyderabadi special, Lemon/Nimbu, Milk and Milk Products, Mint/Pudina (fresh), Poultry/Murgh, RCI:Authentic Hyderabadi Cuisine, Red Chilli powder, Rose water/Gulab jal, Saffron/Zafraan, Salt/Namak, Tomato/Tamatar (fresh), Turmeric/Haldi, White Potato/Aloo, Yellow Onion/Pyaaz, Yogurt/Dahi 69 Comments »

Note – Read the whole post very carefully (also watch the video link I have posted at the end of the post) before you try preparing the Biryani, Please do not be overwhelmed by the length of the post. I have tried to explain each and every step briefly and as efficient as possible. Do write to me, if you have any queries. I will be glad to help you out.

Biryani is one of the most famous Hyderabadi one-dish meals craved and devoured by people from all over the world. The basic process of preparing Biryani involves the layering of raw marinated or cooked meat along with half cooked long grained aromatic Basmati rice, and a range of fresh spices and herbs for exceptional flavor and aroma.

Basically, there are two kinds of Biryani: Pakki Biryani, and Kachchi Biryani.

Pakki Biryani: where are half Basmati cooked rice is layered along with completely cooked chicken or lamb meat and then cooked till done on slow heat on dum.
1. Pakki Gosht ki Biryani
2. Pakki Murgh Biryani

Kachchi Biryaniwhich is the true Hyderabadi Biryani – where are half cooked Basmati rice is layered along with raw marinated meat and then finished on slow heat till done on dum.
1. Kachchey Gosht ki Biryani
2. Kachche Aqni ki Dum Murgh Biryani (which I am writing about today)

The preparation process of Kachchi Biryani is rather simple compared to the Pakki Biryani. In Kachchi biryani all you have to do is to marinate the chicken for overnight preferably and the next day layer it along with half cooked Basmati rice and leave it cook on slow heat/dum until completely done; whereas in Pakki Biryani you have to stand in front of your stove attending the chicken as it cooks completely, and then layer it with half cooked Basmati rice and finish it until done on slow heat/dum.

As you use the raw marinated chicken in this method, while you slow cook the Biryani on dum, the flavor of the chicken intensifies and infuses with the rice and other aromatic fresh herbs and spices giving you a heavenly aroma in the end which will fills your kitchen and your entire house.

*****

Here is the outline of the steps involved in the preparation, so that it is simpler for you all to understand the detailed method, follow these steps while you prepare the Biryani:

Outline of the steps:

Day 1:
Marinate Chicken.
Day 2:
1. Add Fried onions to the Marinated Chicken.
2. Give a smoked flavor to the Marinating Chicken with Fried Onions (
optional, but gives a very good flavor to the Biryani).
3. Prepare Basmati Rice, also called as Adhaan.
4. Arrange layers and garnish.

*****

The Detailed method:

Kachchi Aqni ki Dum Murgh Biryani
Serves – 8-10Day 1Marinate Chicken:

Chicken marinating in a bowl

Ingredients:

Chicken – 1.4 kg, with bone, cut into medium size pieces
Red chilli powder – 1/2 tsp
Green chilli paste – 1 1/2 tsp
Salt – 2 tsp
Turmeric/Haldi – 1/2 tsp
Tomato – 2, medium sized, pureed (optional)
Ginger-Garlic/Adrak-Lahsun paste – 2 tbsp
Yogurt – 2/3 cup, lightly whipped
Freshly squeezed Lemon Juice – 1/2 cup
Garam masala – 2 tbsp
Green Cardamom powder – 1 tsp
Dry roasted Cumin seed powder – 1 tsp
Dry roasted Coriander seed powder – 1 tsp
Fresh Cilantro and Mint – 2 tbsp, roughly chopped

Method:

In a large bowl marinate the chicken with all the ingredients. Make sure all the pieces of chicken are coated in the marinade. Cover and leave in the fridge overnight.

Day 2.

1) Adding Fried onions to the marinated chicken:

Ingredients:

Canola Oil – 3/4 cup
Finely sliced Yellow Onions – 800 gms
Salt – 1 tsp

Method:

1. Remove the marinating chicken from the fridge and let it come to room temperature.
2. Meanwhile, pour oil into a large non-stick frying pan at medium high heat. As soon as it gets warm, throw in the sliced onions and add salt. Stir fry until they are evenly golden brown in color. Make sure they do not burn them. Using a slotted spoon, remove the onions from the oil into a platter. Divide the fried onions into two equal parts and add one half of the fried onions to the marinating chicken and mix well. Spread the other half on a tissue lined platter to be used later for garnish, until cool. Once they are cool, they crisp up. Also divide the oil in which the onions were fried into two equal parts. Add one part of the oil into the marinating chicken and mix well. Reserve the other half to be added to the rice as the top layer along with garnish later on.

2) Give a smoked Flavor to the Marinating Chicken (optional step, but gives a really good flavor to the Biryani. I recommend you try this atleast once. Skip to the step 3 if you want to avoid)

Ingredients:

3 or 4 Burning Charcoal briquettes
Canola oil/Ghee – 1 tsp
Disposable aluminium foil tray/loaf pan

Method:

1. Make a well in the center of the marinating chicken in the bowl so that the mini aluminium loaf pans fits into it perfectly. My Ammi uses an onion skin for this purpose. With the help of tongs, carefully put the burning charcoal briquettes into the aluminium loaf pan.
2. Pour about a teaspoon of oil/ghee onto the charcoal. You will see that dense fumes start forming.
3. Immediately cover the bowl with a lid, so that the fumes do not escape. Keep it aside until you prepare the rice.

3) Preparing Basmati Rice/Adhaan:

Ingredients:

Long grained Basmati Rice (preferably ‘Lal Qilla’ Brand) – 4 cups, presoaked in water for 30 minutes
Salt – 3 tsp
Bay leaf/Tej Patta – 1
Cloves – 3
Green cardamom – 4
Cinnamon stick – 3/4 inch
Caraway seeds/Shah Zeera – 1 1/2 tsp
Water – 9 cups

Method:

1. Wash the rice and soak it in surplus water for about 30 minutes.
2. In a large cooking pot pour in water along with cloves, bay leaf, cardamom, cinnamon, caraway seeds and salt. Give it a stir, cover and let it come to a boil. (While the rice is boiling, follow the steps below under ‘Arranging layers and Garnish’ until step 4 and be ready)
3. Once boiling add the rice and mix gently, let the rice cook until it is half done, 2-3 minutes. Drain the rice and keep aside.

4) Arranging layers and Garnish: (Work fast while the rice is still hot! and try not to let the rice cool down)

Ingredients:

Marinating Chicken
Boiled, Quartered and shallow fried Potatoes – 2 cups (optional)
Mint leaves/Pudina – 1/2 cup, loosely packed, roughly chopped
Half cooked rice prepared earlier
Cilantro/Kothmir – 1 cup, loosely packed, roughly chopped
Ghee – 2 tsp (optional)
Reserved Fried Onions for garnish
1/4 Saffron strands, crushed and steeped in 1/4 cup warm milk
Rose water/Gulab Jal – 1 tsp (optional)
Green Cardamom seed powder – 1/2 tsp (optional)
Toasted Almonds and Cashewnuts – 1/2 cup total (optional)
Shelled Hard Boiled Eggs – 6-8 (optional)
Dough to seal the edges of the Casserole dish (optional)

(I use the ingredients stated as ‘optional’ only during parties when guests are invited)

Method:

1. Preheat the oven to 550°F (only if using an oven to prepare it on Dum, read below)
2. Carefully lift the loaf pan containing the charcoal briquettes from the marinating chicken, and discard it.
3. In a heavy bottomed casserole dish (which can be used in Oven-if using the Oven method (or) which can be used on stove-top-if using the Stovetop method – read below), arrange the marinating chicken along with all its juices in a single layer. Do not crowd it. (Use two casserole dishes if needed)
4. Spread the chopped mint leaves and the shallow fried potatoes (if using) over it.
5. Now add the drained warm half cooked rice prepared earlier and spread it nicely to cover the chicken all over. Reserve about 1 1/2 cups cooked rice for the top most layer.
6. Next, spread the chopped cilantro, toasted almonds and cashewnuts, hard boiled eggs (if using), reserved fried onions, cardamom seed powder and pour ghee (if using) and the saffron soaked in milk and rose water all over the rice. Add the 1 1/2 cup reserved rice and spread as the top most layer to cover evenly. Now pour the reserved oil in which the onions were fried evenly all over the rice.( I do not add fried onions over the top layer of rice to avoid getting the onions and herbs blackened or burned by steam).
7. Cover the dish with an aluminium foil or a tight lid (or) seal the edges with a dough and cover with the lid tightly, you can use some weight over the lid, so that no steam escapes.

Lid sealed with dough and being cooked on stovetop

If using an oven to cook:
Put the sealed casserole in the preheated oven at 550°F for 20 minutes. Later, lower the heat to 300°F and leave the casserole dish in the oven for about 30 minutes. Remove from dish from oven once done.

If you are cooking on stove top:
1. Take a flat Dosa Tawa or a griddle pan and put it on the stove at high heat. As it gets warm, put the casserole dish on the tawa and let it cook for about 5 minutes on high heat.
2. Later, lower the heat to medium and let it cook for about another 15 minutes.
3. Now, reduce heat to very low and let cook for another 15-20 minutes and your Biryani will be done by now.

Once done, let the dish rest for 30 minutes. Later, open the lid and a heavenly aroma fills your house inviting all your house members. Carefully dig your spoon deep into the casserole dish until it touches the bottom, and gently mix the rice with the chicken until it is all completely mixed. Serve immediately.

Tip: Adding salt to the water in which you cook rice is essential, or else the whole taste of Biryani turns upside down. One tip if you have forgotten to add salt to the water while boiling rice is – stir the required amount of salt in a little quantity of hot water, about half cup or a few tablespoons, and pour this on the biryani evenly. Warm the biryani in microwave and serve immediately.

Suggested accompaniments: I enjoy my Biryani with Mirchi Ka Salan or Baghare baingan and Dahi ki Chutney as a side dish, and glass of chilled coke alongside. Yumm-O!

Note: You can also go through this video of ‘Khan Biryani’ showcased by VahChef, one of my favorite chefs, to get an idea on how to prepare Kachchi Murgh Biryani. His method for Khan Biryani is a bit different but quite interesting though.

I shared this recipe as part of the RCI:Authentic Cuisine of Hyderabad Event that I am hosting this month on my blog.

Be sure to read all the rules for the event and drop me your entries. The last date to send me your entries is September 15th’ 07.

Luv,
Mona

AddThis Social Bookmark Button

Amchur-Harimirch wale Kacche Gosht ke Kofte

August 15th, 2008 Mona Posted in Amchur powder, Beef Stock, Blog Events/Entries/Polls, Canola Oil, Cardamom/Elaichi, Carom seeds/Ajwain, Cinnamon/Dalchini, Clove/Laung, Cumin seeds/Zeera, Curry leaves (fresh), Dried Red Chillies, Garam masala powder, Ginger-Garlic paste, Green Chillies, Hyderabadi special, Lamb/Beef/Mutton/Veal/Sheep, Red Chilli flakes, Red Chilli powder, Salt/Namak, Sesame seeds/Til, Turmeric/Haldi, Yellow Onion/Pyaaz, Yogurt/Dahi 26 Comments »

Happy Indepedence Day all my dear Indians!

Kofta (in Urdu language, Singular-Kofta; Plural-Kofte) means meatballs. Among all the meatball curries that I prepare, two of them, the Methi-Gosht ke Kofte and this one that I am writing about today are the most favorite in my house and we devour them along with warm Naan, or Afghani Roti which I get from the market usually.

It is called as ‘Kacche Gosht ke Kofte’ as the meatballs/Kofte in this method are added raw into the hot gravy and are allowed to cook in it. The meatballs cook perfectly in the hot bubbling gravy within a few minutes. I love this technique because, as the raw meatballs cook in the hot gravy, they impert their juices and flavor and give a deep taste.

Amchur-Harimirch wale Kacche Gosht ke Kofte – Meatballs in a hot and sour gravy

The two main ingredients here are Amchur in the Kofta and Green chilli paste in the gravy. You can feel the light tartness in the meatballs when you have them and the slight hotness due to the green chilli paste in the gravy make you leave wanting for more. It is a very simple recipe.

As Ramadhan is fast appraching, you can prepare this curry in large amounts, portion it and store it in freezable plastic food storage boxes that are microwave safe. When you sit to have your meal after iftaar, just microwave the box for a few minutes, and you are done. It will save you a lot of time.

You can use ground meat to prepare this curry, or if ground meat is not available, then you can even use meat chunks to prepare it. Wash and cut the meat chunks into bite size pieces, and put the chunks along with the spices for meaballs in a food processor, and pulse till the meat is well ground and mixed with the spices. Food processor is one of the most important kitchen gadgets in my kitchen. It makes my work very easier.

Amchur-Harimirch wale Kacche Gosht ke Kofte – Meatballs in a hot and sour gravy

For the Meatballs/Kofte

Ingredients:

Ground Veal/Lamb/Goat meat (or) Veal/Lamb/Goat meat chunks cut into bite size pieces or mince – 300 grams (read the notes above)
Dry Raw Mango/Amchur – 2 tsp
Red chilli flakes – 2 tsp
Garam Masala – 1 tsp
Salt/Namak – 1 tsp
Turmeric/Haldi – 1/2 tsp
Ginger-Garlic/Adrak-Lahsun paste – 2 tsp

Kacche Gosht ke Kofte – Raw meatballs

Method:

1. In a food processor or a blender, add all the ingredients and pulse till the mixture is all well mixed. Remove it into a bowl. Take a small amount into your hand and shape into little balls (approx 1 inch in diameter) rubbing the mixture between your palms. Continue making balls untill all the mixture is completed. Keep aside.
2. Wash your hands well with soap.

TIP: To freeze meatballs ahead of time: You can prepare the meatballs and freeze them for future use.
Form meatballs, and place them on a parchment paper lined baking sheet in the freezer. Once the meatballs are hard and well frozen, transfer them to a resealable plastic bag and store in the freezer for up to 3 months. To serve, thaw and cook them in the curry.

For the Curry/Gravy:

Ingredients:

Canola oil – 4 tbsp
Yellow onion – 3 , large, thinly sliced
Salt – 1 tsp
Seseme seeds/Til – 1 tsp
Cumin seeds/Zeera – 1 tsp
Carom seeds/Ajwain – 1 tsp
Clove/Laung – 2
Green cardamom/Elaichi – 4
Cinnamon sticks/Dalchini – 1 inch stick
Ginger-Garlic paste – 2 tsp
Green chilli – finely chopped, 2 tsp
Red chilli powder – 1/2 tsp
Yogurt – 2 cup, lightly whipped
Beef Stock – 1 litre
Curry leaves – 6
Dried red chilli – 4, broken into two, seeds shaken out

Method:

1. Pour 3 tbsp oil into a large non-stick frying pan at medium heat and as soon as it warms up, add the onion and salt. Saute it for 3 minutes, then cover the lid. After 3 minutes, stir the onions, add a tablespoon of water and cover the lid again. Continue doing this until the onions are well browned and soft.
2. Add seseme seeds, cumin seeds, carom seeds, clove, green cardamom, cinnamon, and ginger-garlic paste and green chillies. Saute them for 2-3 minutes. Sprinkle red chilli powder.
3. Add the yogurt and keep strirring it continously for 1-2 minutes. Turn the heat off. Once cool, pour this gravy into a blender container and blend till finely pureed.
4. In the same pan pour 1 tbsp of oil and as soon as it warms up add the dried red chilli powder and curry leaves. As they begin to crackle in a minute or two, pour the pureed sauce back into the pan. Add the meat stock and increase the heat to medium high. Let it come to a boil.
5. Lower the heat to medium low, and gently add the meatballs one by one to the gravy in a single layer, and close the lid. Let it cook for 10-15 minutes. Keep gently giving it a stir every 3 minutes or so taking care not to break the meatballs. Serve warm.

Suggested Accompaniments: This curry goes very well along with Naan or Afghani Roti, or even along with steamed Basmati.

This curry goes all the way to Srivalli of ‘Cooking 4 All Seasons’ who is hosting the event- Curry Mela.

Also, congratulations to Jyothi of Shadruchulu for winning the title of ‘The Best Hyderabadi Blog 2008′.

Have a pleasant weekend eveyone!

Luv,
Mona

AddThis Social Bookmark Button

Turai Gosht

August 7th, 2008 Mona Posted in Canned Tomato paste, Canola Oil, Gourds, Hyderabadi special, Lamb/Beef/Mutton/Veal/Sheep, Red Chilli powder, Ridged Gourd/Turai, Salt/Namak, Tomato/Tamatar (fresh), Turmeric/Haldi, Yellow Onion/Pyaaz 11 Comments »

Turai (in Urdu) also called as Ridged Gourd (in English); other names: Ridged Loofah, Silk Gourd, Chinese Okra; is my family’s all time favorite vegetable. We all love this humble vegetable a lot. It is mostly an Asian vegetable, easily found in most of the Chinese and Indian grocery stores in the North America. This curry/Salan, about which I am going to write today, is a classic Turai preperation in my house which we usually love to have along with some warm rotis for lunch or dinner. For a vegetarian version, you can simply omit the meat and cook the Turai for a comforting vegetarian meal.

Turai are similar to cucumbers and squash, dark green or green in colour with hard and sharp ridges running from its head to its bottom, and a dull rough skin. They are available in various sizes. I describe the taste of Turai slightly sweetish and a little bland, hence it easily absorbs the flavors of the other ingredients it is cooked along. When you buy them, look for younger ridged gourds without and dark spots, as if you end up buying the mature ones, they are usually fibrous, bitter and not edible. Inside its flesh is full of water, so you need not add more water while you cook Turai.

Turai or Ridge Gourd                     Peeled and Chopped Turai

To prepare it, you need to peel the gourd with a vegetable peeler, wash and pat dry it with paper towels, slice them lengthways into two, and chop them up into semi-circular discs. The gourd being quite bland in taste, absorb the sweetish flavor of the onions, and the tangy taste of tomatoes. You will love this simple and tasty dish.

Turai Gosht – Ridged Gourd in Lamb meat and Tomato Sauce

Ingredients:

Ridged Gourd/Turai – 4 or 5, young and fresh, peeled, rinced and chopped
Canola Oil – 2 tsp
Yellow Onion – 2, large, finely sliced
Lamb meat – 300 gms, cut into bite size pieces
Turmeric – 1/4 tsp
Fresh Ripe Red Tomato – 2, large, chopped finely
Red Chilli powder –  2 tsp
Salt – to taste

Turai Gosht – Ridged Gourd in Lamb meat and Tomato Sauce

Method:

1. In a pressure cooker at medium heat, pour oil and as soon as it gets warm, add the onion, meat, turmeric and salt. Pour in 1 cup water and pressure cook it till the meat is tender.
2. Later, open the lid of the cooker and add the chopped ridged gourd/turai, chopped tomatoes and red chilli powder. Pressure cook again about 5-8 minutes.
3. Open the lid of the pressure cooker and check to see if the Turai is tender. Add a few splashes of water if needed. Serve warm.

Suggested Accomapniments: Serve along with some warm Rotis, or along with Basmati Chawal/Khushka or Plain Rice and Khatti Dal for a simple and delicious meal.

Luv,
Mona

AddThis Social Bookmark Button

Sem Ki Phalli Ka Salan

July 18th, 2008 Mona Posted in Canola Oil, Coriander seeds, Fats and Oils/Tel, Garam masala powder, Indian broad Beans/Sem ki phalli, Onion/Pyaaz, Red Chilli powder, Salt/Namak, Tomato/Tamatar (fresh), Vegetables/Tarkariyaan, Yellow Onion/Pyaaz 15 Comments »

Indian broad beans (also sometimes referred to as Valor papdi or Hyacinth Beans ), or Sem Ki Phalli as they are called in Urdu language, (Chikkudu kaya in Telugu) are are a kind of green bean, very commonly sold in Indian markets and are available fresh daily at the ‘Rythu Bazar’ or the Farmers Market in India where you get to see an array of fresh fruits, spices, nuts, herbs and vegetables in huge piles being sold at reasonable prices. I do not usually get to see Indian vegetables and herbs at the Farmers market here, but when I do, I do not hesitate to get some, cook and enjoy eating them to the late morsel. Try searching for these beans at the Indian or Chinese grocery stores and food markets, you will find them definitely.

Indian broad beans – Sem ki phalli

The last week, I found some of these beans at the market and prepared this very comforting and simple stir fry which brings along many memories of my dear Ammi and my childhood. After washing and pat drying them, I always used to sit along with my mother to remove the hard fibrous srtings from the sides, split each bean into two, remove the seeds from inside into a small cup, and make a small pile of the prepared beans, chatting away endlessly. She used to then chop them up and when all were done, I was always so eager to taste this mouth wateringly delicious simple vegetable stir fry preperaed by her at the meal. Faint nostalgic memories like these tears my heart out with an intense desire to go back and live those moments again.

Sem Ki Phalli – Indian broad beans, with strings removed, split and chopped

These beans have hard fibrous strings which are preferably removed always while preparing them to be cooked. Some choose not to remove these strings as it provides fibre to the diet. The method to remove these strings is to simply tear the tip of the bean with hand and pull away the string from each side in one motion. These beans are delicious and nutritious. Do try them if you find these at the stores anytime.

Sem Ki Phalli Ka Salan – Sauteed Indian broad beans

Ingredients:

  • Indian broad beans/Sem Ki Phalli – 500 gms
  • Canola Oil – 2 tbsp
  • Yellow Onion – 2, large, sliced thin
  • Red Chilli powder – 2 tsp
  • Water – 1/2 cup
  • Salt – 2 tsp or to taste
  • Garam Masala – 1 tbsp
  • Dry Roasted Coriander seed powder/Dhaniya powder – 1 tsp
  • Tomato (fresh) – 1, medium, chopped fine

Sem Ki Phalli Ka Salan – Sauteed Indian broad beans

Method:

  • In a large frying pan at medium heat, pour oil and as soon as it gets warm add the sliced onion and salt and let it cook covered for 5-8 minutes, stirring it occasionally in between.
  • Add the beans, red chilli powder and water. Close the lid and let it cook for about 20 minutes, or until the beans are soft, stirring it occassionally. You can add more water if required.
  • Add garam masala, coriander seed powder and tomato. Close the lid and let it cook for 10 more minutes until the water is absorbed. Serve warm.

Suggested Accompaniments: Serve warm with Rotis.

Luv,
Mona

AddThis Social Bookmark Button