Basic How To’s: Series VI ~ Homemade Khoa/Mawa
Basic How To: Homemade Khoa/Mawa
Milk and its products like Yogurt, Ghee, Khoa, Paneer are much valued and used very extensively in Indian cooking.
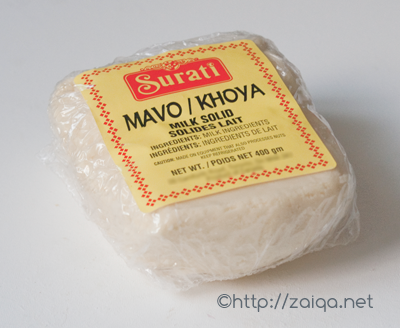
Khoa (also referred to as Khoya/Khawa/Mawa) is reduced milk, reduced to such an extent that it is almost doughy or granular in texture. This concentrated solid is used as the base in most of the Indian sweet preperations like Burfi, Gulab Jamun, Peda, Kalakand, Chumchum, Kalajamun and various other Halwa’s and Mithai’s. It is very easily available in India and sold at the dairy stores or parlours by halwais(milk traders) selling all kinds of Indian diary products like ghee, paneer, curd etc. In Canada, I am lucky enough to find Khoa packets available ready made at most of the Indian stores or Bombay Bazaar.

store brought Khoa packet from Bombay bazaar in Toronto
I prepare two kinds of Khoa at home usually, the ‘Chikna khoa’, and the ‘Daan-e-daar khoa’.
Chikna Khoa: has about 80% mositure and is made by slowly cooking milk uncovered until it is reduced to a doughy mass.
Daan-e-daar Khoa (granular khoa): is made coagulating milk with acid and then slow cooked until all the moisture is evaporated and you are left with granular milk solids.
The rock hard kind of Khoa that you get ready made from the market which even can be grated is called as Batti Khoa.
Many friends and readers of my blog have asked me the procedure to prepare Khoa at home, or its substitutions. Here is a pictorial tutorial for the procedure to prepare Khoa at home:
Chikna Khoa
Makes – 170 gms
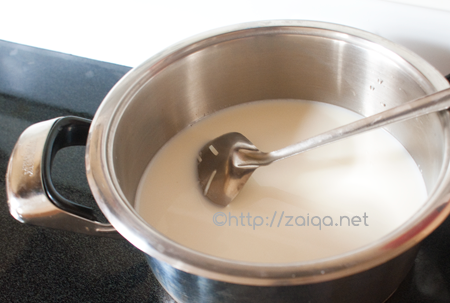
Pour 1 liter milk in a heavy bottomed milk saucepan (of you can use any clean heavy bottomed vessel, you can even use a heavy bottomed non-stick saucepan) at medium high and let it come to a boil once.

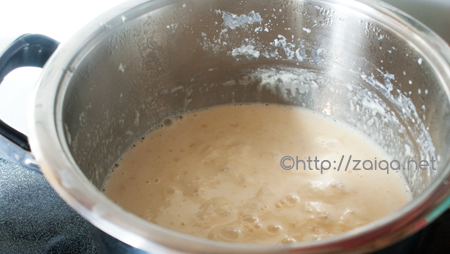
Lower the heat to medium and let cook until the milk is reduced to 1/4th the original quantity. This takes about 1 hour or so and it requires a careful watch to prevent milk from getting burnt, and a constant/very frequent stirring.

Once the milk is reduced to 1/4 quantity, lower the heat to medium low and let cook for some more time, stirring continously, until it is dry and lumpy/doughy.

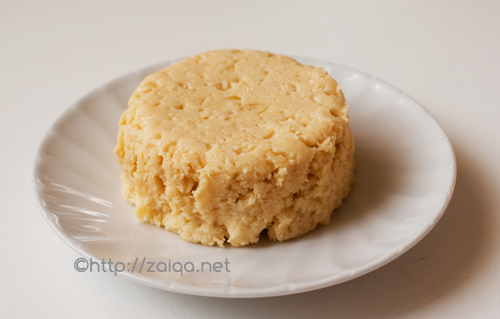
Remove from heat and transfer the khoa to a cup and let cool. Once cool, refrigerate it for a hour so that it thickens/hardens. Remove the prepared Khoa from the refrigerator transfer to a zip-lock sandwich bag and freeze to store for future use, or use immediately. Normally one liter of milk should give you 125-170 gm of khoya.

fresh and home-made ~ Chikna Khoa
This procedure prepares unsweetened khoa. To prepare sweetened khoa, add desired quantity of sugar on the last stages to sweeten the khoa.
Daan-e-daar Khoa
Pour 1 liter milk in a heavy bottomed milk saucepan (of you can use any clean heavy bottomed vessel, you can even use a heavy bottomed non-stick saucepan) at medium high and let it come to a boil once. Add 1 tbsp lemon juice so that the milk curdles and lower the heat to medium and continue cooking. Keep stirring the milk and cook until most of the moisture has been evaporated and the milk is reduced to dry lumpy texture. Remove from heat and transfer the khoa to a cup and let cool. Once cool, refrigerate it for a hour so that it thickens/hardens. Remove the prepared Khoa from the refrigerator transfer to a zip-lock sandwich bag and freeze to store for future use, or use immediately.
Tip: Daan-e-dar khoa can also be prepared from failed yogurt.
A friend of mine had once shared this useful recipe for a quick khoa substitute:
Quick Khoa Substitutes:
1. Add full fat or low fat milk powder and just a little bit of full fat or low fat unsweetened condensed milk/heavy cream to make it into a semi-solid paste in a bowl. Pour this into into a thick milk saucepan at medium low heat. Let cook stirring continously until it is until it is dry and lumpy/doughy. Remove from heat and let it cool completely. Transfer to refrigerator so that it thickens/hardens. Shape/cut into blocks and store the khoa blocks in plastic wrap in zip-lock sandwich bags and freeze to store for future use, or use immediately.
2. If all this is not possible, you can simply substitute khoya with equal amounts of milk powder. That should work out fine.
This post is my contribution to the event Back to Basics originally stated by Jaya, and currently being hosted by Aqua at Served with Love.
Luv,
Mona
You can follow any responses to this entry through the RSS 2.0 feed. You can leave a response, or trackback from your own site.
October 26th, 2009 at 8:26 pm
nice Khoa dear………it’s looking yummy..
October 27th, 2009 at 1:53 am
hi mona…….i tried this but the milk is not at all changing to thick lumps why..should i add some things
Nishat, there is no need to add anything. You just have to slow cook the milk, for around 1 hour or so, until all the moisture is evaporated and only the milk solids are left. ~Mona
October 27th, 2009 at 3:52 am
Nothing will beat this homemade khoa, great efforts Mona ..
October 27th, 2009 at 4:09 am
I had always bought the khoa from the market and never satisfied with it, from next time there is no going outside for khoa. Thanks for sharing this recipe.
October 27th, 2009 at 9:29 am
Thanks for sharing and the demo..Mona
October 27th, 2009 at 9:36 am
Mona, u are the queen of cooking from scratch! Nothing like using real khoa to really boost the flavor and texture of desi sweets.
October 27th, 2009 at 11:47 am
Superb and Clear explanation and demonstration for doing Khoa! thanks, very useful!
October 27th, 2009 at 1:05 pm
Great tutorial, thanks for the info! I always wondered what is this “khoya, koya” that recipes talked about.
October 27th, 2009 at 1:14 pm
Assalamualaikum Mona,beautiful illustration of khoa prep..i usually make khoa accidentally when i forget to switch off milk on the stove… 🙂
October 27th, 2009 at 2:46 pm
salaamz mona jee yesssssssssssssssssssssssssssss i got it i really got itg ………………..its great and trust me its wooooooooooooooooooooooooooooooow thanks i tried it again and i have got it love you lotssssssssssssssssssssssssss.you are the queeeeeeen QUEEN OF THE KITCHEN ……………. JUST GREAT I AM SURE JIJU IS VERY LUCKY TO HAVE U AS A WIFE.ALLAHAMDUILLAH
October 27th, 2009 at 4:00 pm
assk mona
hope u r doing fine. it has been while i got to see ur blog. was busy with vacation . missed u and ur site .
wow i luv ur khoa recipe. reminds me of my moms kitchen in hyd. she would prepare the same when the milk had curdled .
i have never tried this recipe and ur desi ghee recipe till now, but shall try soon.
just a quick q , which khoa shall i use to make gulabjamun . also for how long i can save the refrigerated khoa. thx.
i usually add carnation milk powder/liq and whipping cream to gits powder to make gulab jamun as it makes consistency very soft.
take care
rizruby
Wa-AlaiKumAs-Salaam Rizruby, I missed you too. Hope you had a good time.
For Gulabjamuns, I usually use Chikna Khoa, or even Batti Khoa (the ready-made rock hard khoa from market) whatever is available.
To store home-made Khoa the best method is to freeze it. Refrigerated Khoa will only keep for just a few days. ~Mona
October 28th, 2009 at 2:16 am
I had never heard of Khoa! Sounds delicious….
Great post as usual 🙂
October 29th, 2009 at 1:41 am
ummm this post reminded me of my hometown,..:-)
November 13th, 2009 at 11:15 pm
WONDERWOMAN. you make khoya in your home.
April 1st, 2010 at 3:15 am
Dear Mona,
thanks for the neat pictorial. i didn’t know there existed 2 types of khoa. i made the dhaanedar khoa y’day and it turned out very well. yes nothing to beat the flavour and taste of home-made khoa.
July 15th, 2010 at 3:27 pm
Mona, when you are using Khoa from the freezer, do you thaw out the whole block in the fridge overnight, or can you add frozen khoa directly to the mithai when you are cooking it?
Nazia, when you are using khoa from the freezer, you can either grate it or defrost in the microwave for just a few minutes before use.
August 23rd, 2010 at 4:29 am
salaam
i have some ricotta cheese leftover isit possible to use it to make khoa?
Khadija, you can use ricotta cheese as a substitute for khoa.
June 17th, 2013 at 5:11 pm
[…] or Pumpkin variety instead) Ghee – 2 tbsp White Sugar – 1/3 cup Milk – 1/3 cup Khoa – 2 tbsp, finely grated Cardamom seed powder – a pinch Finely Slivered toasted […]
March 21st, 2014 at 5:24 pm
Hey mona
Asak
I wanted to ask you a question. I made khoya but it kinda had a spicy feeling 🙁
Don’t know why 🙁
Also khoya is basically very very thick cream right?
Ayesha, perhaps you the pan/container you used to make the khoya had a little bit of spice from earlier preparations. please always a separate saucepan for making all milk based preparations.
March 19th, 2018 at 12:18 am
how many days we can preserved khoya ??