Gajar Ka Meetha

November 4th, 2010 Mona Posted in Almonds/Badaam, Carrot/Gajar, Cashewnuts/Kaaju, Chironji/Charoli, Ghee, Hyderabadi special, Khoa, Milk and Milk Products, Pinenuts/Chilgoze, Pistachios/Pista, Raisins/Kishmish, Sugar/Shakkar, Walnuts/Aqrot 8 Comments »

Come winter, and my taste buds keep craving for a meetha/Indian dessert. Though not a big meetha loving person, I tend to enjoy subtly sweetened home made Indian desserts. The last fall, I had tried my hands on pumpkin meetha which had turned out fabulous, this year the classic gajar ka meetha was foreordained. I happened to spot some beautiful carrots at the regular food mart at a very reasobale rate, and who could resist this nutrient laden root vegetable.
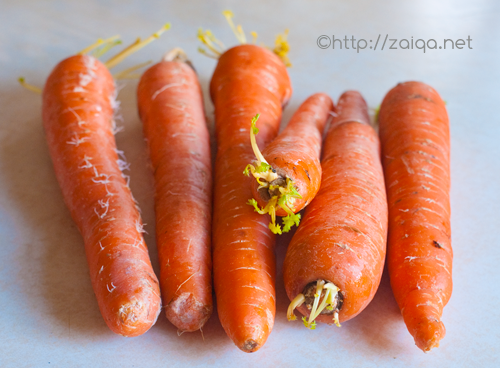
Farm Fresh Carrots

This winter dessert of reduced carrots and milk never ceases to appeal both me and my hubby. He even enjoys this meetha warmed along with hot parathas in the breakfasts. I restrict to eating it a little only after dinner.

Gajar ka Meetha can be enjoyed hot or cold, and can even be reheated. This meetha is generally prepared from the red carrots that are available in India throughout winters. For this preparation, use a food processor thats effortlessly grates the carrots in a jiffy.

I do not like my meetha saturated with either sugar or ghee, and I also hate a mushy disintegrated gajar ka halwa. So feel free to alter the amounts of sugar and cook the meetha mushy if you desire.

Gajar Ka Meetha – Carrot Sweetmeat

Ingredients:

Red Carrots (preferably) or any Sweet Carrots/Gajar – 1 kg, washed, scraped and finely grated (grate them as fine as possible, as long), cores discarded (I often use baby carrots which are quite sweet)
Ghee – 2 or 3 tbsp
Khoa – 1/2 cup, finely grated (or) Milk powder – 1/2 cup
Milk – 1/2 cup
Sugar – around 1 cup or less (according to taste)
Mixed Dry Fruits and Nuts – chopped walnuts, chironji, pinenuts, cashewnuts, raisins, slivered almonds and pistachios, etc – 1/4 cup, lightly toasted or shallow fried in oil or ghee
Cardamom powder – 1/4 tsp (optional)
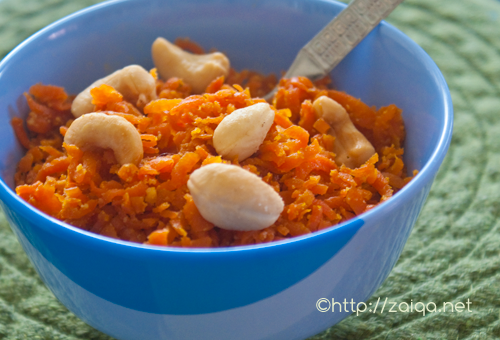
Gajar Ka Meetha – Carrot Sweetmeat

Method:

1. In a large non-stick heavy bottomed saucepan (or a large iron kadai is best) at medium high heat add the grated carrots and dry roast them while stirring every 2-3 minutes for the first 8-10 minutes, then every minute for the next 15-20 minutes. Add ghee and continue roasting it for a few more minutes. This is the most important step to develop a deep roasted flavor in the carrots. Do not burn them and stir very gently, do not mash up the carrots while stirring. During this time a wonderful fragrance of roasting carrots will fill your kitchen.
2. Once the carrots are nicely roasted, lower the heat to medium and pour in the milk and khoa and let cook until the milk is absorbed by the carrots. Add the dry fruits and nuts and cardamom powder. Add the sugar little by little and keep tasting until you get the desired sweetness and the meetha thickens a bit. Mix well. And cook for a little longer while stirring very gently every once in a while until the meetha is almost dry. Remove from heat. Serve it warm or chilled or along with vanilla ice cream. Store the meetha once completely cooled in an air tight container in the refrigerator.

Suggested Serving: To impress your guests, serve the chilled meetha in mini pastry cases that are easily available in stores. You can name it as ‘Gajar Ka Meetha Tarts’.

Luv,
Mona
AddThis Social Bookmark Button

Ande ka Meetha

January 26th, 2010 Mona Posted in Cardamom/Elaichi, Egg/Anda, Eid/Ramadhan/Iftaar, Ghee, Hyderabadi special, Khoa, Milk and Milk Products, Sugar/Shakkar 29 Comments »

At the very onset, I wish all my dear Indians, a very happy Republic Day! Mera Bharat Mahaan!

During my childhood, somedays when suddenly cravings for this meetha would tingle my dear Papa’s taste buds, he would roll up his sleeves and get ready to prepare his favorite dessert, Ande ka Meetha (also referred to as Ande ka Halwa or Ande ke Lauz). My Ammi preferred it, because the preperation of this delicious dessert involves a rigorous stirring throughout the process which required a manly strength.

Papa often used to prepare this meetha in the winter months so that we get to enjoy it the season long. Crumbly, sweet with a taste of eggs and milk solids roasted in ghee, this meetha will surely become of your favorites.

So, here’s the recipe for Ande ka Meetha. Today I prepared a small quantity of this meetha, according to the instructions my Papa gave me on phone this morning. Love you Papa, this is for you!

Ande ka Meetha – Crumbly Egg Squares Dessert

Ingredients:

Milk – 500 ml
Home-made Khoa – 200 gms (or equal quantity milk powder)
Eggs – 6, large
Granulated white sugar – 250 gms (1 cup) (you can add more if you want)
Green cardamom/Elaichi powder – 1/2 tsp
Home-made Ghee – 125 ml (1/2 cup)

Method:

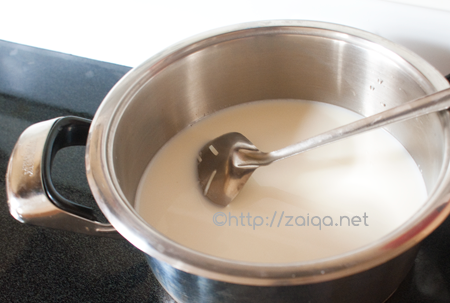
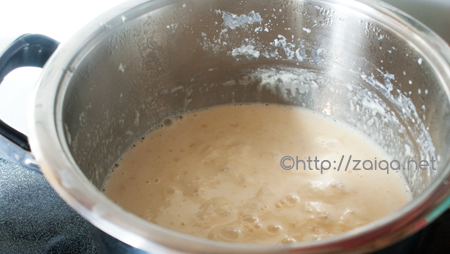
1. In a saucepan, boil milk. Once boiling, add the khoa and let it dissolve. Keep stirring continuously and let the milk cook until the amount is reduced to 500 ml, and the khoa has completely dissolved and the milk has slightly thickened. Remove from heat and let it cool.
2. Once the cooked milk+khoa is cool, pour into a mixing bowl. Add all the remaining ingredients and whisk using a fork until well blended.
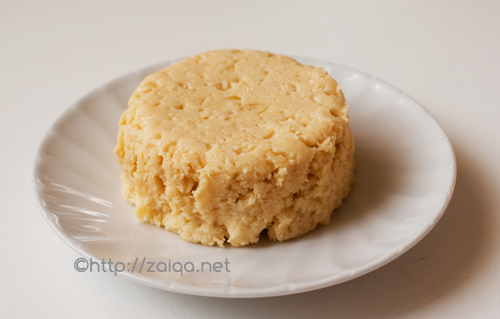
3. In a thick bottomed non-stick saucepan at medium heat, add the above whisked mixture and cook it stirring continuously throughout. It takes about one hour of continuous stirring throughout the process at medium heat to cook this meetha. After every 10 minutes you will start observing the changes, first the mixture becomes thick, then it starts leaving sides and comes together, then it becomes dryer and dryer with a change in color, then it begins to get granular and browner as you keep roasting it.

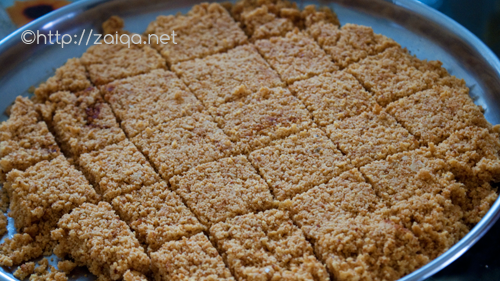
Ande ka Meetha

Now is the time to remove the mixture into a thali or a flat platter/tray greased with a bit of ghee. Using the back of a spoon, immediately flatten it clean, and cut it into squares using a greased knife of pizza cutter. Garnish with varq and let it cool completely and store in air tight food storage boxes in the refrigerator. It keeps well for a long time.

Luv,
Mona

AddThis Social Bookmark Button

Dum ke Rote ~ I

November 9th, 2009 Mona Posted in All-Purpose Flour/Maida, Almonds/Badaam, Baking powder, Cardamom/Elaichi, Ghee, Hyderabadi special, Khoa, Milk and Milk Products, Pistachios/Pista, Saffron/Zafraan, Semolina/Sooji/Suji, Sugar/Shakkar 29 Comments »

Rote (also referred to as roat), are baked~cooked on dum, sweet and crunchy semolina flat cookie sort of delicacies made especially in Hyderabad city, which are deliciously crunchy from the outside, but soft in the center. This confection has the all goodness in them, including exotic saffron, nuts, khoa and glorious ghee.

Semolina -Sooji rawa (fine variety)

The following is one of my friend Saba’s recipe, which I have changed just a little bit here and there. My hubby loved these rote a lot الحمد لله and I plan to make them again soon inshallah.

My mother-in-law’s version is simpler. Inshallah I will post my Mother-in-laws version for this confectionery sometime in the future.

Dum ke Rote – Baked Sweet Semolina flat breads
Makes: 13 large rote as shown in the picture below

Ingredients:

Almonds – 3/4 cup
Pistachios – 1/2 cup
Saffron threads – 2 pinch
Semolina/Sooji (fine variety) – 3 cups
All-Purpose flour – 3 1/4 cup
Granulated Sugar – 3 cups
Baking powder – 1 1/2 tbsp
Cardamom powder – 1 tsp
Homemade Khoya – 3/4 cup
Ghee – 1 cup, warmed
Warmed Milk – 1 cup

Dum ke Rote

Method:

1. Soak the almonds and pistachios together in cool water overnight. The next day, peel them and keep aside. In a blender container pour in 1/2 cup warmed milk and the peeled nuts and grind to a smooth paste. Keep aside in a bowl.
2. Add the khoya and the remaining warmed milk in a blender container and blend to a smooth paste.
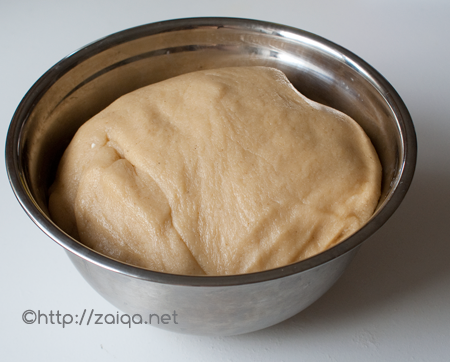
3. In a mixing bowl, add semolina, all-purpose flour, sugar, baking powder and cardamom powder. Using a whisk, mix well. Add the nuts+milk paste, and the khoya+milk paste and ghee and mix well. Knead to form a dough. Cover and keep aside for 1 hour for it to rest. Later, knead again until dough is pliable and cover again and let rest for 1 more hour.

4. Preheat oven to 350°F and knead the dough a final time. Pinch out fist size balls from the dough and shape into smooth balls. Using your fingers flatten them into discs (approx 6 inches in diameter) and arrange on greased foil lined baking sheets leaving 2 inch space all around each of the discs. Gently press few sliced almonds on top of each disc. Place the baking sheets in the oven and bake for 10-15 minutes or until the sides and base are nicely browned (but not burnt). Keep a close eye. Immediately switch to broil on low setting for 2-5 minutes until the tops are browned (but not burnt) and the nuts are toasted. Keep a close eye.
5. Remove the baking sheets from the oven. Leave to cool on tray for 5 minutes. Using a flat spatula transfer them to wire racks until they are cooled completely. Store in an air tight container at room temperature. Finish within 3-4 weeks.

If you prepare this delicacy at home too, feel free to send me your recipe for Dum ke Rote. I will be happy to try it out.

Luv,
Mona

AddThis Social Bookmark Button

Basic How To’s: Series VI ~ Homemade Khoa/Mawa

October 26th, 2009 Mona Posted in Home-made Khoa/Mawa, Khoa, Lemon/Nimbu, Milk and Milk Products 20 Comments »

Basic How To: Homemade Khoa/Mawa

Milk and its products like Yogurt, Ghee, Khoa, Paneer are much valued and used very extensively in Indian cooking.

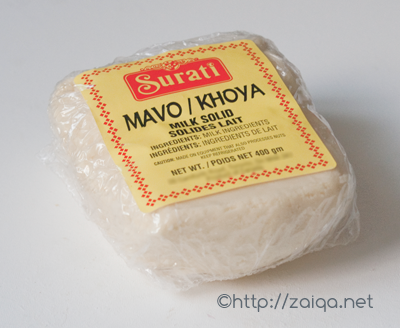
Khoa (also referred to as Khoya/Khawa/Mawa) is reduced milk, reduced to such an extent that it is almost doughy or granular in texture. This concentrated solid is used as the base in most of the Indian sweet preperations like Burfi, Gulab Jamun, Peda, Kalakand, Chumchum, Kalajamun and various other Halwa’s and Mithai’s. It is very easily available in India and sold at the dairy stores or parlours by halwais(milk traders) selling all kinds of Indian diary products like ghee, paneer, curd etc. In Canada, I am lucky enough to find Khoa packets available ready made at most of the Indian stores or Bombay Bazaar.

store brought Khoa packet from Bombay bazaar in Toronto

I prepare two kinds of Khoa at home usually, the ‘Chikna khoa’, and the ‘Daan-e-daar khoa’.
Chikna Khoa: has about 80% mositure and is made by slowly cooking milk uncovered until it is reduced to a doughy mass.
Daan-e-daar Khoa (granular khoa): is made coagulating milk with acid and then slow cooked until all the moisture is evaporated and you are left with granular milk solids.
The rock hard kind of Khoa that you get ready made from the market which even can be grated is called as Batti Khoa.

Many friends and readers of my blog have asked me the procedure to prepare Khoa at home, or its substitutions. Here is a pictorial tutorial for the procedure to prepare Khoa at home:

Chikna Khoa
Makes – 170 gms

Pour 1 liter milk in a heavy bottomed milk saucepan (of you can use any clean heavy bottomed vessel, you can even use a heavy bottomed non-stick saucepan) at medium high and let it come to a boil once.

Lower the heat to medium and let cook until the milk is reduced to 1/4th the original quantity. This takes about 1 hour or so and it requires a careful watch to prevent milk from getting burnt, and a constant/very frequent stirring.

Once the milk is reduced to 1/4 quantity, lower the heat to medium low and let cook for some more time, stirring continously, until it is dry and lumpy/doughy.

Remove from heat and transfer the khoa to a cup and let cool. Once cool, refrigerate it for a hour so that it thickens/hardens. Remove the prepared Khoa from the refrigerator transfer to a zip-lock sandwich bag and freeze to store for future use, or use immediately. Normally one liter of milk should give you 125-170 gm of khoya.

fresh and home-made ~ Chikna Khoa

This procedure prepares unsweetened khoa. To prepare sweetened khoa, add desired quantity of sugar on the last stages to sweeten the khoa.

Daan-e-daar Khoa

Pour 1 liter milk in a heavy bottomed milk saucepan (of you can use any clean heavy bottomed vessel, you can even use a heavy bottomed non-stick saucepan) at medium high and let it come to a boil once. Add 1 tbsp lemon juice so that the milk curdles and lower the heat to medium and continue cooking. Keep stirring the milk and cook until most of the moisture has been evaporated and the milk is reduced to dry lumpy texture. Remove from heat and transfer the khoa to a cup and let cool. Once cool, refrigerate it for a hour so that it thickens/hardens. Remove the prepared Khoa from the refrigerator transfer to a zip-lock sandwich bag and freeze to store for future use, or use immediately.
Tip: Daan-e-dar khoa can also be prepared from failed yogurt.

A friend of mine had once shared this useful recipe for a quick khoa substitute:

Quick Khoa Substitutes:

1. Add full fat or low fat milk powder and just a little bit of full fat or low fat unsweetened condensed milk/heavy cream to make it into a semi-solid paste in a bowl. Pour this into into a thick milk saucepan at medium low heat. Let cook stirring continously until it is until it is dry and lumpy/doughy. Remove from heat and let it cool completely. Transfer to refrigerator so that it thickens/hardens. Shape/cut into blocks and store the khoa blocks in plastic wrap in zip-lock sandwich bags and freeze to store for future use, or use immediately.

2. If all this is not possible, you can simply substitute khoya with equal amounts of milk powder. That should work out fine.

This post is my contribution to the event Back to Basics originally stated by Jaya, and currently being hosted by Aqua at Served with Love.

Luv,
Mona

AddThis Social Bookmark Button

Pumpkin ka Meetha

October 19th, 2009 Mona Posted in Almonds/Badaam, Cardamom/Elaichi, Ghee, Khoa, Milk and Milk Products, Pistachios/Pista, Pumpkin, Sugar/Shakkar 23 Comments »

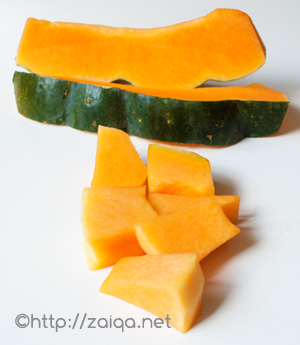
Pumpkins, during this season are spotted galore at every food market and I had brought a beautiful Pumpkin home a few days back. After enjoying a warming Pumpkin soup, I prepared a simple Pumpkin ka Meetha, just similar to Gajar ka Meetha and Kaddu ka Meetha, and الحمد لله it was delicious.

Pumpkin slices, peeled and cubed

I prepared a very small quantity with left over pumpkin, and it was enough for me and my hubby. If you are thinking of preparing it for a bigger crowd, do increase the quantities accordingly.

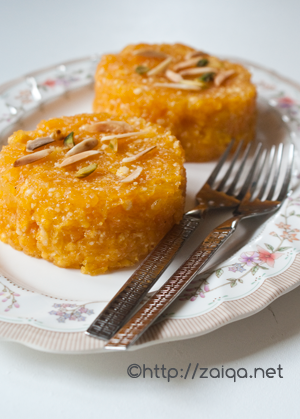
Pumpkin ka Meetha/Halwa
Makes- 2 small bowls as in the picture

Ingredients:

Pumpkin – 350 gms, peeled and grated (I used Chinese/Japanese variety Pumpkin, however you can try using any Winter squash or Pumpkin variety instead)
Ghee – 2 tbsp
White Sugar – 1/3 cup
Milk – 1/3 cup
Khoa – 2 tbsp, finely grated
Cardamom seed powder – a pinch
Finely Slivered toasted Pistachio+Almond – 1 tbsp

Pumpkin ka Meetha

Method:

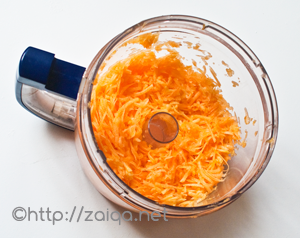
1. Cut pumpkin in slices. Peel and cut into cubes. Grate the cubed pumpkin. My food processor does the job in a jiffy.

grated pumpkin in the food processor bowl

2. In a stainless steel saucepan at medium high heat and add the grated pumpkin and dry roast it stirring it frequently until most of the moisture is evaporated and it is mostly dry. You will also observe a slight change in color and a nice aroma.
3. Pour in ghee and keep stirring it for 3 minutes. Add milk, khoa, sugar and cardamom powder. Let cook stirring frequently until all the milk has been absorbed, about 10 minutes. Once the halwa is dry, remove from heat and let cool. Once cool, refrigerate and serve garnished with toasted slivered nuts.

Suggested Serving: To impress your guests, serve the chilled meetha in mini pastry cases that are easily available in stores. You can name it as ‘Pumpkin Meetha Tarts’.

Luv,
Mona
AddThis Social Bookmark Button